Home
» Discover
»
What to Do With Leftover Halloween Candy: 10 Delicious Dessert Recipes
What to Do With Leftover Halloween Candy: 10 Delicious Dessert Recipes
If you are wondering what to do with leftover Halloween candy, start by matching the candy to the dessert. Chopped chocolate bars work in brownies and cookies, wafer candies make crunchy toppings, and chocolate-covered caramels can become pretzel bites. A good batch should still taste like a dessert with candy in it, rather than a melted candy bowl.
These 10 recipes include baked treats, no-bake desserts, and small batches you can assemble without committing your entire stash. Use U.S. measuring cups and spoons. Times and yields are estimates; candy fillings, appliance power, and portion size can change the results. When a recipe uses a packaged mix, follow its instructions for the base.
Sort the Candy Before You Start
Remove every wrapper before measuring. Inspect trick-or-treat candy and discard suspicious items or damaged packaging. Keep ingredient labels available for allergy checks, especially when combining several brands. The FDA's Halloween food safety guidance also identifies hard candy and similar items as choking hazards for very young children.
Candy type
Best uses here
What to watch for
Plain chocolate and peanut butter cups
Brownies, cookies, cheesecake cups
Keep pieces small enough to distribute evenly.
Wafer bars and toffee
Bark, parfait toppings, apple nachos
Moist fillings soften crisp pieces; add them near serving time.
Chocolate-covered caramel candies
Pretzel bites
Warm only until soft enough to press.
Candy corn and candy-coated chocolate
Popcorn clusters and cereal treats
Use as mix-ins or toppings rather than a melted base.
Gummies, sour candy, and hard candy
Keep separate from these chocolate recipes
They are not interchangeable with chocolate or soft caramel.
Choose one flavor family per batch. Mint chocolate, for example, can overpower peanut butter or fruit flavors. Chop most bars into roughly 1/4- to 1/2-inch pieces, and reserve a few attractive pieces for the top.
1. Peanut Butter Cup Candy Brownies
Makes: about 24 small brownies. Time: 10 minutes of prep, the package's baking time, and at least 1 hour to cool.
Ingredients:
1 brownie mix labeled for a 9-by-13-inch pan
Eggs, oil, and water in the amounts listed on that package
1 cup chopped peanut butter cups or chocolate bars, divided
Heat the oven and prepare the pan as directed on the mix. Make the batter using the listed ingredients.
Fold in 3/4 cup candy. Spread evenly in the pan and bake according to the package, checking at its earliest suggested time.
Check a spot without a candy pocket: the center should meet the package's doneness instructions, with no liquid batter. Sprinkle the remaining candy over the hot brownies and press lightly.
Cool completely before cutting with a clean knife.
For a better result: Melted candy can make a toothpick look wet even when the brownie is baked. Check a second spot before adding more oven time. If the edges become dry, use less candy in the batter next time and save more for the topping.
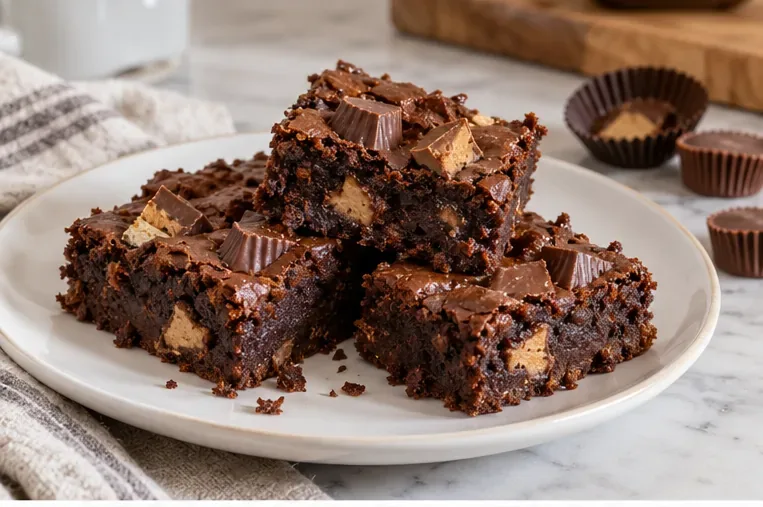
Chopped peanut butter cups add pockets of flavor to chocolate brownies.
2. Chocolate Candy Bar Cookies
Makes: about 30 small cookies. Time: 15 minutes of prep, 9–11 minutes per tray, plus cooling. This is a half-batch adaptation of Hershey's Chocolate Bar Surprise Cookies, without optional nuts.
Ingredients:
1/2 cup softened butter; 6 tablespoons each granulated sugar and packed light brown sugar
1 cup chopped chocolate candy bars or a mixture of bars and candy-coated chocolate
Heat the oven to 350°F. Cream butter, sugars, and vanilla; beat in the egg.
Combine flour, baking soda, and salt separately. Mix into the butter mixture, then fold in candy.
Drop rounded tablespoons onto an ungreased baking sheet, leaving about 2 inches between portions.
Bake 9–11 minutes until lightly browned. Let cookies firm up briefly on the sheet, then transfer to a rack.
Check: Edges should hold their shape. If one test cookie spreads excessively, chill the remaining dough before baking.
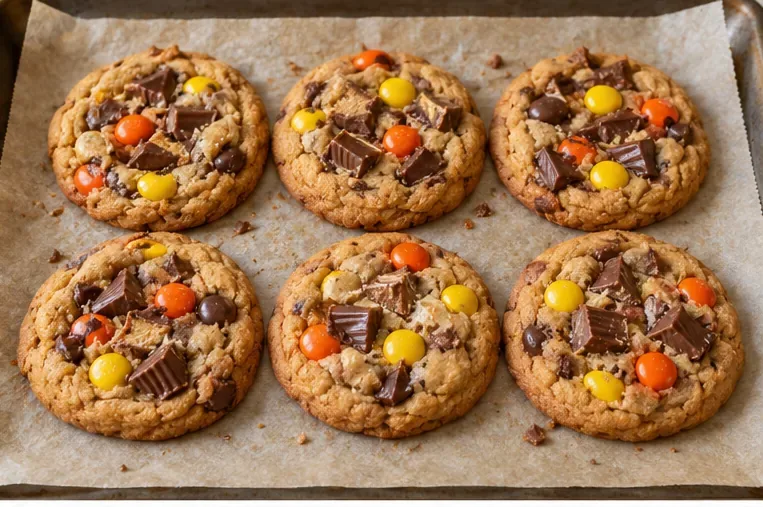
Combine similar chocolate candies in a batch of brown sugar cookies.
3. Chocolate-Pretzel Candy Bark
Makes: about 12 pieces. Time: 15 minutes of prep plus 30–60 minutes to chill.
Ingredients:
8 ounces semisweet baking chocolate, chopped
1/2 cup chopped wafer bars or other chocolate candy
1/3 cup broken small pretzels
Line a tray with parchment. Put baking chocolate in a completely dry microwave-safe bowl.
Microwave at 50% power for 30 seconds and stir. Continue in 15-second bursts, stirring each time, until smooth.
Spread into an approximately 8-by-10-inch rectangle. Scatter candy and pretzels over it and press gently into the chocolate.
Refrigerate until firm enough to break into pieces. Keep covered and chilled if the room is warm.
Check: Toppings should stay attached when you lift a piece. Add them before the base sets. This simple bark is not tempered, so it can soften at room temperature and may lack a glossy finish. The melt-and-top approach is also described in Hershey's leftover candy ideas.
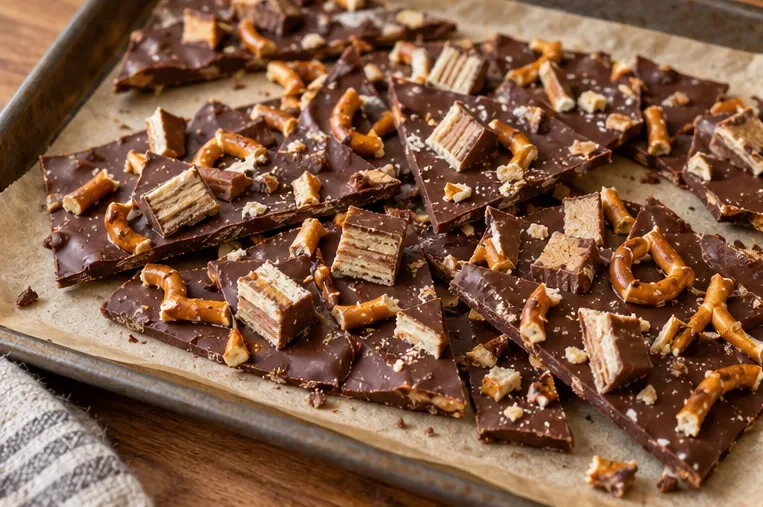
Thin chocolate bark gives wafer pieces and pretzels a firm base.
3/4 cup small candy-coated chocolates or chopped chocolate bars
Lightly grease a 9-by-13-inch pan. Melt butter over low heat in a large saucepan. Add marshmallows and stir until melted; remove from heat.
Stir in cereal until coated. Let the mixture stop steaming, then briefly fold in half the candy.
Transfer to the pan. Press gently with a buttered spatula and add the remaining candy on top.
Cool until the slab holds together, then cut into 16 squares.
Check: The bars should bend slightly rather than feel rock-hard. Low heat and light pressing help preserve a softer bite. Serve the same day for best texture, or keep airtight at room temperature for up to two days.
5. No-Bake Candy Cheesecake Cups
Makes: 6 small dessert cups. Time: 20 minutes of prep plus at least 2 hours to chill.
Ingredients:
3/4 cup graham cracker crumbs and 2 tablespoons melted butter
8 ounces cream cheese, softened just enough to beat
1/4 cup powdered sugar and 1/2 teaspoon vanilla extract
1/2 cup cold heavy whipping cream
1/2 cup finely chopped peanut butter cups or plain chocolate candy
Mix crumbs with melted butter and divide among six small cups.
Beat cream cheese, powdered sugar, and vanilla until smooth. In a separate bowl, whip the cold cream to stiff peaks.
Fold whipped cream into the cream cheese, followed by the candy. Spoon over the crumbs.
Cover and refrigerate at least 2 hours. Keep chilled until serving.
Check: The filling should sit in a soft mound on a spoon. These are spoonable cups, not a filling intended to produce clean cheesecake slices. If the mixture is loose, chill longer; do not add raw flour to thicken it.
6. Candy Crunch Ice Cream Pie
Makes: 8 slices. Time: 10–15 minutes of prep plus at least 6 hours to freeze.
Ingredients:
1 ready-to-eat, 9-inch deep-dish graham cracker or chocolate crumb crust
1 quart vanilla ice cream
1/2 cup finely chopped chocolate candy or toffee bars
3 tablespoons chocolate sauce, plus a little extra candy for serving if desired
Let ice cream soften only until scoopable, without allowing it to become liquid.
Quickly fold in chopped candy. Spoon into the crust and swirl chocolate sauce over the top.
Cover and return to the freezer immediately. Freeze at least 6 hours, until firm throughout.
Let stand briefly before slicing. Add any crunchy topping just before serving.
Check: A slice should hold its shape as you lift it. If the center slumps, return the pie to the freezer. If your crust is shallow, freeze excess filling in a separate covered container rather than overflowing it. Avoid large caramel chunks, which can become difficult to bite when frozen.
7. Candy Corn Chocolate Popcorn Clusters
Makes: about 12 clusters. Time: 15 minutes of prep plus about 30 minutes to chill.
Ingredients:
6 cups plain popped popcorn, with unpopped kernels removed
8 ounces semisweet baking chocolate, chopped
1/2 cup candy corn or small candy-coated chocolates
1/2 cup broken pretzels
Line a baking sheet with parchment. Place cooled popcorn and pretzels in a large bowl.
Melt chocolate at 50% microwave power in short bursts, stirring between each, until smooth.
Drizzle over the popcorn and toss gently. Fold in candy, then spoon 12 loose mounds onto the tray.
Chill until the chocolate sets and the clusters lift cleanly from the parchment.
Check: Chocolate should bind the popcorn without pooling heavily underneath. If you want less sweetness, use 1/4 cup candy rather than increasing the chocolate. Serve soon after making for the crispest texture; a tightly sealed container helps protect leftovers from humidity.
8. Chocolate-Caramel Pretzel Bites
Makes: 24 bites. Time: 10 minutes of prep, 3–5 minutes in the oven, plus cooling. This version uses the warming method from Hershey's ROLO Pretzel Delights.
Heat the oven to 250°F. Line a baking sheet with parchment.
Arrange 24 pretzels on the sheet and place one candy on each.
Warm for 3–5 minutes, just until the candy begins to soften.
Remove from the oven. Gently press a second pretzel onto each candy and let cool completely.
Check: The candy should compress without becoming a puddle. If it resists gentle pressure, warm briefly again. Use this timing for the specified candy; solid chocolate pieces and hard caramels behave differently.
9. Chocolate Candy Pudding Parfaits
Makes: 4 servings. Time: 15 minutes, plus the pudding package's setting time.
Ingredients:
1 package instant chocolate pudding mix that makes approximately 2 cups
Cold milk in the amount and type specified on the pudding package
1/2 cup crushed chocolate sandwich cookies
1/2 cup chopped chocolate candy, divided
1/2 cup prepared whipped topping or whipped cream
Prepare the pudding exactly as directed and let it thicken.
Divide half the pudding among four glasses. Add a layer of cookie crumbs and half the chopped candy.
Repeat with the remaining pudding. Finish with whipped topping, remaining crumbs, and candy.
Serve promptly for distinct crunchy layers, or cover and refrigerate until serving.
Check: The pudding should hold a spoon mark before layering. If it remains runny, check the milk quantity and package requirements; some mixes do not set the same way with plant-based milk. To prepare ahead, chill the pudding separately and add wafer candy or cookie crumbs near serving time.
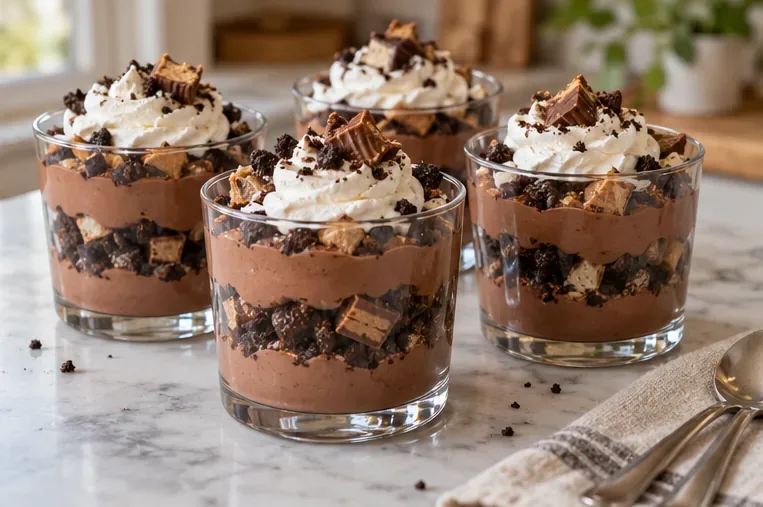
Layer pudding with cookie crumbs and candy, adding crunchy toppings near serving time.
10. Caramel Apple Candy Nachos
Makes: 4 servings. Time: about 15 minutes.
Ingredients:
2 large crisp apples
4 ounces soft vanilla caramel candies, unwrapped
2 tablespoons milk
1/4 cup finely chopped chocolate bars, peanut butter cups, or toffee
Rinse apples under running water and dry. Core and thinly slice them just before serving; arrange on a large plate.
Put soft caramels and milk in a small saucepan over low heat. Stir until melted and smooth, following any specific melting directions on the candy package.
Let the sauce cool until warm rather than hot. Drizzle over apples and scatter chopped candy on top.
Serve immediately with forks or small plates.
Check: The sauce should fall from a spoon in a ribbon. If too thick, stir in milk 1 teaspoon at a time. This recipe is best assembled at the last minute: apples release moisture, and the toppings soften as they sit. Hard caramel sweets are not a substitute for soft caramels here.
How to Keep Leftover Candy Desserts at Their Best
Make the amount you expect to enjoy, and keep unused candy wrapped with its original storage information. Baking candy into a dessert does not create a new universal shelf life; the finished recipe and its most perishable ingredient determine storage.
Cookies and brownies: Cool completely before sealing. Freeze portions you will not use soon in airtight packaging; thaw only what you need. Texture can change with different fillings.
Cheesecake cups and pudding parfaits: Keep covered and refrigerated. Make small batches, follow ingredient storage directions, and add crunchy toppings close to serving.
Ice cream pie: Keep frozen between servings and return the remaining pie promptly to the freezer.
Apple nachos: Assemble for immediate eating; store any unused caramel sauce separately in the refrigerator.
For perishable desserts, the FDA recommends a refrigerator at 40°F or below and a freezer at 0°F. Discard perishable foods left out longer than two hours, or one hour when the temperature is above 90°F. Do not taste uncooked brownie batter or cookie dough.
The most useful leftover Halloween candy recipes solve a specific problem: brownies absorb a handful of chocolate pieces, bark gathers crunchy odds and ends, and chilled cups turn a modest amount of candy into individual servings. Choose the recipe that fits your candy and available time, then judge the result by texture and doneness rather than the clock alone.