10 DIY Halloween Decorations Using Recycled Cardboard Boxes (Easy to Advanced)

You saved a few delivery boxes for a craft project, but now they are leaning against the recycling bin and Halloween decorations still need to be made. Store-bought props can take up money and storage space, while loose cardboard looks like clutter until you give it a shape and a purpose. The trick is to match each box to a project: thin flat pieces work for hanging silhouettes; intact boxes work for characters; strong corrugated panels are better for standing displays.

These 10 DIY Halloween decorations using recycled cardboard boxes are arranged from the simplest cutouts to a miniature haunted house. Most use what is already around the home. All are intended primarily for dry, indoor locations; an outdoor display should be sheltered, brought inside during bad weather, and positioned clear of walking routes.

Sort the boxes before you cut anything

Start with clean, dry cardboard. Put thin cereal-box board or flattened shipping-box panels in one pile, sturdy double-wall panels in another, and intact small or medium boxes in a third. Flatten unwanted flaps and remove staples or sharp packing hardware. A dry box takes paint and glue more predictably than one with damp, softened corners.

Gather scissors, a pencil, ruler, scrap paper for templates, black and orange paper or water-based craft paint, masking tape, and craft glue. Optional extras include twine, tissue paper, a hole punch, removable hanging hooks, and battery-powered LED tea lights. A craft knife is useful for window openings but should be handled by an adult on a protected cutting surface; children can trace, paint, and glue precut pieces.

The U.S. Environmental Protection Agency's waste-management hierarchy emphasizes reducing and reusing materials before recycling where practical. For this project, that means selecting boxes you already own and using offcuts for smaller eyes, ears, tabs, and braces rather than buying more supplies.

10 cardboard Halloween decorations, from easy to advanced

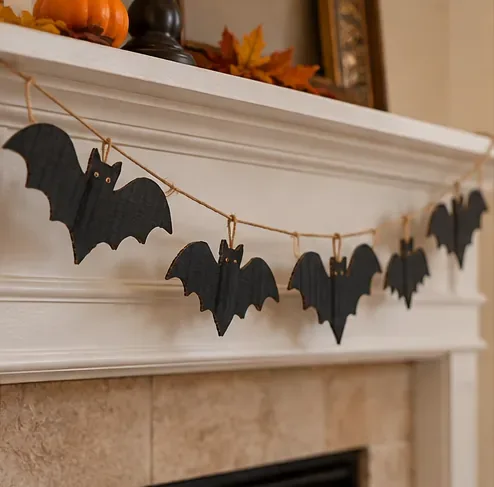
1. Hanging cardboard bat garland

Best for: A mantel, wall, or doorway trim. Difficulty: Easy. Use: One flattened box and a little twine.

  1. Fold a scrap-paper bat shape in half, draw one wing, and cut it out so both sides match.
  2. Trace the template onto flattened cardboard several times, alternating large and small bats if you want variety.
  3. Cut the silhouettes, paint them black on both sides, and let them dry flat.
  4. Punch two small holes near the body of each bat and thread twine through them, spacing the bats with small knots.
  5. Hang from removable hooks, leaving enough slack for a gentle curve.

If the garland curls, paint both faces rather than soaking only one side. Hang it away from operating fireplaces, lamps, and heaters. A flat silhouette is more reliable than a complex three-dimensional bat when your starting material is thin cardboard.

Black cardboard bat shapes threaded onto a twine garland across a white mantel
A strand of black bat cutouts hangs from twine over a mantel, showing how thin panels from a shipping box become lightweight wall decor.

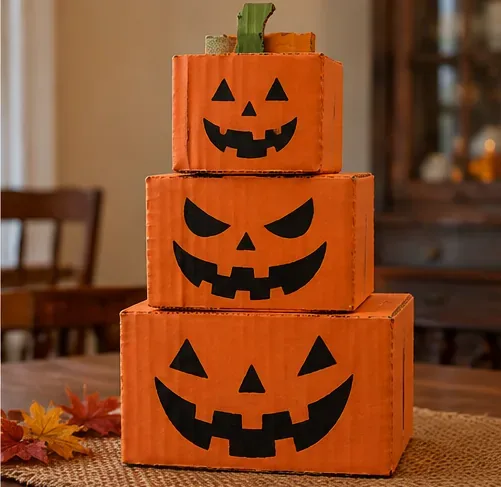
2. Stackable jack-o'-lantern boxes

Best for: A covered entry table or living-room corner. Difficulty: Easy. Use: Three empty boxes in decreasing sizes.

  1. Close and tape the bottoms of the boxes, then nest or stack them with the largest underneath.
  2. Wrap the visible faces in orange reused paper, or apply light coats of orange craft paint.
  3. Make eyes, noses, and crooked mouths from leftover black cardboard. Glue them to the fronts.
  4. Roll a scrap of green cardboard into a stem, attach it to the smallest top box, and add a leaf.
  5. Check that the tower stays upright when gently touched. Connect boxes with removable loops of tape if needed.

A tower is easier than shaping a perfectly round pumpkin, because the original box geometry provides stability. Avoid placing heavy objects inside the top box. For a softer look, use different smiling faces instead of identical scary ones.

Three orange cardboard boxes stacked with black jack-o-lantern faces and a green stem
Three nested cardboard boxes painted orange create a stable jack-o-lantern tower; each box has a different black facial expression.

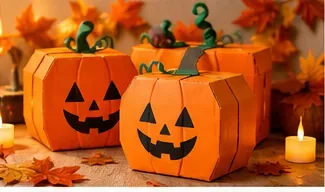
For a second variation, cut six or eight pumpkin ribs from thin box panels, curve them lightly, and glue the lower edges around a cardboard base. This produces an individual faceted pumpkin rather than a stack of squares; it requires more cutting but fits smaller spaces.

Individual pumpkin-shaped cardboard decorations painted orange with black faces and green tendrils
Several smaller faceted cardboard pumpkins demonstrate an alternative to stacking whole shipping boxes.

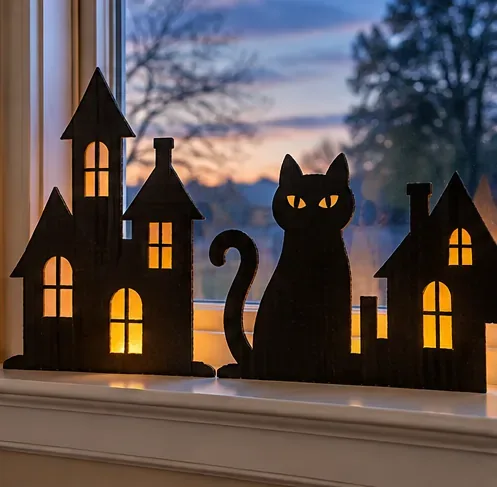
3. Spooky window skyline and cat

Best for: A window sill that can support lightweight pieces. Difficulty: Easy to moderate. Use: Flat cardboard with long lower edges.

  1. Draw a row of crooked rooftops, chimneys, and a cat with a curled tail on the plain side of flattened packaging.
  2. Cut around the outlines. An adult can cut rectangular or arched windows from the buildings.
  3. Paint the fronts matte black and fold short rectangular tabs backward at the base for support.
  4. Place the pieces along the sill, overlapping tall roofs behind shorter shapes.
  5. For a nighttime effect, place a separate flameless LED light behind the houses, not directly against paper or fabric.

Test the view from outside before gluing the pieces together. Wider roof shapes can block the cat; a few taller, narrower silhouettes usually give each object more room to be recognized. Do not obstruct window operation or emergency escape routes.

Black cardboard haunted houses and a cat silhouette arranged on a window sill at dusk
Folded cardboard tabs support a cat and small haunted-house silhouettes along a window sill, with warm battery lighting behind the cutout windows.

4. Small bat creature made from a box

Best for: A desk, bookshelf, or party table. Difficulty: Easy to moderate. Use: One small cube box plus two wing panels.

  1. Wrap the cube in black paper or paint its outside.
  2. Trace two matching wide wings onto a spare flat panel; keep tabs at the ends that will join the body.
  3. Fold the tabs and tape them firmly to the back and sides of the box.
  4. Add round eyes and tiny triangular paper fangs to the front.
  5. Set it on a shelf and adjust the wings until the box does not tip.

Oversized wings look dramatic, but they act like levers and can pull the body over. If the decoration rocks, shorten the wings or glue an extra scrap-cardboard base underneath.

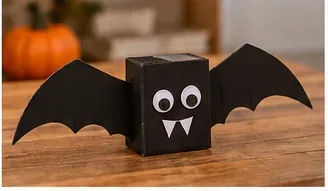
Small black cardboard bat creature with attached wings, round eyes, and white fangs
A compact black box becomes a bat character when two broad cardboard wings, white eyes, and triangular fangs are added.

5. Monster-eye cardboard wreath

Best for: An interior door. Difficulty: Moderate. Use: One large panel for a ring, plus narrow strips and circles.

  1. Trace two concentric circles on sturdy cardboard and cut out the center to create a ring.
  2. Cut short strips from corrugated offcuts and glue them around the ring, overlapping like fringe.
  3. Make several large eyes from nested paper or cardboard circles with dark pupils.
  4. Arrange the eyes asymmetrically, then glue them in place after checking the balance.
  5. Attach a twine loop through two small reinforced holes at the top of the ring.

Keep the finished wreath light: adding more layers may look fuller, but a heavy wreath needs a stronger hook. Position it so that it cannot obscure a door viewer, handle, lock, or exit sign.

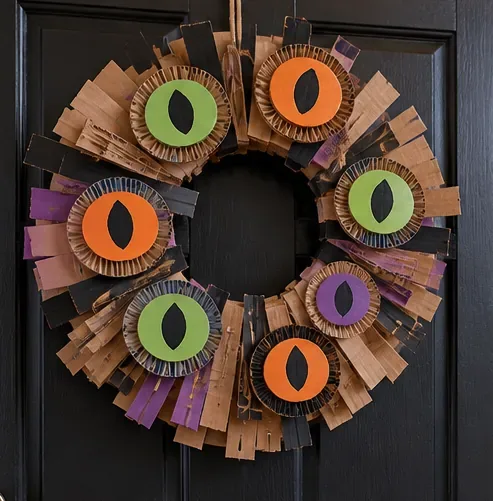
Round Halloween wreath made of layered corrugated cardboard strips and colorful monster eyes
A circular cardboard backing supports fringed corrugated strips and flat green, orange, and purple monster-eye shapes on a dark door.

6. Halloween character boxes: black cat or skull

Best for: A shelf grouping where each character can have a different expression. Difficulty: Moderate. Use: Small intact boxes and leftover flat scraps.

  1. For a cat, cover one box in black paper, then cut pointed ears, a curled tail, almond-shaped eyes, and whiskers.
  2. Reinforce each ear or tail by attaching it with a folded cardboard tab on the inside of the box.
  3. For a skull variation, cover a separate box with pale paper, then add large dark eyes, a triangular nose, and teeth drawn in black.
  4. Group the characters at different heights, keeping wide, flat bases on the shelf.

The cat needs projecting parts, so use thicker material for its tail. The skull relies mostly on flat facial features and can be made from lighter packaging. Neither needs holes cut into its structure unless you specifically want a lantern later.

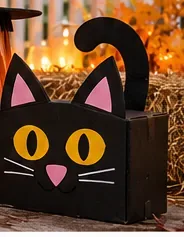
Black cardboard cat box with pointed ears, yellow eyes, pink nose, and curled tail
A painted black cardboard box becomes a cat with cardboard ears, a curled tail, and high-contrast facial features.
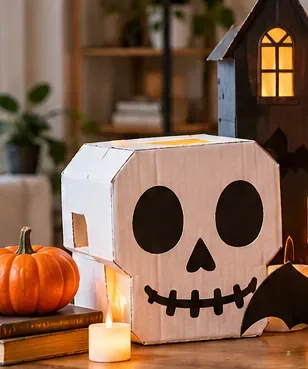
White cardboard skull box with dark circular eyes and a painted stitched smile
An alternative character-box face uses a pale cardboard skull with two large black eyes, a triangular nose, and a stitched mouth.

7. Freestanding cardboard cemetery tombstones

Best for: A hallway vignette or a sheltered display near a wall. Difficulty: Moderate. Use: Large flat double-wall cardboard.

  1. Draw three different headstone tops: rounded, pointed, and broken-looking.
  2. Cut the outlines from sturdy cardboard, doubling a panel with glue if it bends easily.
  3. Paint light gray, then dab darker gray lightly onto the edges. Add cracks or simple black symbols.
  4. Cut two short cardboard feet for each stone. Slot or tape them at right angles behind the lower corners.
  5. Stand the stones on a level, dry surface and check that the back supports do not show from the main viewing angle.

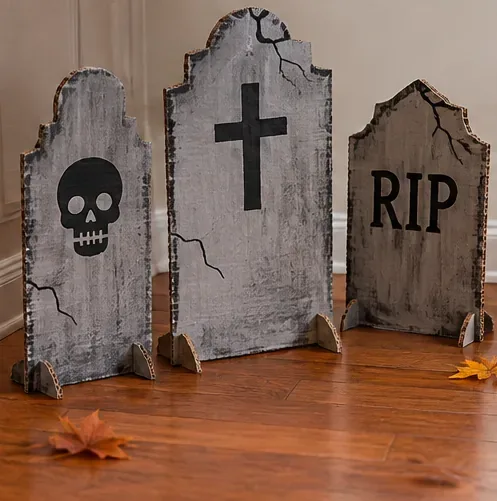
Flat headstones will often flop forward unless you build a deep enough foot. A longer rear brace or a folded triangular support makes a bigger difference than extra paint. Keep freestanding pieces off stairways and clear of pedestrian paths.

Three gray cardboard tombstone silhouettes with hand-painted cracks and folded feet
Three corrugated tombstone panels stand upright using cardboard support feet, with gray paint, cracks, and spooky black emblems.

8. Ghost-window cardboard lantern

Best for: A dim indoor corner. Difficulty: Moderate. Use: One medium box, thin white paper, and a battery-powered light.

  1. Choose a box with a stable bottom and leave an accessible opening for the battery light.
  2. Draw a large ghost shape on two faces, leaving enough cardboard around each shape to hold the box together.
  3. Have an adult cut out the ghost openings. Glue white tissue paper or translucent paper over the openings from the inside.
  4. Place a commercially made battery-powered LED tea light on the bottom, with access to its on/off switch and battery compartment.
  5. Turn it on to inspect the silhouette, then turn it off when the display is not in use.

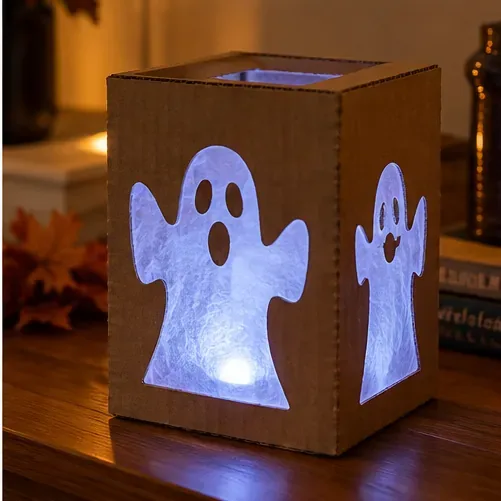
Do not put a burning candle, incandescent bulb, or hot light source inside cardboard. The U.S. Consumer Product Safety Commission's 2023 Halloween safety guidance recommends battery-operated lights and keeping decorations clear of fire hazards. If young children can reach the display, make sure its batteries are secured in the product's enclosed compartment.

Cardboard cube lantern with two translucent ghost-shaped windows glowing with cool white light
A recycled cardboard box has ghost-shaped openings covered with translucent paper, lit by a battery-powered light inside.

9. Tall cardboard witch with a pointed hat

Best for: A floor-level interior scene against a wall. Difficulty: Moderate to advanced. Use: One tall narrow box, large paperboard for the hat, and paper strips for hair.

  1. Stand the box upright, tape its seams, and cover it in green paper or green paint.
  2. Make eyes, a nose, and a smile from scraps, keeping the face large enough to read across the room.
  3. Roll a stiff sheet of black cardboard into a cone and tape the seam. Add a wide flat ring for the brim.
  4. Attach the hat at several points around the top of the body. Glue orange paper strips beneath the brim as hair.
  5. Check that the witch cannot tip when the hat is nudged; widen the base or shorten the hat if necessary.

A tall hat has visual impact but adds top weight. Place this figure on the floor rather than a narrow shelf, and do not let it lean into a walkway or exit. A shorter witch is the safer option in a home with energetic pets.

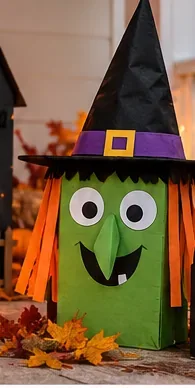
Tall green cardboard witch character with black pointed hat and orange paper hair
A rectangular green cardboard body supports a large black cone hat and orange paper strips, forming a freestanding witch display.

10. Miniature illuminated haunted house

Best for: A dining-room sideboard or Halloween centerpiece. Difficulty: Advanced. Use: Several sturdy panels, small boxes, and battery-operated LEDs.

  1. Sketch a front elevation with one main building and one smaller tower. Decide where the doors and windows will be before cutting.
  2. Cut front, back, side walls, and roof pieces; mark each piece on its hidden side.
  3. Cut window openings while the panels are still flat. Leave generous space between holes so the walls stay rigid.
  4. Join the walls with folded interior tabs and strips of packing tape; add a triangular brace at each weak corner.
  5. Form sloped roofs from scored, folded cardboard and fasten them to the walls. Paint the exterior a dark color.
  6. Put translucent paper behind the windows and position flameless lights so the light is visible but the batteries and switches remain accessible.
  7. Set the building on a separate flat cardboard base, then turn it gently to check every corner and roof joint.

This project takes more precision than the others because every opening removes some stiffness from the box. If a wall starts buckling, glue a narrow support strip vertically just inside it rather than adding more exterior paint. A smaller two-room house is a better first attempt than a large, multi-story castle.

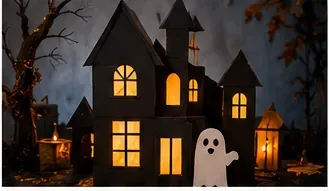
Small black cardboard haunted mansion with peaked roofs and illuminated arched windows
A miniature cardboard haunted house features multiple peaked roofs, arched cutout windows, and warm flameless lights shining through.

Small fixes that prevent the most common cardboard craft problems

  • Paint wrinkles the panel: Use thin coats on both sides, allow drying between coats, and flatten under a clean board once dry.
  • Edges peel: Trim loose paper fibers and cover exposed seams with kraft tape or glued scraps.
  • Standing props fall: Increase the depth of the base, add triangular braces, or reduce the height and weight of the top piece.
  • Hanging pieces twist: Give each silhouette two attachment holes rather than one.
  • Light looks patchy: Use translucent paper to soften the glow and move the battery light without letting it touch the paper window.
  • Porch decorations sag: Bring them inside before rain or damp overnight conditions. Ordinary shipping cardboard is not weatherproof.

Before placing anything near a doorway, follow the CPSC's recommendation to keep steps, porches, and paths free of obstacles. The U.S. Fire Administration's Halloween fire-safety materials also advise keeping decorations away from flames, heaters, and hot light bulbs. Decorative cardboard should never cover a smoke alarm or block a route out of a room.

How to check the finished decorations

Do a final walkthrough with all the lights on first, then repeat it under the lighting you expect on Halloween night. A successful result is not simply a decoration that photographs well; it also stays in place, remains easy to recognize, and does not create a trip or fire hazard.

  • Recognizable: Can someone tell that a cutout is a bat, cat, pumpkin, or house from several steps away?
  • Stable: Do freestanding boxes and headstones stay upright after a gentle touch?
  • Safe: Are exits, doors, windows, stairs, heat sources, and walkways unobstructed? Are all lights flameless?
  • Accessible: Can you turn a battery light off without tearing open the project?
  • Reusable: Can the pieces be packed flat or nested together for storage next year?

Finally, save clean offcuts for repairs and next year's crafts. After the season, remove plastic tape, electronics, and other attachments where practical before evaluating recycling options. The EPA's recycling guidance says cardboard boxes can be recycled and should be flattened; check your local program for rules on heavily painted, glued, or otherwise contaminated material. The best outcome is a decoration you enjoy again next Halloween rather than a box that becomes single-use waste in a new shape.

Leave a Comment

The Villain Era Trend: Best Dark Costumes for Halloween 2026

The Villain Era Trend: Best Dark Costumes for Halloween 2026

Build a dark, polished Halloween 2026 look with six villain-inspired costume ideas, practical styling tips, budget guidance, and safety checks.

Windows 11 Network Reset: What It Changes and How to Reconnect

Windows 11 Network Reset: What It Changes and How to Reconnect

Learn what Windows 11 network reset changes, what to save first, and how to reconnect Wi-Fi, Ethernet and VPNs and check your network profile afterward.

Windows Security Protection History: Check a Blocked File Safely

Windows Security Protection History: Check a Blocked File Safely

Review Windows Security Protection History, understand blocked alerts, and check a file’s source, signature, and hash before deciding what to do.

Windows 11 Microphone Privacy Settings: Allow a Specific App

Windows 11 Microphone Privacy Settings: Allow a Specific App

Allow microphone access for a specific Windows 11 app, understand shared desktop permissions, check Edge site access, and verify your microphone works.

Windows 11 Wi-Fi Connected but No Internet: Safe DNS Checks

Windows 11 Wi-Fi Connected but No Internet: Safe DNS Checks

Fix Windows 11 Wi-Fi connected but no internet with safe IP and DNS checks, reversible network settings, and clear guidance on when to use network reset.

How to Reset Site Permissions in Microsoft Edge Without Deleting Browsing Data

How to Reset Site Permissions in Microsoft Edge Without Deleting Browsing Data

Reset permissions for one website in Microsoft Edge while keeping cookies, history, and saved passwords. Follow safe steps for Windows 10 and Windows 11.

How to Check and Change Microsoft Edge Sleeping Tabs for a Specific Website

How to Check and Change Microsoft Edge Sleeping Tabs for a Specific Website

Check whether an Edge tab can sleep, keep a specific website active, edit or remove its exception, and troubleshoot sleeping tabs on Windows 10 and 11.

20 Easy College Halloween Costumes You Can Make from Your Closet

20 Easy College Halloween Costumes You Can Make from Your Closet

Need a last-minute college Halloween costume? Try 20 easy, budget-friendly looks built from closet staples, plus quick styling and safety tips.

Allergy-Friendly Trick-or-Treating: The Teal Pumpkin Project in 2026

Allergy-Friendly Trick-or-Treating: The Teal Pumpkin Project in 2026

Learn what the Teal Pumpkin Project means in 2026, how hosts can offer separate non-food treats, and how families can plan routes and review candy safely.

Trick-or-Treating in 2026: What’s Changing on Halloween Night

Trick-or-Treating in 2026: What’s Changing on Halloween Night

See what the latest 2026 Halloween survey says about trick-or-treating, community events, and practical ways to plan a safer neighborhood outing.