What is Program Compatibility Troubleshooter in Windows 11? How to use it?
Program Compatibility Shooter is a Windows tool that helps you troubleshoot application compatibility issues.
Just because a developer built an application for an older version of Windows doesn't mean you can't run it on a newer version of the operating system. Through Compatibility Mode, you can easily run older programs without any problems most of the time.
However, if you do run into compatibility issues, don’t worry. Windows has a built-in tool that can help you diagnose and fix them easily. It’s called the Program Compatibility Troubleshooter, and this article will show you all the different ways you can run it.
1. Run Program Compatibility Troubleshooter using the context menu
The easiest way to run the Program Compatibility Troubleshooter on Windows 10 is to simply right-click on the app and select Troubleshoot compatibility . If you're on Windows 11, you'll first have to click Show more options after right-clicking on the app to bring back the classic context menu, then select Troubleshoot compatibility .
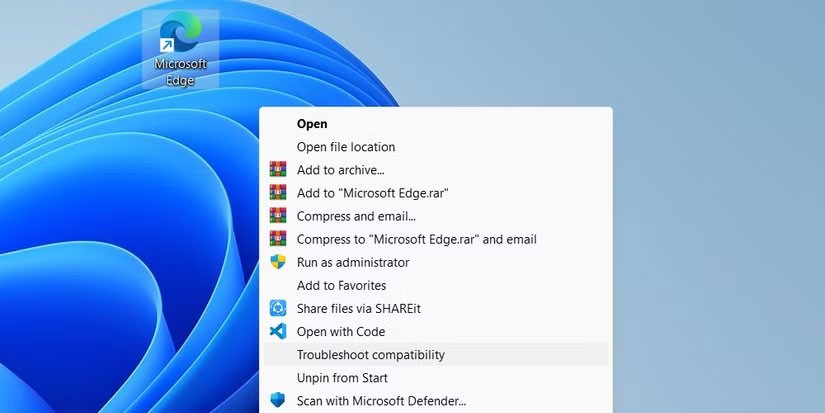
This will immediately launch the tool and help you fix any compatibility issues you are having with the selected application.
2. Run the Program Compatibility Troubleshooter on the Troubleshoot page
Both Windows 10 and 11 have a Troubleshooting page in the Settings app where you can launch the Program Compatibility Troubleshooter. If you can't access the Troubleshooting page because the Settings app isn't working, read our guide on how to fix Windows Settings won't open .
On Windows 11
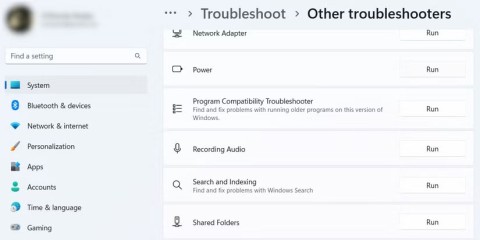
To run the Program Compatibility Troubleshooter from Settings on Windows 11, start by pressing Win + I to open the Settings app. Next, click System on the left menu, then click Troubleshoot on the right.
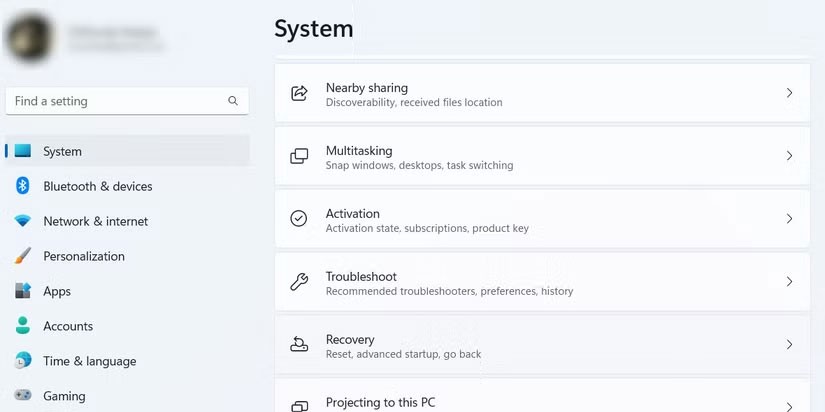
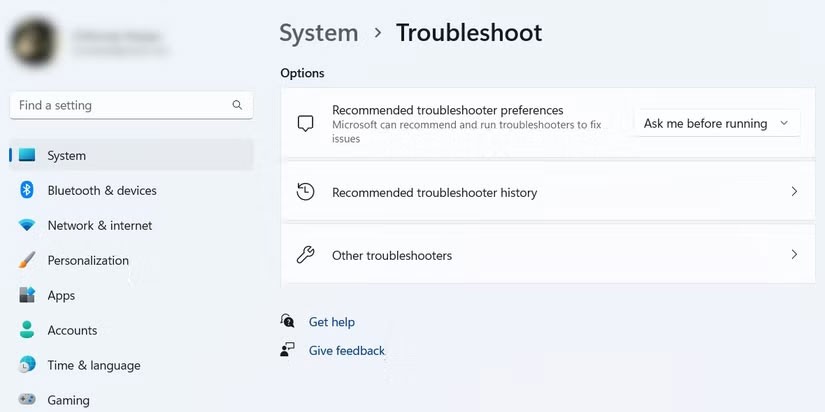
On the Troubleshoot page , scroll down and click Other troubleshooters .
Scroll down to the Other section , find Program Compatibility Troubleshooter from the list of troubleshooters, then click the Run button next to it.
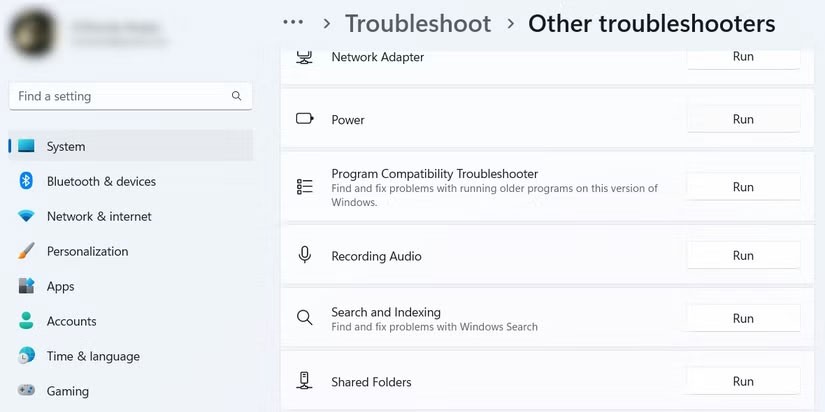
This will launch the Program Compatibility Troubleshooter.
On Windows 10
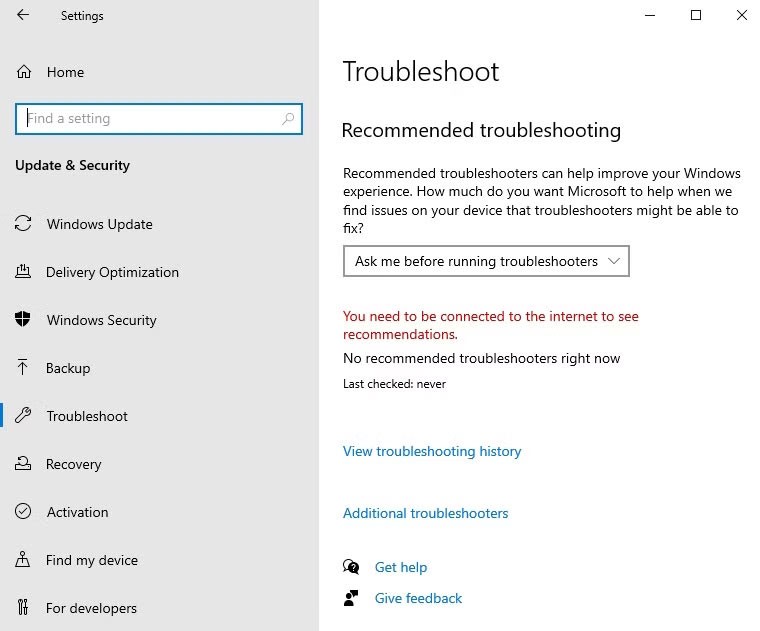
If you're using Windows 10, press Win + I to open the Settings app , then click Update & Security . Next, click Troubleshoot on the left menu, then click Additional troubleshooters on the right.
Find and click Program Compatibility Troubleshooter to expand it. Then, click the Run this troubleshooter button .
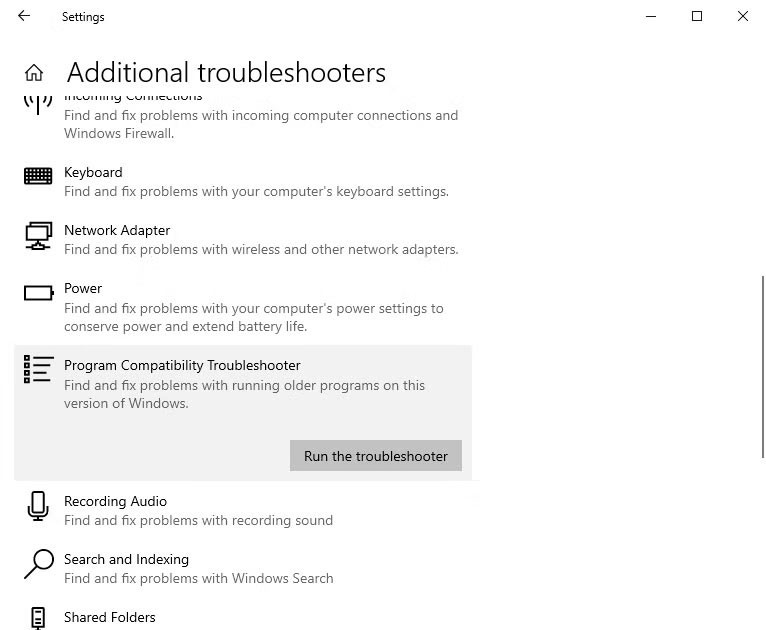
Now, you can use the tool to fix compatibility issues on Windows 10.
3. Run Program Compatibility Troubleshooter using Control Panel
Another way to launch the Program Compatibility Troubleshooter is through the Control Panel. To do so, start by pressing Win + S to open Windows Search, type control panel into the search box, and then click Control Panel in the search results.
Tip : You can also read our guide on how to open Control Panel on Windows for more methods of launching programs.
In Control Panel , select Programs , and then click the Run programs made for previous versions of Windows link .
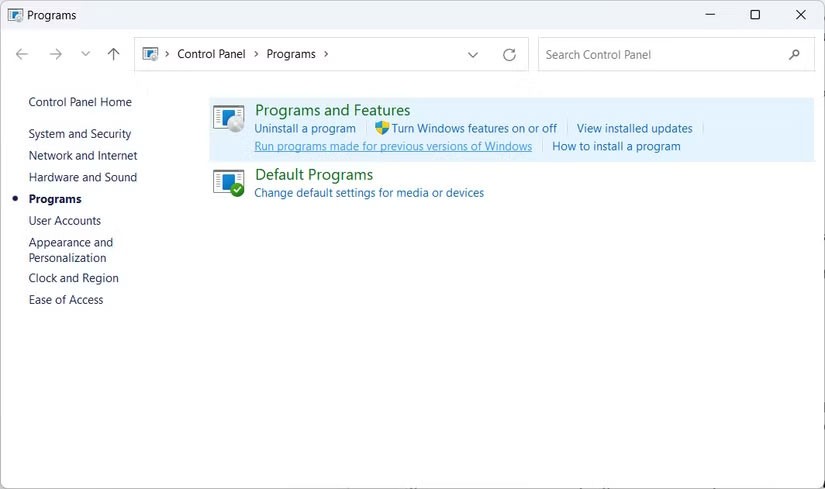
This will launch the Program Compatibility Troubleshooter.
4. Run the Program Compatibility Troubleshooter using the desktop shortcut
If you use the Program Compatibility Troubleshooter a lot, adding it to your desktop is a good way to keep it handy. To do so, right-click an empty space on your desktop, then click New > Shortcut to launch the Create Shortcut wizard .
Copy the text below:
%systemroot%\system32\msdt.exe -id PCWDiagnosticNext, paste the text you just copied into the Create Shortcut wizard's text box, then click Next .
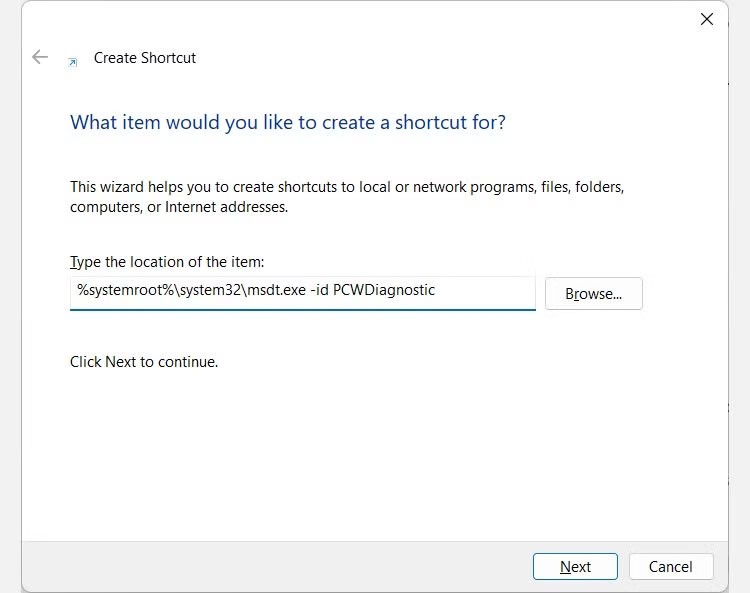
Name the shortcut Program Compatibility Troubleshooter , then click Finish to add the shortcut to the desktop.
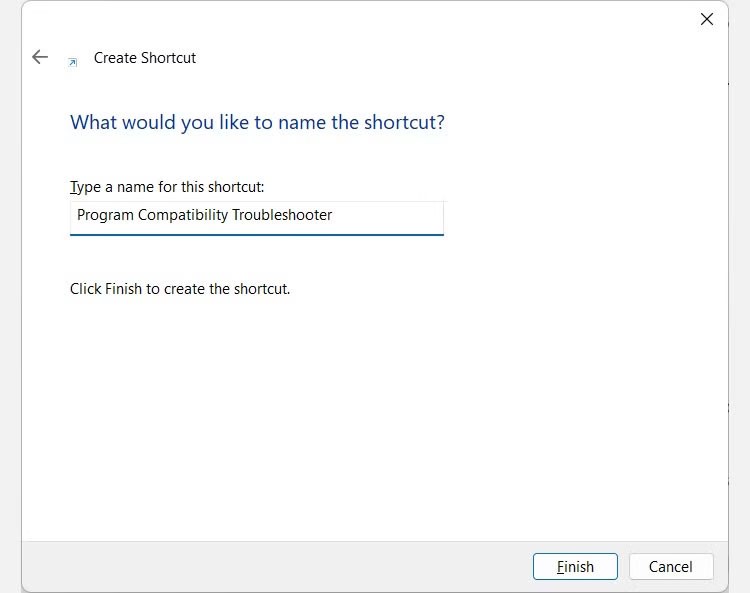
Now when you double click on the newly created shortcut, you will launch the Program Compatibility Troubleshooter.
The Program Compatibility Troubleshooter is sometimes the last resort to get older applications running on your current version of Windows. There are several ways to launch this handy tool, and this article has just shown you all of them in case one of them doesn’t work for you.
Struggling with the frustrating "Something Went Wrong" error during Windows 11 upgrade? Discover proven, step-by-step fixes to get your system updated smoothly and securely. Say goodbye to upgrade headaches!
Struggling with Printer Error 709 on Windows 11 after a recent update? Discover proven troubleshooting steps to resolve this issue and get your printing back on track without frustration. Step-by-step guide for smooth fixes.
Discover how to harness the latest Windows 11 accessibility features in 2026 to make your computing experience inclusive, efficient, and empowering. Step-by-step guides for everyone.
Struggling with JDK install failures? Dive into this comprehensive troubleshooting guide to resolve common Java Development Kit issues on Windows, macOS, and Linux. Get back to coding without the hassle.
Struggling with the Windows 11 Sticky Notes database error? Discover proven troubleshooting steps to restore your notes quickly and effortlessly. Get back to productivity without the frustration.
Struggling with Rainmeter skin positioning errors on Windows 11? Discover proven fixes for misalignment, dragging issues, and DPI glitches. Step-by-step guide to restore your desktop perfection.
Discover how to use Windows 11 virtual desktops correctly to supercharge your workflow. Learn setup, management, and pro tips for seamless multitasking without the overwhelm.
Discover how to safely convert MBR to GPT without data loss in Windows 11. Follow our step-by-step guide using built-in tools and third-party software for a seamless upgrade to modern partitioning.
Struggling with the 0x80072ee7 Store connectivity error? Discover proven, step-by-step fixes to restore your Microsoft Store access quickly and easily. Say goodbye to frustrations!
Struggling with background change errors on Windows 11 Pro? This step-by-step guide helps gamers fix the issue fast, restoring your custom setups without hassle. Discover proven methods to personalize your desktop effortlessly.
Discover how to set up Windows 11 Dynamic Refresh Rate for buttery-smooth performance on compatible displays. Follow our step-by-step guide to optimize your PC
Struggling with slow browsers on Windows 11? Discover proven fixes for memory leaks in Chrome, Edge, Firefox, and more. Boost performance and end frustration today.
Struggling with the Windows 11 Photos App File System Error? Discover proven, step-by-step fixes to restore your photo viewing experience without hassle. Updated with the latest troubleshooting tips for seamless performance.
Struggling with OBS Studio black screen on Windows 11? Discover proven fixes for smooth streaming and recording. Step-by-step guide to resolve black screen issues quickly and easily.
Struggling with "GPT Partition Style Not Supported" error on your old PC? Discover proven solutions to convert partitions safely, upgrade your system, and get back to smooth computing without data loss. Perfect for legacy hardware users.
