Clear Nextcloud’s Missing Database Indexes Warning
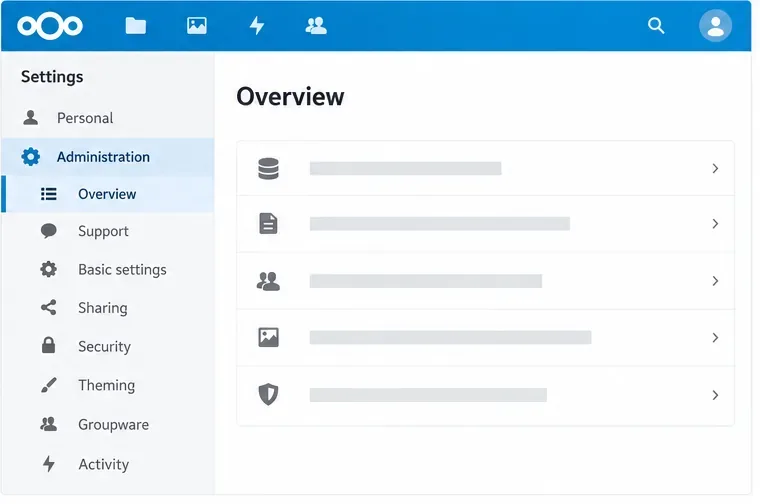
Run Nextcloud’s OCC repair safely, preview the database changes, and check why the warning might remain.
Windows 10 is the latest operating system, bringing quite a lot of exciting new features. However, in the process of using some people encountered the error of sound loss, without knowing the reason why, interfering with the process of work and entertainment on the computer.
So how to fix audio problems on Windows 10, please refer to the following 7 ways to quickly find the cause and how to fix it:
When you encounter a sound problem, the first thing you need to do is to check all jacks , sometimes due to loose pins or unused connectors. Remember to check if the speaker is turned on again or not, see if the Power button is on or off . In addition, also need to check the volume on the speaker to accidentally turn it to the minimum. If everything is fine without sound then continue with the methods below.
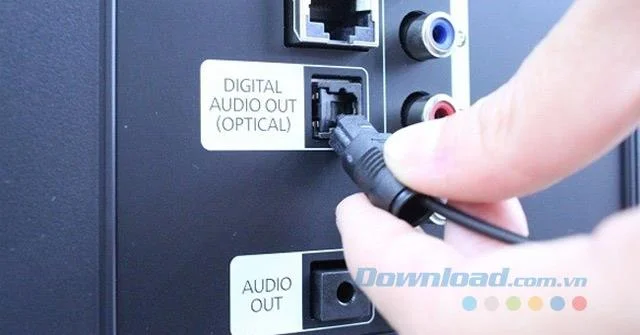
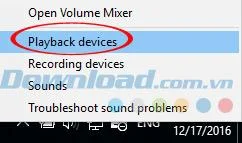
Sometimes you change some of the default settings, causing them to be in the wrong format leading to audio loss. Now, right-click the speaker icon in the system tray, select Playback Devices .
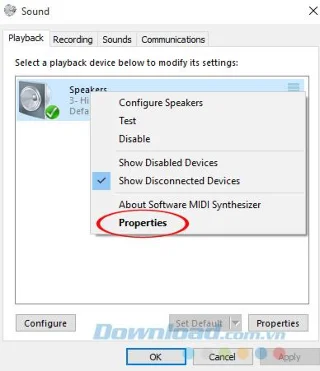
The Sound interface appears, right-click Speakers , and select Properties.
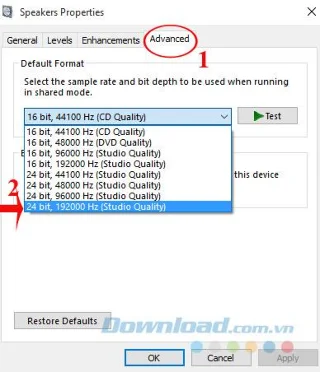
When the Speakers Properties window appears, switch to the Advanced tab . In the Default Format section , choose the frequency of 24 bits, 44,100 Hz or 24 bits, 192,000 Hz . Then click OK to save.
On Windows 10 built-in Audio Enhancements, improving the sound quality of external speakers. But in some cases they are the reason that the speakers do not emit sound. Ideally, you should try disabling this function. How to do it is quite simple, just right-click the speaker icon in the system tray, select Playback Devices . Then, right-click Speakers , select Properties.
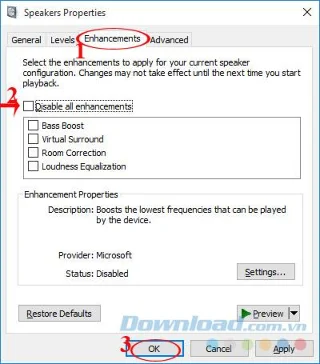
Speakers Properties interface appears, switch to the Enhancements tab , uncheck the Disable All Enhancements box . Then click OK to save the settings.
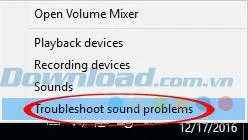
Not only Windows 10, but all versions of Windows operating system provide Windows Audio Troubleshooter debugger, to solve audio or Internet problems. Just right-click the speaker icon in the system tray and select Troubleshoot Sound Problems to start the debugger.
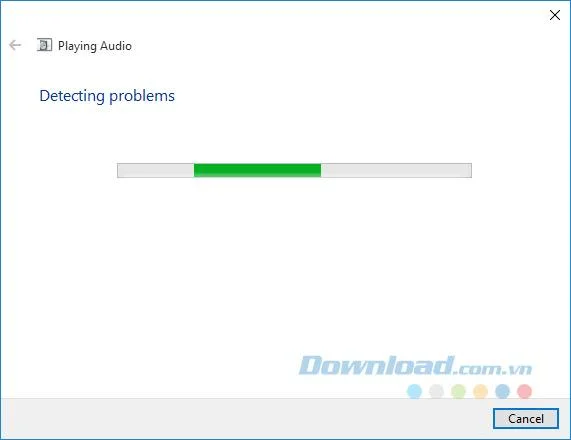
Immediately after that the debugger will automatically scan the sound system to find errors, when finding the cause will notify you and automatically fix that audio error.
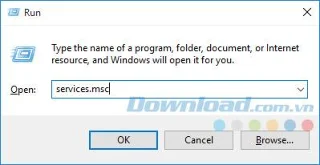
In some cases, restarting Audio Services also fixes the sound loss error on Windows 10, so do not hesitate to try it: The procedure is quite simple, just press Windows + R key combination to Open the Run dialog box . Then type services.msc into the Open box , then click OK .
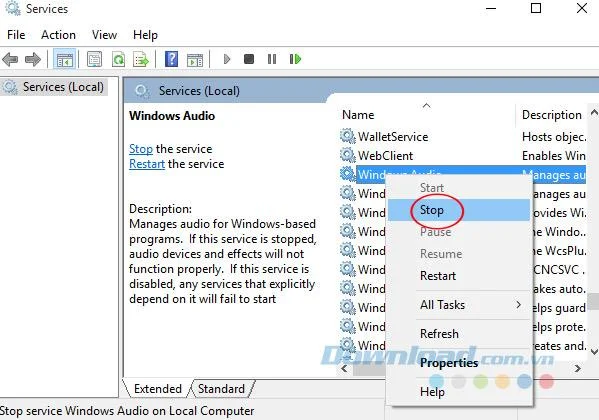
When the Services window appears, right-click on Windows Audio , select Stop to pause the audio service. Then, press Start again to restart the service.
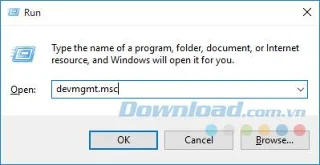
Perhaps the sound driver is too old or incompatible with the current version also causes a computer sound error. You can update the Sound Driver by: Pressing the Windows + R key combination to open the Run dialog box . Then type devmgmt.msc in the Open box , and then click OK .
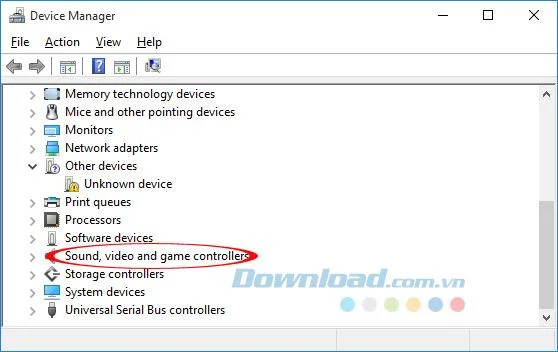
The Device Manager interface appears, double-click Sound, video and game controllers.
Here, there will be 2 ways to update the Audio Driver:
Method 1: Automatically update the Driver
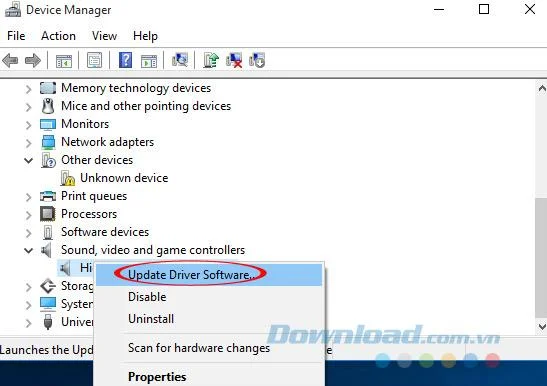
When you double-click Sound, video and game controllers will appear audio drivers, just right-click on it, select Update Driver Software .
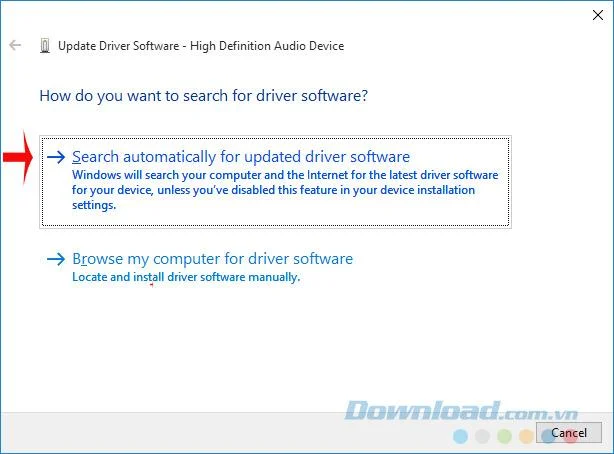
Next, click Search automatically for updated driver software to automatically find and update the new Driver.
Method 2: Download the Audio Driver on your computer yourself
If the driver update function does not work, you must manually find the new driver on the manufacturer's homepage. Then download the computer, then follow the procedure below to update the new Driver:
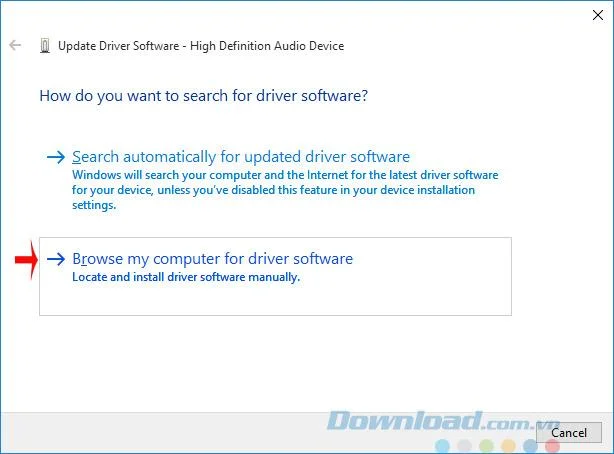
You still follow the steps above, when the Update Driver Software interface , click Browse my computer for driver software .
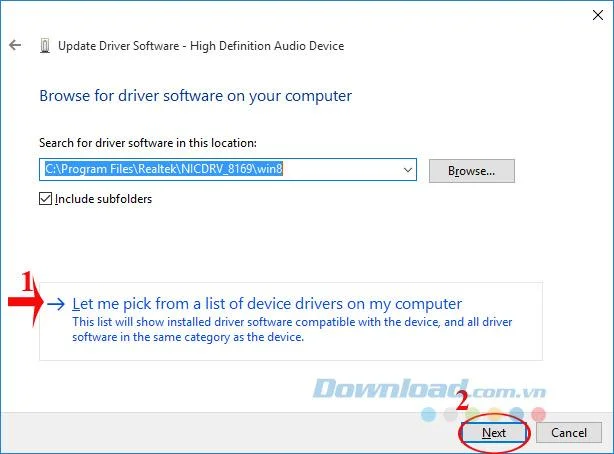
Continue, click Let me pick from a list of device drivers on my computer , then click Next .
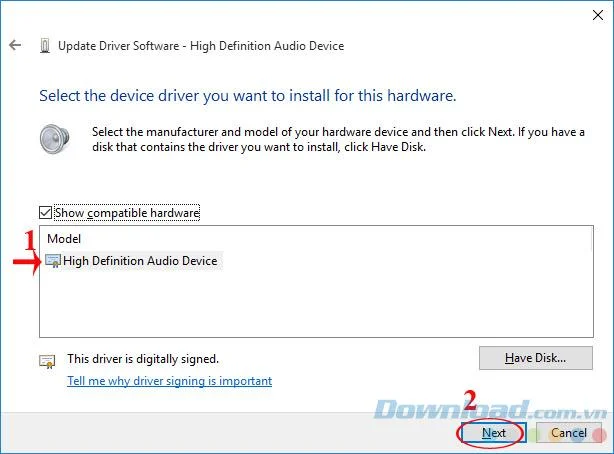
Finally, select High Definition Audio Device, then click Next to proceed to update the new Driver.
Each new Windows update often comes with patches as well as improved performance, so you should update the operating system for your computer to fix the current sound loss error. Click the Start Menu , select Settings .
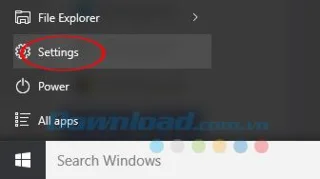
The Settings interface appears, click Update & Security.
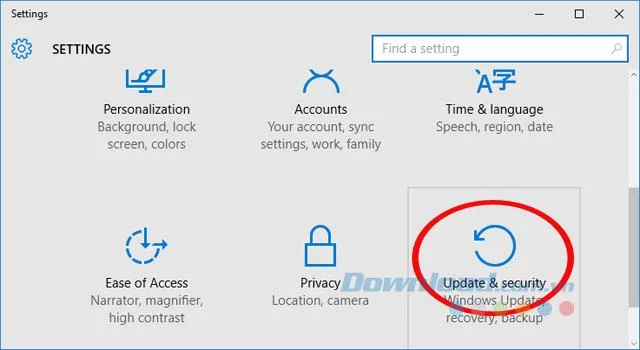
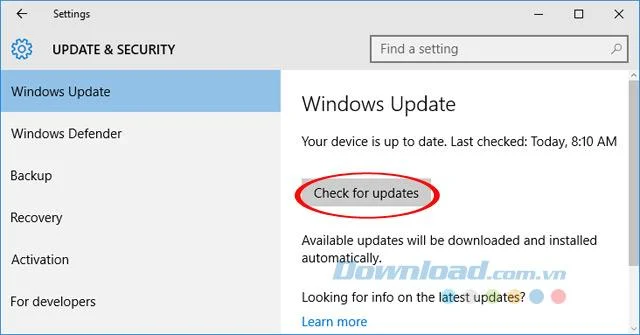
Next, click on the Windows Update tab , in the right pane click on Check for updates to check if there is a new version, if any, it will automatically update to the new version.
If you're not sure what the problem is with your computer, you can use these 7 ways to quickly troubleshoot, comfortable listening to music, watching your favorite movies. And if you are using Windows 7, Windows 8 or 8.1 operating system and have audio problems , you can refer to the fix that we guide in the previous article.
I wish you successful implementation!
Run Nextcloud’s OCC repair safely, preview the database changes, and check why the warning might remain.
Allow larger Nextcloud browser uploads by aligning PHP, Nginx or Apache, temporary storage, and timeout settings—and verify which limit is blocking the file.
Set the PHP memory limit Nextcloud actually uses, restart the right service, and confirm the 512 MB setting in Admin Overview.
Mount a compatible object-storage bucket in Nextcloud using its S3 backend, with the right endpoint, credentials, access scope, and verification steps.
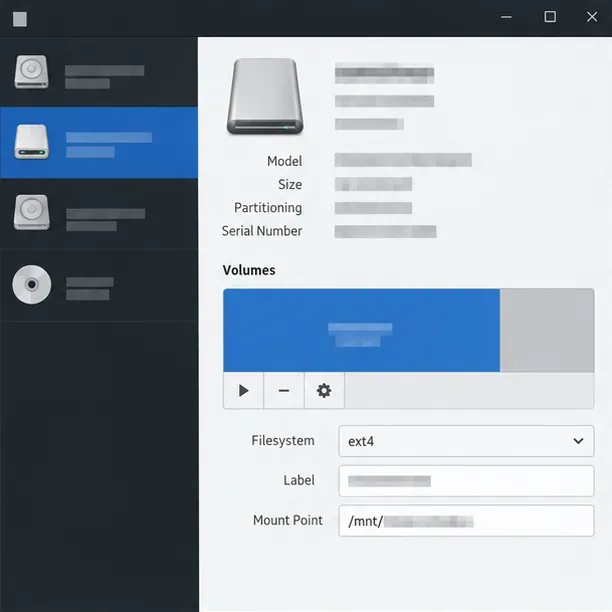
Safely move a Linux Nextcloud data directory to an external drive using a persistent UUID mount, maintenance mode, a verified copy, and the original-path symlink.
Restore Nextcloud access after an update by diagnosing SQL errors, checking database connectivity, and safely completing interrupted migrations.
Use Nextcloud’s OCC command to reset an administrator password from the server shell, with guidance for usernames, permissions, and external login providers.
Clear Nextcloud’s HSTS warning by setting the header at Apache, NGINX, or your TLS proxy, then verify the public HTTPS response safely.
Trace App Store installation failures to DNS, HTTPS, proxy, TLS, or configuration issues from the Nextcloud server itself.
Move thumbnail work to a controlled background schedule, trim unused preview sizes, and verify the queue without overwhelming your Nextcloud server.