If you're building your own PC and have decided to invest in some fast RAM , how do you make sure it performs at its advertised speed? You may not know this, but in reality, RAM will always run at a slower speed than it was designed for, unless you manually adjust its speed or enable Intel XMP to optimize its speed.
Before enabling XMP, it's important to understand how your CPU connects to RAM and why XMP is necessary in the first place.
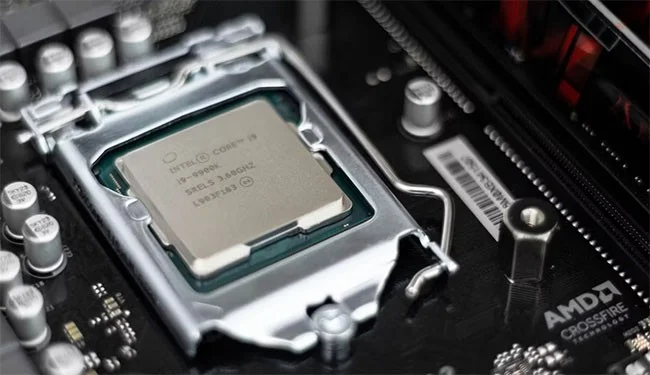
You see, the CPU in your system is connected to the RAM through the motherboard using sockets. It is through these sockets that data reaches the CPU. Therefore, the motherboard, CPU, and RAM must work together to get data from the RAM to the CPU.
To keep everything running properly, your computer's motherboard uses a small chip that stores the BIOS (Basic Input/Output System) . This chip is activated when you turn on your computer. After power is applied, the BIOS performs a power-on self-test (POST). During this test, the motherboard checks the status and initializes the various input/output devices connected to the CPU. During this test, the motherboard decides what frequency the RAM should run at.
CPU on motherboard
To do this, the motherboard communicates with the Serial Presence Detect (SPD), a chip that stores information such as the RAM's frequency, voltage, and timings. The data stored on this SPD is standardized for different RAM technologies such as DDR2, DDR3, and DDR4 by the Joint-Electron-Device-Engineering-Council (JEDEC).
Because of this standardization, DDR4 RAM can run at frequencies ranging from 800 to 1600 MHz with data rates up to 3200 megatransfers per second (MT/s). However, a high-performance RAM stick can reach 5333 MT/s.
This begs the question, how does RAM surpass the JEDEC specification and run at faster frequencies? This is where XMP comes into play.
What is XMP enabled for?
RAM runs at standard speeds set by JEDEC, but you can overclock your RAM manually. XMP uses some RAM to save a speed and timing profile that the RAM can safely run at. Enabling XMP configures the memory to run at the speed and timings it is rated for.
Some motherboards do not allow XMP and will not have an option to enable it or will be grayed out when you try to use the feature. In that case, there is nothing you can do, other than upgrading your motherboard to use XMP.
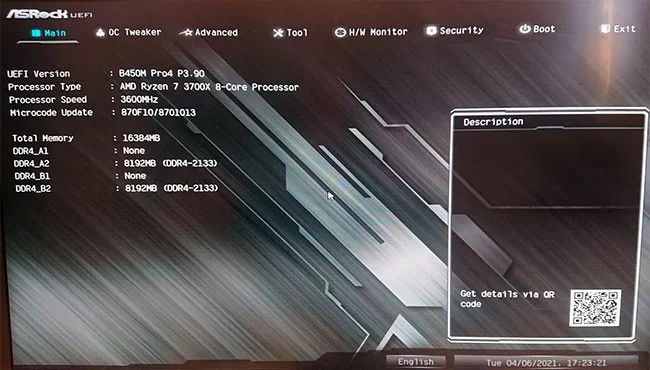
1. Restart your PC or turn it on and access the UEFI/BIOS using the specific key on your motherboard. Typical access keys include Delete, F1, F2, F10, and F12 (yours may be different). Check your motherboard manual or the manufacturer's website for details.
Access UEFI/BIOS
2. Look for the XMP profile toggle. If you see it on your UEFI/BIOS home screen, toggle it to On , then skip to step 6. If not, skip to step 3.
3. If necessary, enable Advanced Mode in your UEFI/BIOS. This is usually done by pressing the F7 key , but again, this button will depend on your motherboard. Typically, that information is located in the bottom right corner.
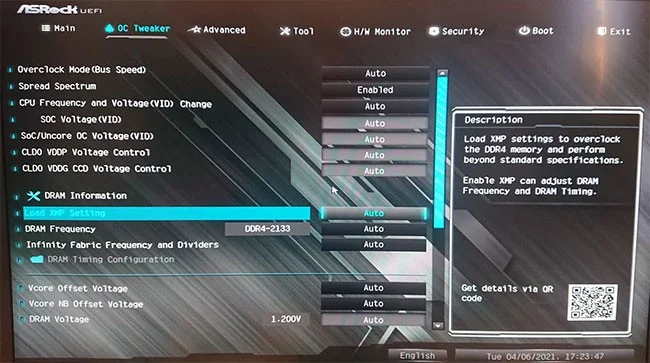
4. Navigate to the overclocking section in the BIOS. This section may be called AI Tuner, AITweaker, Performance, Extreme Tweaker, Overclock Settings , or something similar.
5. Scroll through the list of options until you find the XMP profile toggle. Turn it to On by pressing the Enter key on it or clicking on it and selecting On from the drop-down menu. Some motherboards, like the one below, require you to Load XMP Profile .
Enable XMP profile
6. Save your BIOS settings and exit. You can do this by selecting the Exit button on your keyboard or mouse and choosing to save your settings. Alternatively, use the traditional F10 key . When prompted, confirm your choice.
You can double-check that your XMP profile is enabled by going back into the UEFI/BIOS and making sure the toggle is set to On . Also, check the memory speed in the UEFI/BIOS - it may be on the main screen or overclocking menu - or in the post-boot screen.
You can also use Windows software like CPUZ to confirm your memory speed. If it matches the rated speed given on the memory packaging and label, then your XMP profile is enabled.
If not, rerun the steps to make sure you enabled it correctly. If you are sure you have followed the steps correctly and still are not seeing the expected speeds, you should confirm that your motherboard or processor allows memory overclocking.