How to enable / disable Adobe Flash Player on Chrome computers
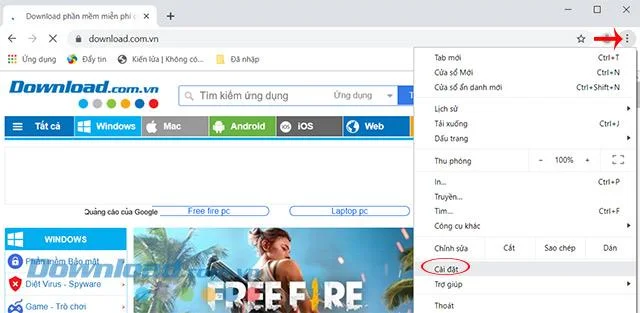
Step 1: At the main interface of Chrome browser , click the 3 vertical dots icon in the top right corner, select Settings.
Settings section on Google Chrome
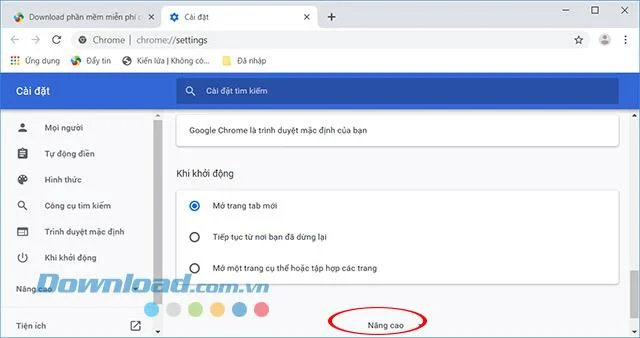
Step 2: The Settings interface appears, scroll down to the bottom and click Advanced.
Select the Advanced section in Chrome Settings
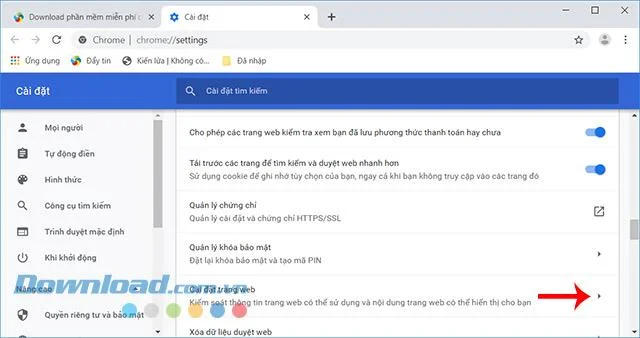
Step 3: In the Privacy and security section , click Site settings.
Select the Website settings section
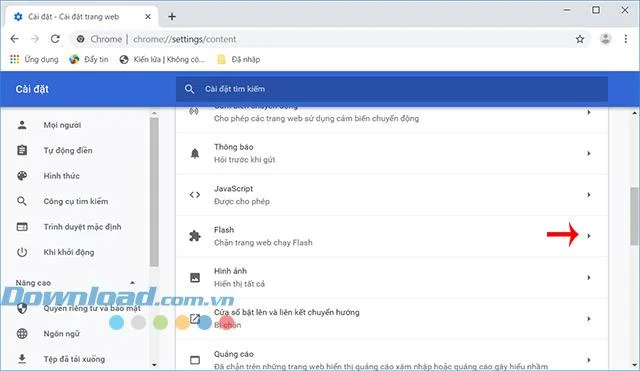
Step 4: Scroll down to the Permissions section , click Flash.
Click on the Flash section
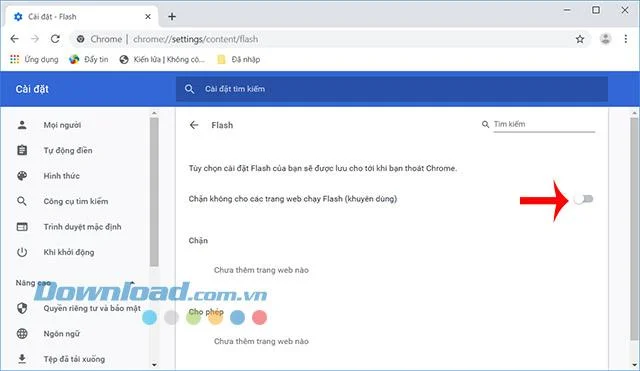
Step 5: The Flash interface appears, you will see that by default Google Chrome is blocking websites from running Flash. Google recommends that users should use this mode to surf the web safely. Or you can go directly to the chrome: // settings / content / flash link.
If you want to use Flash, just drag the slider in the Block to prevent sites from running Flash (recommended) to the right to activate.
Google Chrome blocks websites from running Flash
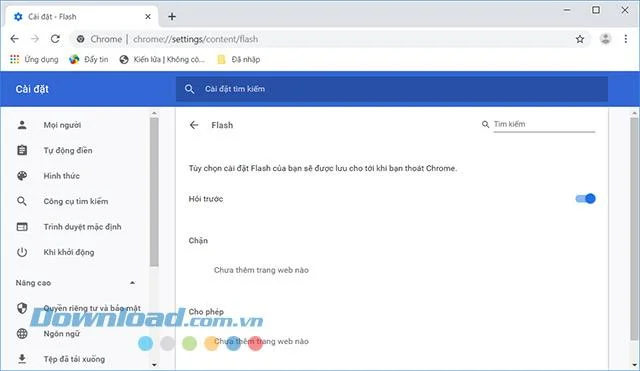
Then, each block will ask Flash before the user. Conversely want to block Flash, just drag this slider to the left as the original is done.
Ask before blocking Flash on Chrome
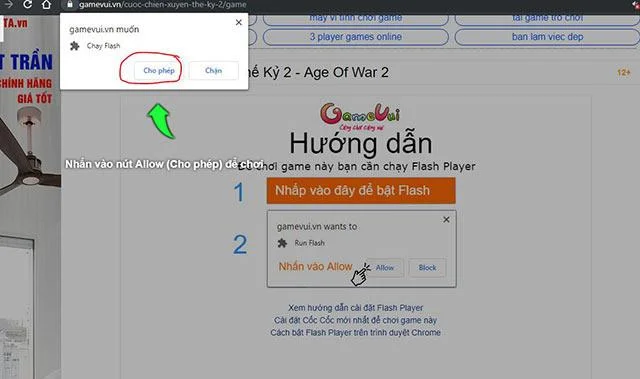
Step 6: After turning on, reload the website, then click Allow to allow Flash to run.
Allows Flash to run
Video tutorial on, turn off Adobe Flash Player on Chrome
How to enable / disable Adobe Flash Player on Chrome Mac
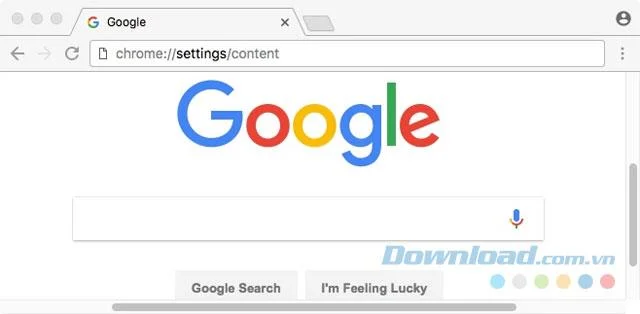
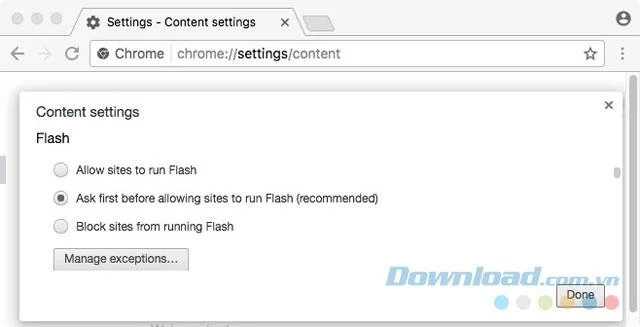
Step 1: In the address bar, type chrome: // settings / content.
Step 2: On the Content Settings screen , find the Flash Player section . Check current status.
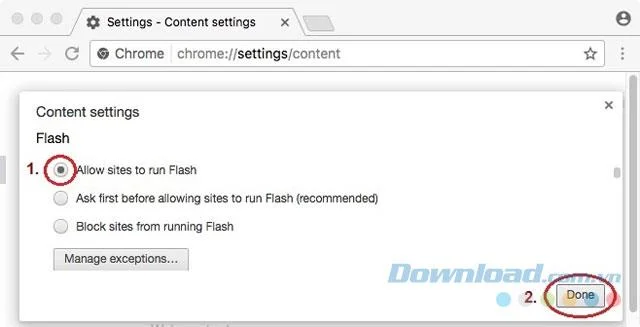
Step 3: Select Allow sites to run Flash , then click Done . Also want to turn off the flash then tick Block sites from running flash to block flash on all websites. To block flashes on some sites, in the Flash exceptions section , enter the domain name to be blocked.
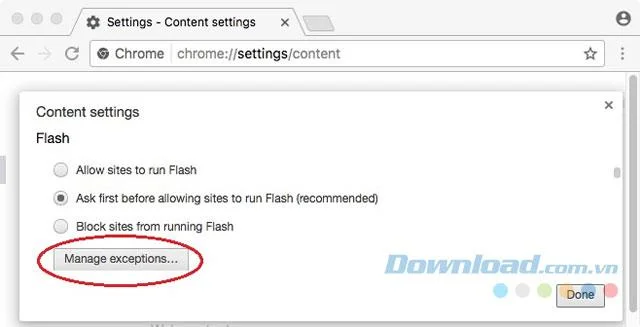
Step 4: To manage Flash Player settings for each page, click Manage exceptions.
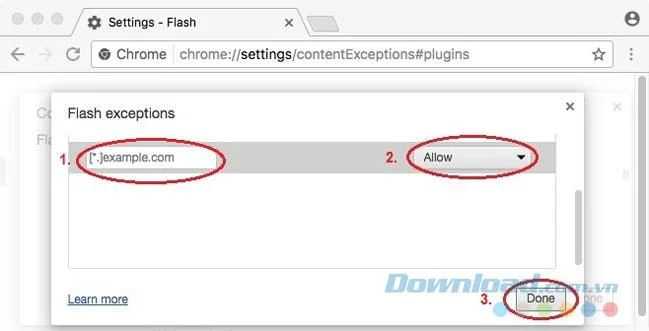
Step 5: On the Flash exceptions screen , enter the website domain name and select Allow . After finishing adding the website, click Done .
Step 6: Close the Content settings screen .
And if you are using another web browser, you can refer to the following tutorial: