How to enable and disable the Adobe Flash Player plugin on Chrome

From Google Chrome 76 version, Adobe Flash Player is officially blocked by default, if you want to use it must be activated in the settings.

Google Chrome 76          Adobe Flash Player

However, many people do not know how to turn on Adobe Flash Player on Chrome like? So invite you to follow the article below to know how.

How to enable / disable Adobe Flash Player on Chrome computers

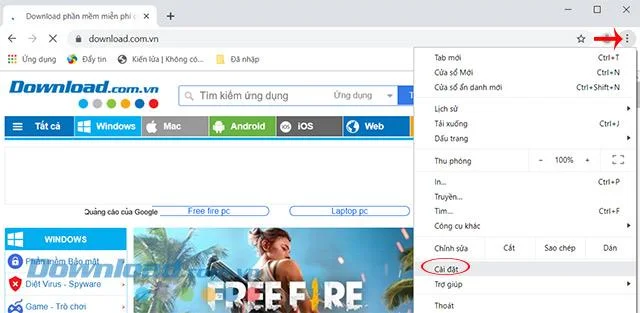
Step 1: At the main interface of Chrome browser , click the 3 vertical dots icon in the top right corner, select Settings.

How to enable and disable the Adobe Flash Player plugin on Chrome
Settings section on Google Chrome

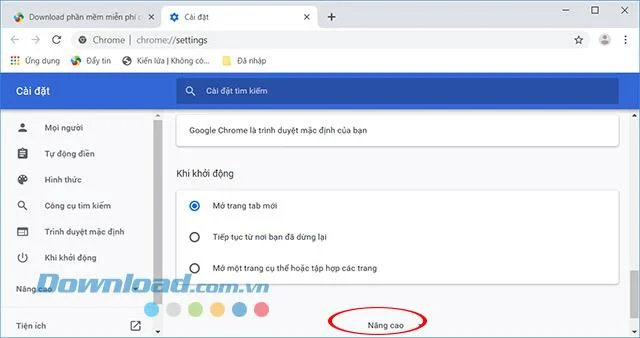
Step 2: The Settings interface appears, scroll down to the bottom and click Advanced.

How to enable and disable the Adobe Flash Player plugin on Chrome
Select the Advanced section in Chrome Settings

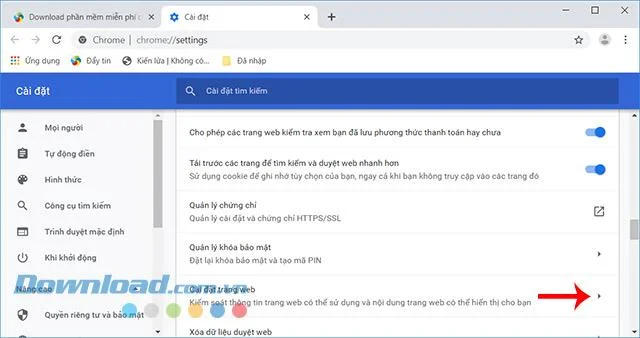
Step 3: In the Privacy and security section , click Site settings.

How to enable and disable the Adobe Flash Player plugin on Chrome
Select the Website settings section

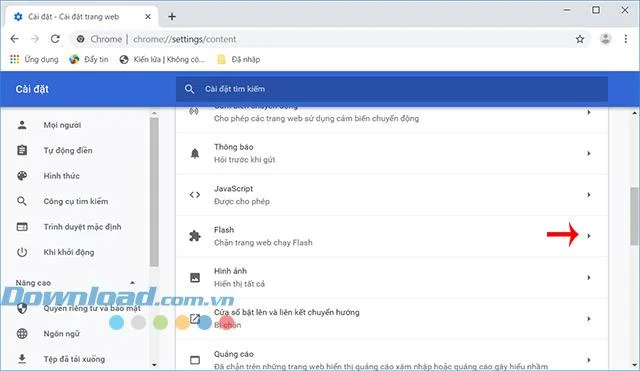
Step 4: Scroll down to the Permissions section , click Flash.

How to enable and disable the Adobe Flash Player plugin on Chrome
Click on the Flash section

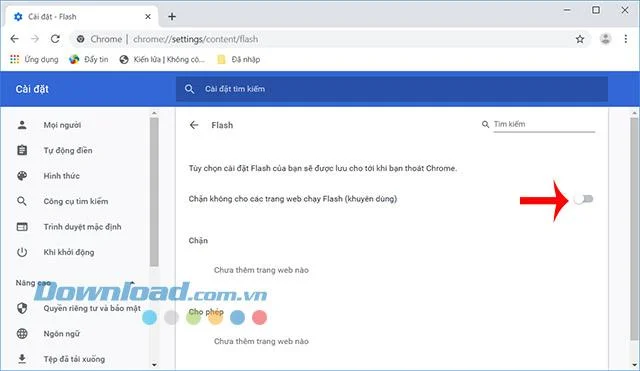
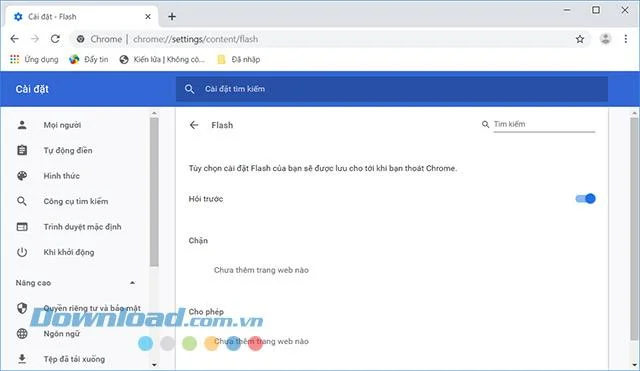
Step 5: The Flash interface appears, you will see that by default Google Chrome is blocking websites from running Flash. Google recommends that users should use this mode to surf the web safely. Or you can go directly to the chrome: // settings / content / flash link.

If you want to use Flash, just drag the slider in the Block to prevent sites from running Flash (recommended) to the right to activate.

How to enable and disable the Adobe Flash Player plugin on Chrome
Google Chrome blocks websites from running Flash

Then, each block will ask Flash before the user. Conversely want to block Flash, just drag this slider to the left as the original is done.

How to enable and disable the Adobe Flash Player plugin on Chrome
Ask before blocking Flash on Chrome

Step 6: After turning on, reload the website, then click Allow to allow Flash to run.

How to enable and disable the Adobe Flash Player plugin on Chrome
Allows Flash to run

Video tutorial on, turn off Adobe Flash Player on Chrome

How to enable / disable Adobe Flash Player on Chrome Mac

Step 1: In the address bar, type chrome: // settings / content.

How to enable and disable the Adobe Flash Player plugin on Chrome

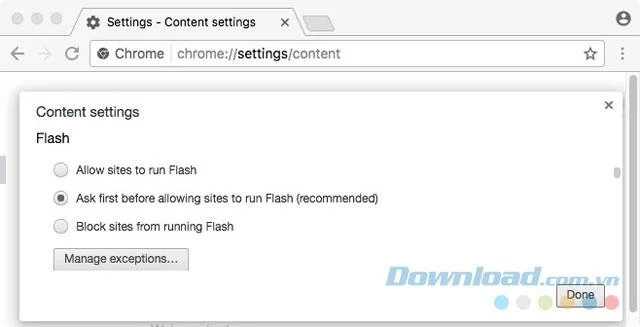
Step 2: On the Content Settings screen , find the Flash Player section . Check current status.

How to enable and disable the Adobe Flash Player plugin on Chrome

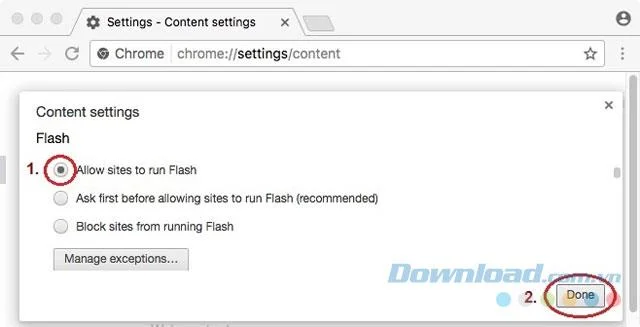
Step 3: Select Allow sites to run Flash , then click Done . Also want to turn off the flash then tick Block sites from running flash to block flash on all websites. To block flashes on some sites, in the Flash exceptions section , enter the domain name to be blocked.

How to enable and disable the Adobe Flash Player plugin on Chrome

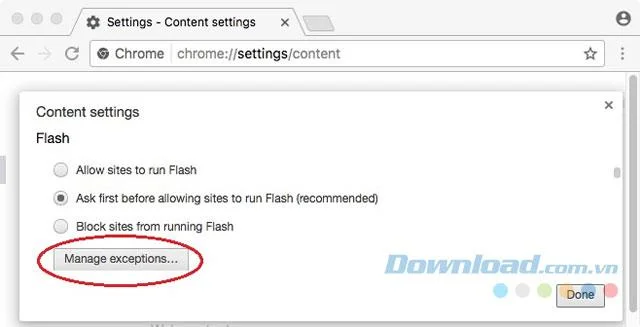
Step 4: To manage Flash Player settings for each page, click Manage exceptions.

How to enable and disable the Adobe Flash Player plugin on Chrome

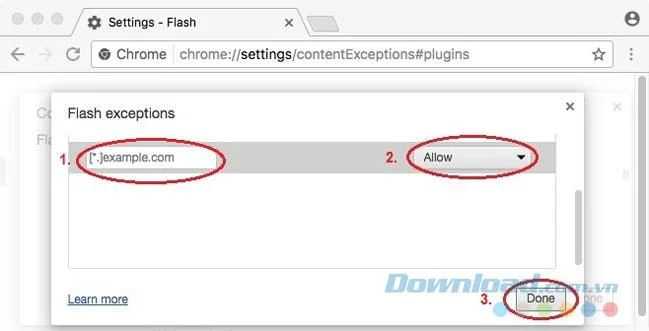
Step 5: On the Flash exceptions screen , enter the website domain name and select Allow . After finishing adding the website, click Done .

How to enable and disable the Adobe Flash Player plugin on Chrome

Step 6: Close the Content settings screen .

And if you are using another web browser, you can refer to the following tutorial:
Leave a Comment

Enable FIPS Mode on SLES 15 and Verify the Boot State

Enable FIPS Mode on SLES 15 and Verify the Boot State

Follow SUSE’s SP7 procedure to enable FIPS mode, reboot safely, verify the active policy, and check whether your compliance requirement calls for validated modules.

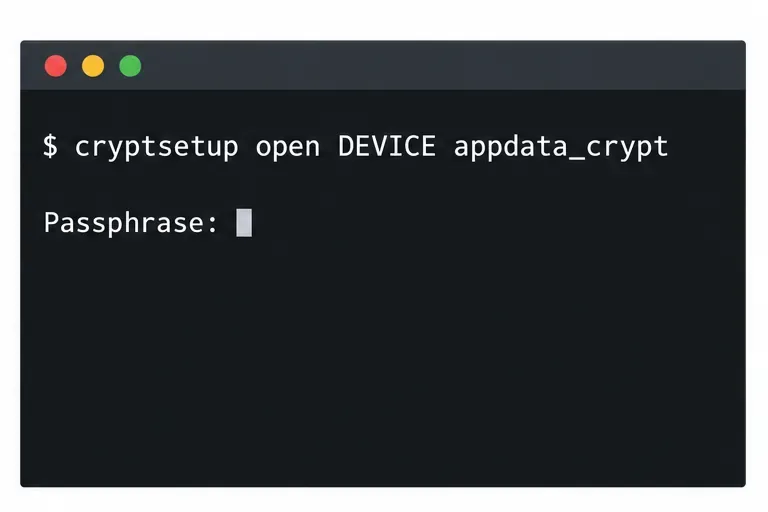
Set Up a LUKS-Encrypted Data Volume on SLES

Set Up a LUKS-Encrypted Data Volume on SLES

Compare YaST and cryptsetup for a new encrypted SLES data volume, choose LUKS1 or LUKS2, and verify unlock and mount behavior safely.

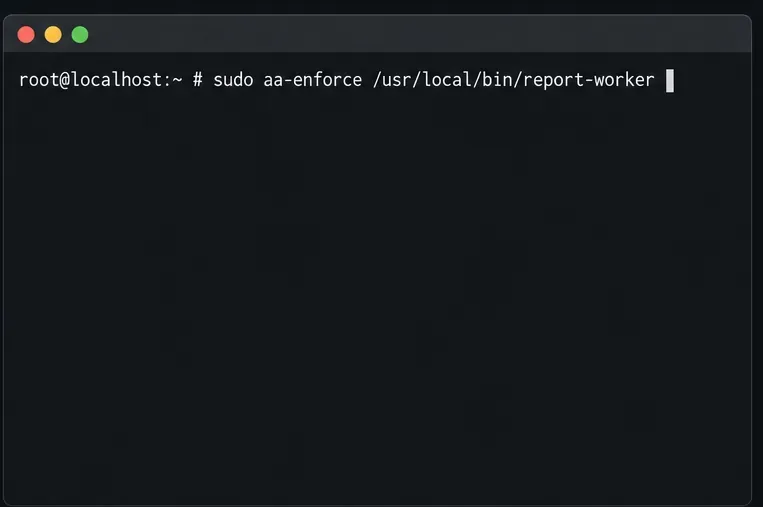
Build a Custom AppArmor Profile on SUSE Linux

Build a Custom AppArmor Profile on SUSE Linux

Create, refine, and verify a least-privilege AppArmor profile on SLES 15 SP7, with a clear note on SLES 16’s SELinux default.

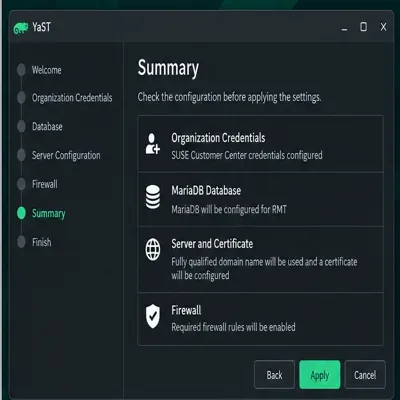
Build a Local SUSE Update Server with RMT on SLES 15

Build a Local SUSE Update Server with RMT on SLES 15

Set up RMT on SLES 15, mirror entitled repositories, and verify HTTPS registration and package access from a test client.

Join SLES 15 to Active Directory with SSSD in YaST

Join SLES 15 to Active Directory with SSSD in YaST

Connect SLES 15 to AD with YaST’s SSSD-based logon management, then verify directory lookup, domain login, and Kerberos tickets.

Enable SLES Live Patching and Verify a Kernel Fix

Enable SLES Live Patching and Verify a Kernel Fix

Set up the right Live Patching path for SLES 16.0 or 15 SP7, apply eligible kernel fixes, and confirm what is active without confusing it with a reboot-required kernel update.

Install and Sign Custom Kernel Modules on SLES 15 Secure Boot

Install and Sign Custom Kernel Modules on SLES 15 Secure Boot

Load a custom SLES 15 kernel module without disabling Secure Boot. Match the running kernel, sign the .ko file, enroll a MOK key, and verify loading.

Keep Services Available During a SLES 15 SP5 to SP6 Upgrade

Keep Services Available During a SLES 15 SP5 to SP6 Upgrade

SLES 15 SP5 can migrate online to SP6, but each node must reboot. Use a tested rolling upgrade or blue-green cutover to keep workloads reachable.

Apply the SLES 15 STIG Safely with OpenSCAP

Apply the SLES 15 STIG Safely with OpenSCAP

Use SUSE’s supported STIG profile to scan SLES 15, test remediation, review remaining findings, and retain assessment evidence.

Restore Cockpit Access to SUSE Linux Enterprise Server

Restore Cockpit Access to SUSE Linux Enterprise Server

Trace a failed Cockpit connection through DNS, port 9090, the systemd socket, firewalld, TLS, and login settings using current SUSE guidance.