Home
» PC Tips
»
How to Fix Windows Problems by Creating a New User Account
How to Fix Windows Problems by Creating a New User Account
If you are troubleshooting a problem on Windows and have tried everything else, your last resort may be to create a new user account to fix it. Such problems can include Windows applications no longer launching and functioning properly or corrupted user account files. A number of different problems are best resolved by creating a new user account.
Since this method is a bit tricky, you need to be sure that this is the only way to fix the problem. Once you have determined this, make sure to follow the steps in this article to make sure you can do it as simply as possible.
1. Always back up your data
This basic step is the most important. Humans make mistakes, and computers aren't perfect. If something goes wrong, your data shouldn't be at risk. Back up your files and create a system restore point . Both of these things will save you time and frustration.
2. Create a new user account
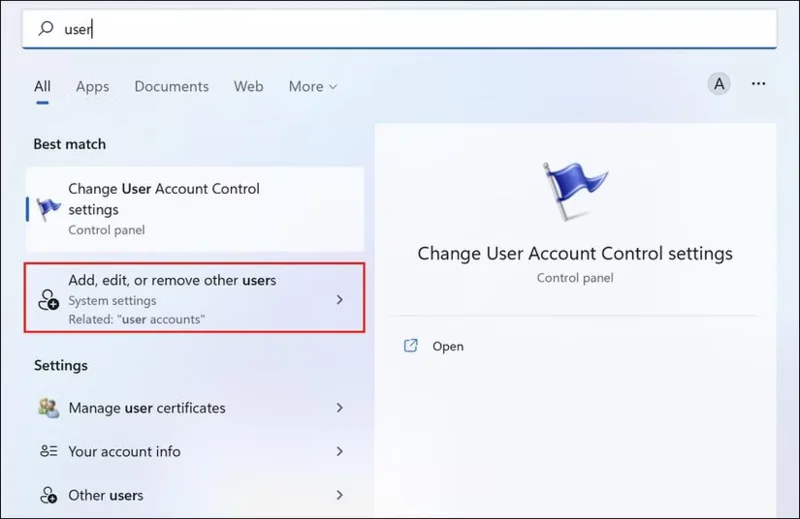
Add, edit, or delete other users on Windows
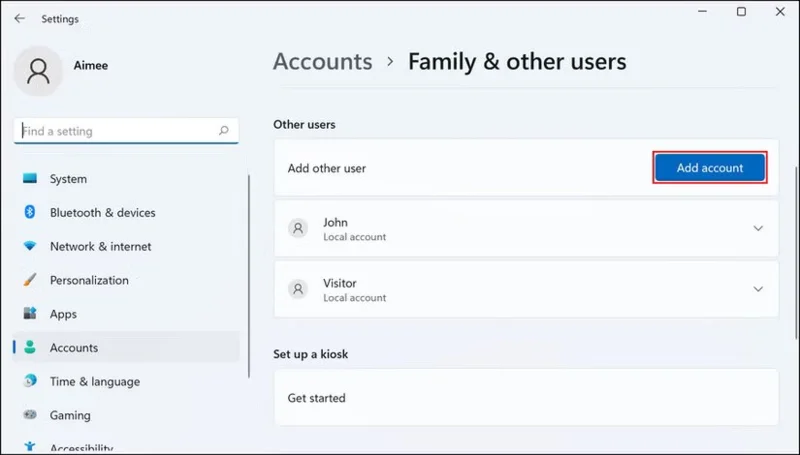
To create a new account, open search (or press the Windows key ) and type user . You should see Add, delete, and manage other user accounts . This will take you to Other Accounts (shown below). Now, click Add an account .
Add an account on Windows
The next steps here are important to follow – don't just skim through Microsoft's "recommended steps."
Instead of entering an email address, look to the bottom of the screen and click the gray Sign in without a Microsoft account button , called Local Account.
Add users without a Microsoft account
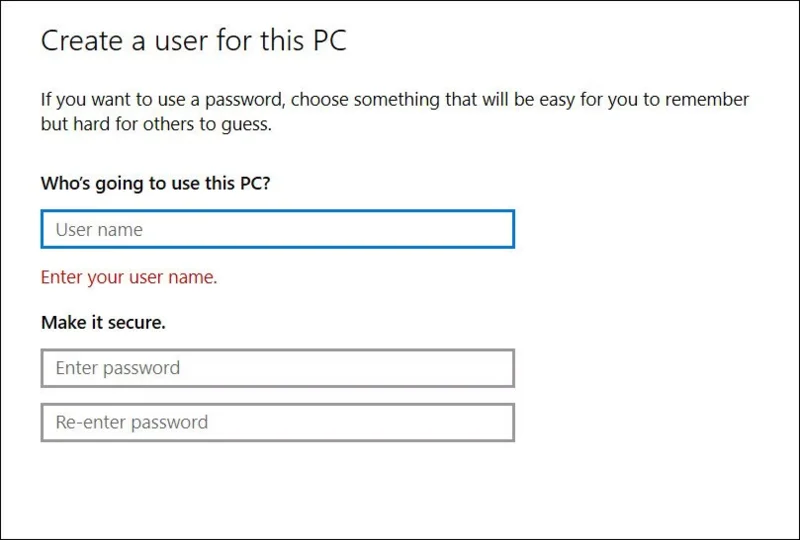
In the next window, fill in the required details (username and password) and click Next . This will successfully create a new user account that is ready to use.
Add details about user account
3. Transfer user account files from old to new
You’ve created a new account and the problem you were having is solved. Now you need to make it look like your old account. Desktop wallpaper and themes are easy parts that can be quickly adjusted, but what about program settings and all your other personal files? When doing this from two different computers, you can use the Windows Easy Transfer tool, but transferring these files on the same computer can be done by copying and pasting manually.
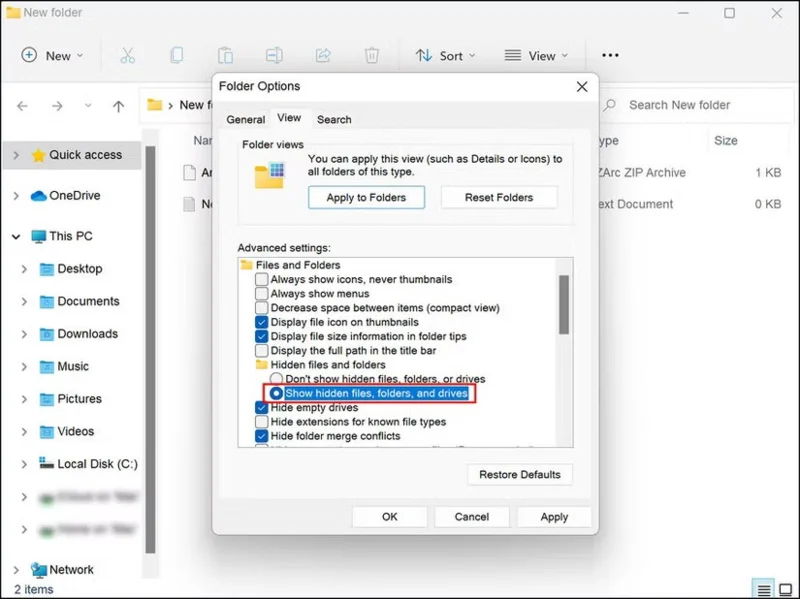
First, make sure your hidden files and folders are visible because program settings are located in the AppData folder , which is usually hidden from view.
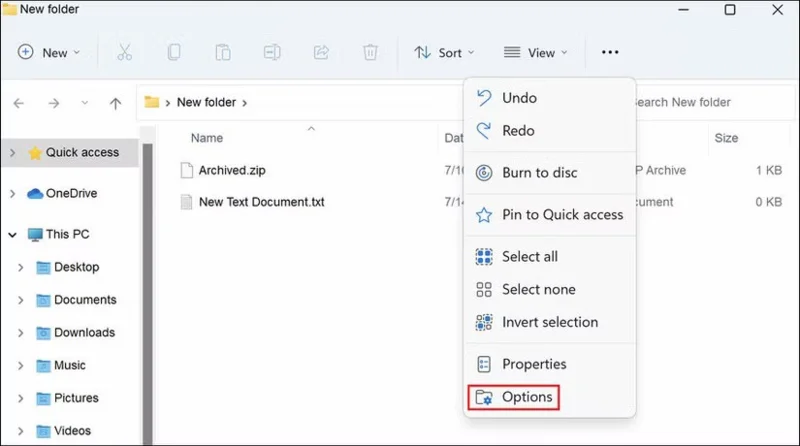
Once in the old User Account folder, click View and see if there is a Hidden Items checkbox (labeled with the number 1 in the top image). If for some reason you don't see that checkbox or it doesn't show all hidden folders, follow #2 in the top image by clicking Options and Change folder and search options .
Options in File Explorer
Click the View tab , find Hidden files and folders and select Show hidden files, folders, and drives .
Show hidden files and folders in File Explorer
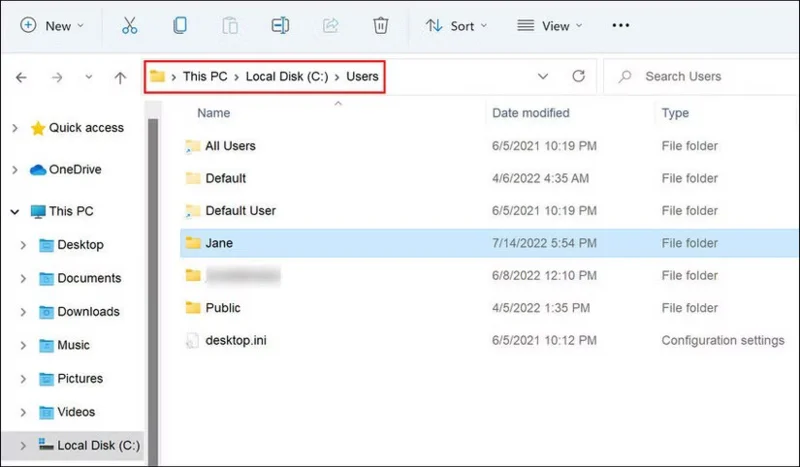
Keeping the old user account folder open, open a new Windows Explorer window and go to the new user account folder. You can easily find it by typing C:\Users.
Local Disk C in File Explorer
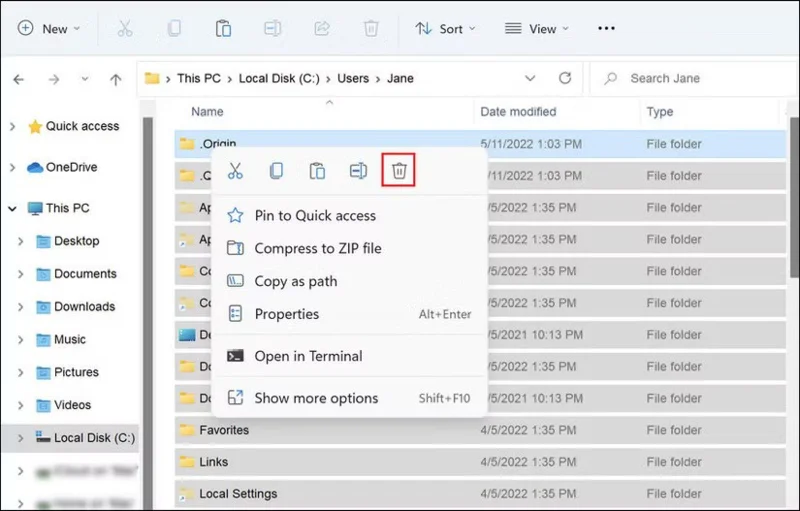
Select all ( Ctrl + A ) the contents of this folder and delete it (press the Delete key ).
Delete the contents of the folder
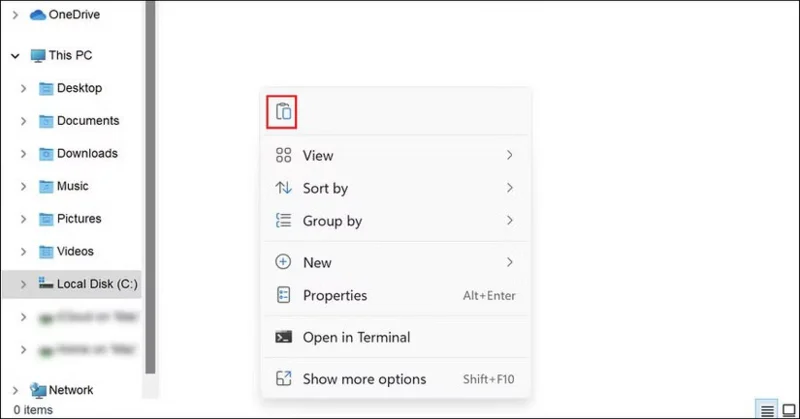
Go back to the old user account folder, copy all the files and folders ( Ctrl + A, Ctrl + C ), then paste them into the new user account folder ( Ctrl + V ).
Paste the contents into the folder
This will take a while - go do some other work and come back.
4. Change username
You probably want to use the same name for your new account as you did for your old account, but you can’t because your old account already has that name. Once you’re settled in your new account and have deleted your old name, you can change your account name quite easily. However, make sure you’re logged in with an admin account before following the steps below.
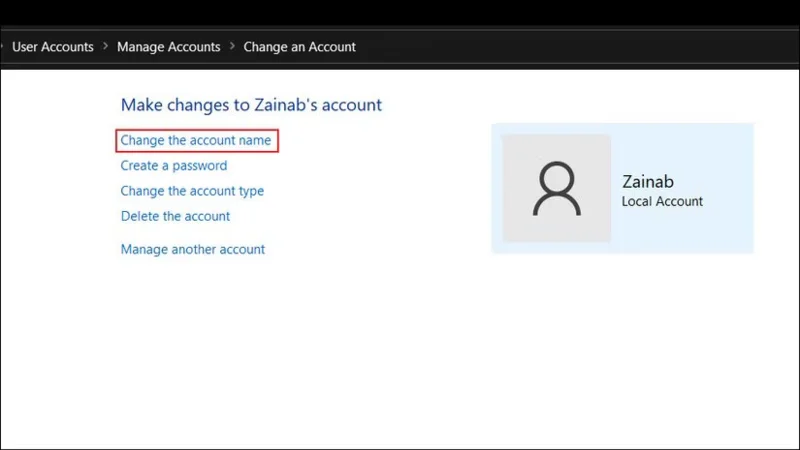
To change the username of a local account, first launch Control Panel and change the View type to Large icons . Select User accounts and then go to Manage another account . Select the target account and click Change the account name .
Option to change account name in Control Panel
Now you can enter the desired name and save the changes.
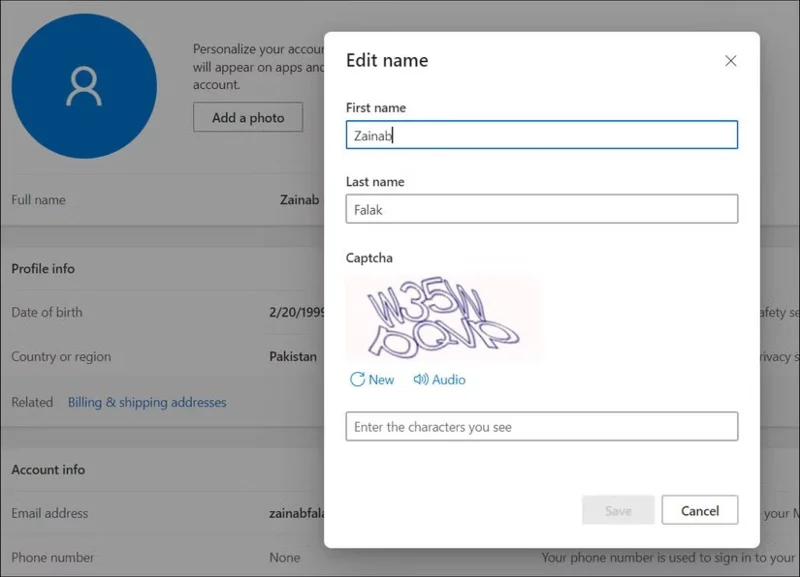
In case you want to change your Microsoft account username, go to the Microsoft website and log in to your account using your email ID and password. In the next window, click Edit name and enter your desired first and last name. Once the account name is changed, the changes will automatically be reflected in your computer account.
Enter your first and last name
Hopefully, the new account solved the problem, saving you from having to reset or do any more complicated troubleshooting. If the problem persists, you can try restoring your system to an earlier point in time and see if that helps. You can also contact Microsoft’s official support team and report the issue to them. Hopefully, they will be able to identify the problem for you and suggest a suitable solution.