HOW TO OPEN MULTIPLE BLUESTACKS MULTIPLE ACCOUNTS

For those looking for an app that can help you run the android system on your PC, then try using Bluestacks. This is an app that allows people to run any kinds of android apps such as games, texting on their computers. Many of you must be asking how the system works and is Bluestacks safe to use. Well, just like other emulators, Bluestacks is safe to use if you download the app from the official website. As for how it works, all you need to do is download the app on your computer. Bluestacks have been developing its features and their newest future is Bluestacks multiple accounts. 

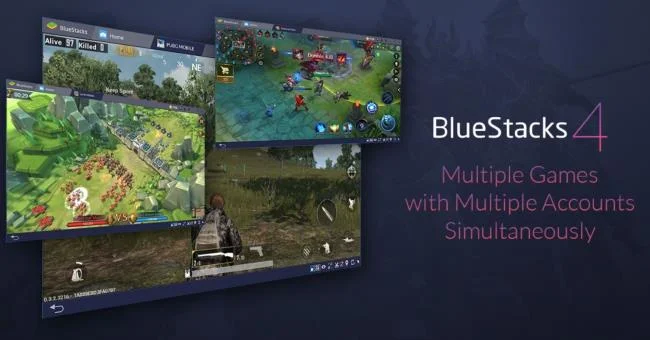
The steps in using Bluestacks is easy and simple to follow. After downloading and installing the app, users will just need to log in to their Google account. Once this is finished, they can start using apps on their computer. However, a frequently asked question is can people use one account for more than activity. Or is it possible to have Bluestacks multiple accounts? Well, with the newest version of Bluestacks, this is now possible. With Bluestacks 4, people can create multiple accounts that can make you play more than one game at a time. So, how can your Bluestack have multiple accounts?

Open Multiple Bluestacks Multiple Accounts

1. Check Your Computer

Before installing the newest version of Bluestacks, check the details of your computer first. The latest Bluestack 4 can only be applied in Windows 7 and above or on the iOS system. Your PC must also have a minimum of 5GB free space for the app only. So, the more space you have the better it is to run the app. And last but also important, you must be an administrator on your PC.

2. Update Your Bluestack App

If your computer meets all the requirements above, then update your app with the newest one. With this new app, people can make multiple accounts and the app itself runs faster. So, if you are still using an older version don’t forget to update it.

3. Go to Setting

When your computer has been installed with Bluestacks, go to the setting menu on the app. Go to Bluestacks Multi-Instance Manager. In this menu, you should be seeing only one row with the word Bluestacks with status running. Whereas on the bottom right of the screen, you will see a new instance button. Click the button and add as many instances as you want. Then click the button Farm on the left bottom of the screen, so you can use it later.

4. Start the Instances

After you have done step number 4, all you need to do is click the start button on the side of each row. You can choose to start the instance now or later, as you like. On each row, you will also see four signs which are setting, short cut, paste, and delete. You can make a shortage of your instance by clicking the shortcut sign in each row.

5. Create a New Account

This the last step in making Bluestacks multiple accounts on your PC. Once you have clicked the starting button, you can log in using a new account in the new instances. The steps in running the new instance are just like the ones before, log in and then choose the app you like.

So, after updating your apps, you can make Bluestacks multiple accounts on your PC. This way you can control more than one account and play more than one game on your PC. Once you finish one of the accounts, you can just log out and close the instance.

Sign up and earn $1000 a day ⋙

Leave a Comment

Turn off these 7 Windows services to extend battery life!

Turn off these 7 Windows services to extend battery life!

Turning off a few of these services can save you a significant amount of battery life without affecting your daily usage.

9 Old Windows Tools That Are Still Useful Today

9 Old Windows Tools That Are Still Useful Today

From performance monitoring to quick system tweaking, these built-in utilities are as useful as ever.

How to fix error code 0x80004005

How to fix error code 0x80004005

Error code 0x80004005 is a type of unknown Windows error, whose cause is related to a number of different issues.

How to Show the Missing Bluetooth Icon on the Windows Taskbar

How to Show the Missing Bluetooth Icon on the Windows Taskbar

If you can't find the Bluetooth icon on the taskbar, follow the steps below to show the missing Bluetooth icon on Taskbar in Windows 10.

How to Clear NVIDIA Shader Cache on Windows

How to Clear NVIDIA Shader Cache on Windows

Clearing the NVIDIA Shader Cache will reset the system, forcing it to rebuild with new data. Here are instructions for clearing the NVIDIA Shader Cache.

Summary of some simple ways to disable USB ports on Windows computers

Summary of some simple ways to disable USB ports on Windows computers

Unlocking USB ports in BIOS is not difficult. However, how to lock computer USB ports? Let's find out with Quantrimang.com!

Extremely simple tips to change IP without VPN

Extremely simple tips to change IP without VPN

Being blocked online can be frustrating, whether it's a forum lockout, a game ban, or a temporary IP restriction. The good news is that you don't always need a VPN to get around these restrictions.

How to Take Advantage of the Performance Tab in Task Manager

How to Take Advantage of the Performance Tab in Task Manager

When your computer crashes, seeing how everything is running can help you troubleshoot. And when everything is working, this information can also help you optimize your system.

5 tips to help your Windows 11 laptop battery last all day

5 tips to help your Windows 11 laptop battery last all day

Windows laptops aren't known for their battery life, at least not without some tweaking. But these tips will help your laptop last all day without having to find a power outlet.

Enable or disable the built-in Administrator account on Windows

Enable or disable the built-in Administrator account on Windows

Windows 10/11 includes a hidden Administrator account that you can use to manage all the important data on your computer. Let's see how to enable or disable the built-in Administrator account on Windows 10/11!

Instructions to fix System Service Exception error on Windows

Instructions to fix System Service Exception error on Windows

System Service Exception or SYSTEM_SERVICE_EXCEPTION is one of the BSOD errors (blue screen of death errors). System Service Exceptions errors occur quite commonly and continuously.

Recover Deleted Data with Recuva Portable in Windows 7

Recover Deleted Data with Recuva Portable in Windows 7

In the following article, we will present the basic operations to recover deleted data in Windows 7 with the support tool Recuva Portable. With Recuva Portable, you can store it in any convenient USB, and use it whenever needed. The tool is compact, simple, easy to use with some of the following features:

How to delete duplicate files to save computer memory using CCleaner

How to delete duplicate files to save computer memory using CCleaner

CCleaner scans for duplicate files in just a few minutes, then lets you decide which ones are safe to delete.

10 Windows Settings You Should Never Leave as Default

10 Windows Settings You Should Never Leave as Default

Windows doesn't come with security set up by default, which means there are some default settings you need to change.

How to Download, Update, and Troubleshoot USB Drivers on Windows 10

How to Download, Update, and Troubleshoot USB Drivers on Windows 10

USB devices have become indispensable in everyday life, allowing us to connect a wide variety of essential hardware to our PCs.