Home
» How to
»
How to use Bandicam to record a computer screen
How to use Bandicam to record a computer screen
Video How to use Bandicam to record a computer screen
Bandicam is one of the most popular computer screen recording software today. With so many outstanding advantages, this tool is always the number one choice of users when they want to record activities on their computer screens. The following article will guide you in detail how to use and related settings on Bandicam software.
Recording a computer screen (or Record screen ) is the way that many computer users (especially those who work related to games, stream games or instruction on computer games) choose to use day. On the market there are many software that support this feature, but Bandicam has always been the first name mentioned due to its outstanding advantages.
Record computer screen activity with Bandicam
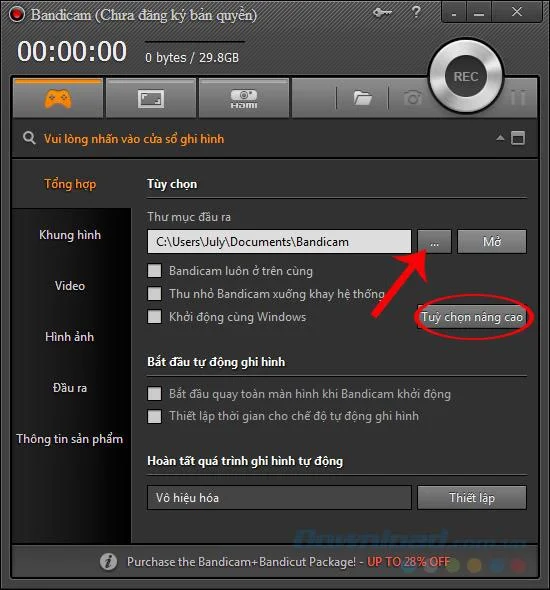
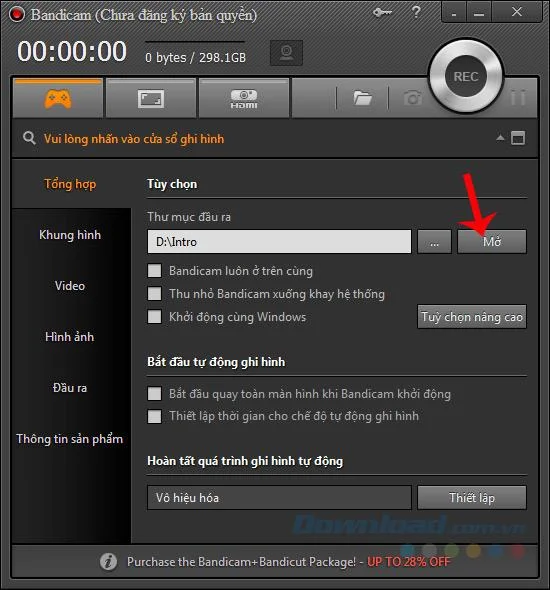
After installing the Bandicam software on the computer successfully, you will see the first interface appear as below. From here, we begin to make the first settings to prepare for the computer screen recording.
At the General tab , the three-dot icon in the Output Folder will allow the user to change the location to save the file after the recording is completed.
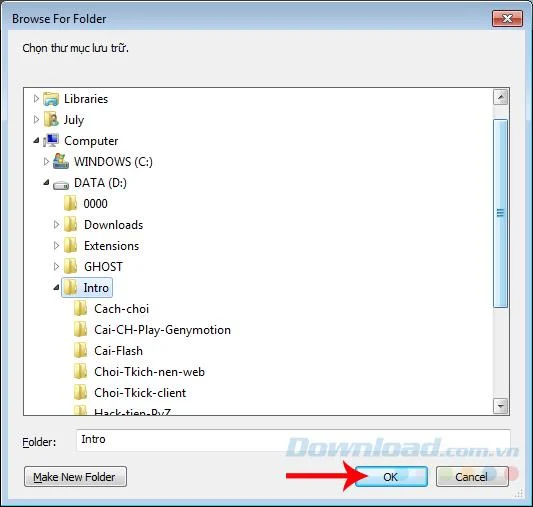
A Windows window appears, find the path to a new location to save the file after the recording is completed and OK to confirm.
Change the location to save the file after the recording is completed
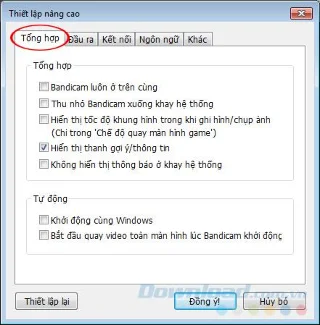
If you select Advanced settings , we can change some other general settings for Bandicam such as device connection, language, the display of this software on the computer.
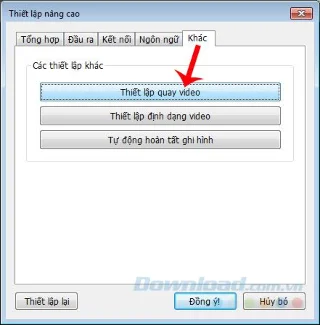
In particular, the Other tab will put us into detailed settings for each item: Video recording settings, video format settings, Auto-complete recording.
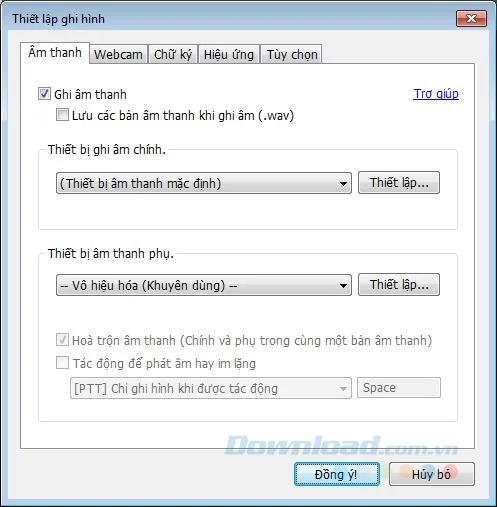
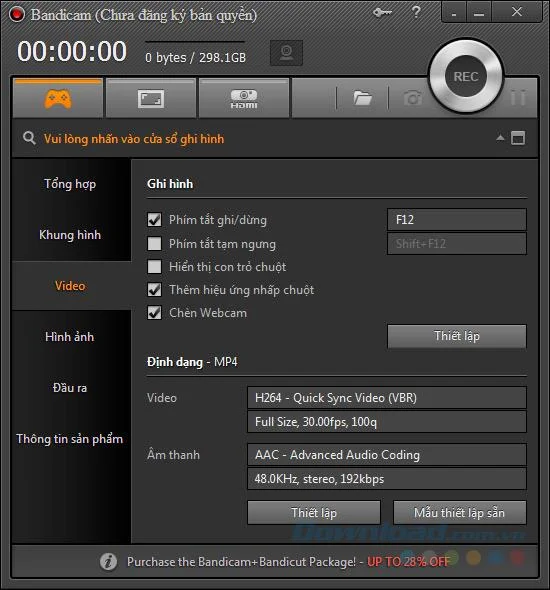
In the Record settings , we are selected and set the display on the computer screen when recording using Bandicam, such as: Audio, Webcam, Signature, Effects, Options . Specifically:
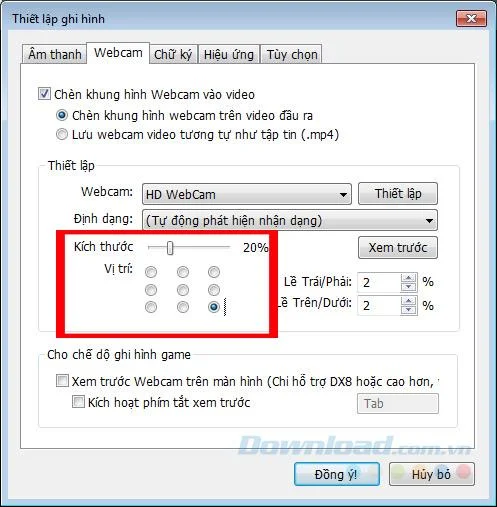
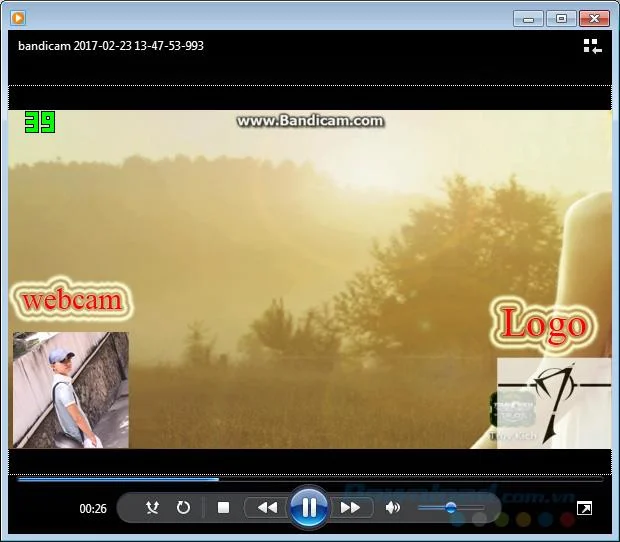
Webcam : allows users to use webcam to record their images and insert them into the computer screen recording frame. This is a feature that streamers still use or if you want to increase interactivity with other computer users, for your videos, you can tick the Insert Webcam frame into the video .
Select the size of the webcam image on the main screen at Size, select Display Location ...
Select and set the display image of the webcam on the recording window
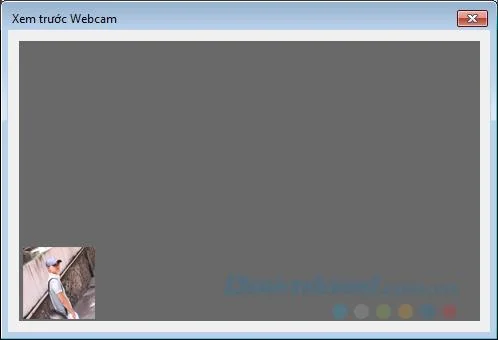
You can click on Preview to see the pattern image.
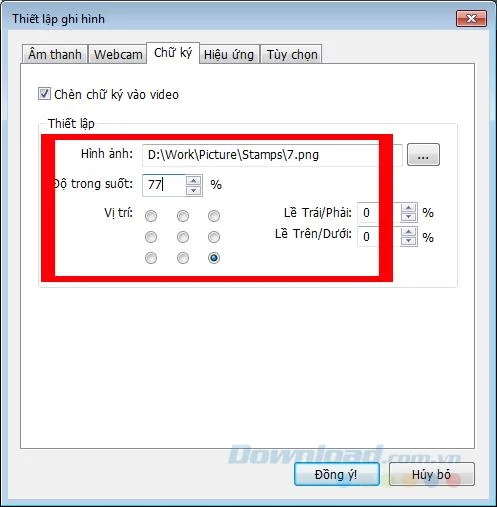
Signatures or logos (water mark) are also one of the effective ways to mark copyright, prevent copying and prevent others from "stealing" their share on other social networking sites.
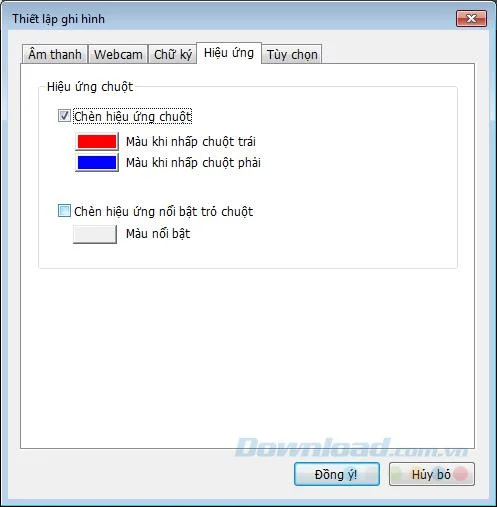
The effect is the highlight feature of the mouse cursor or left and right mouse clicks during use. This method is especially useful and necessary when you make a video of software or a user guide to a mouse. Tick the Insert mouse effect to distinguish each left-right click or Insert the highlight effect of the mouse cursor to create attention on the mouse icon itself on the screen.
Tick to highlight the mouse cursor or each mouse click
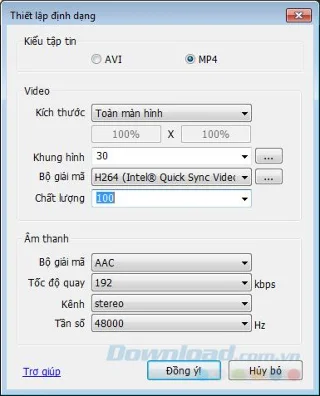
With Format Setting , Bandicam offers users two video formats after recording is completed AVI and MP4 . Then we can use the following options to change it to suit our own needs.
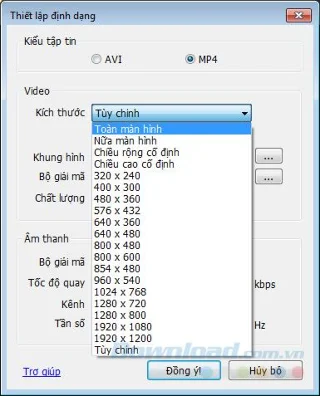
The size of the video recording window, frame, quality ...
Select the video mode when you finish recording and the size of the recording window
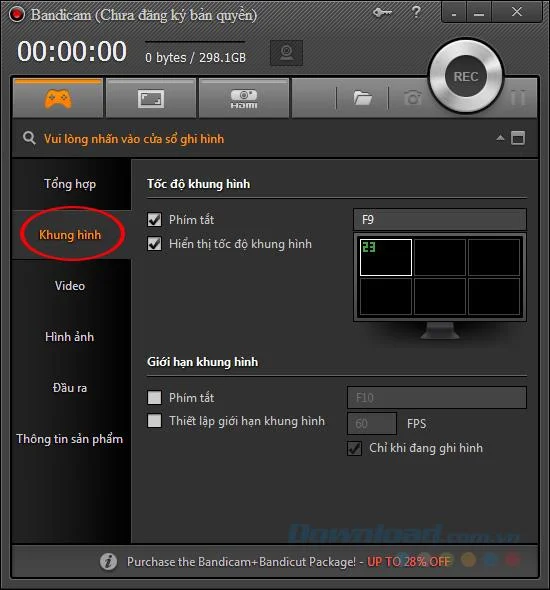
Or we can make each setting individually in the main interface by clicking on the corresponding cards, such as " Frame ".
Video .
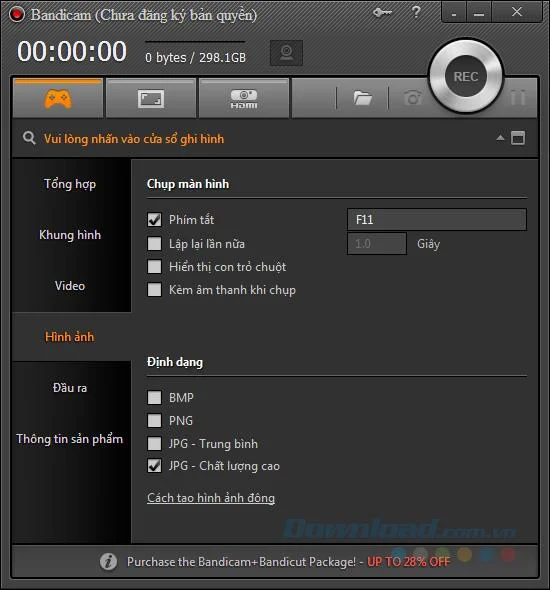
Or " Picture ", can choose to show the mouse cursor in the image or not, the sound taken and immediately change the format of that image.
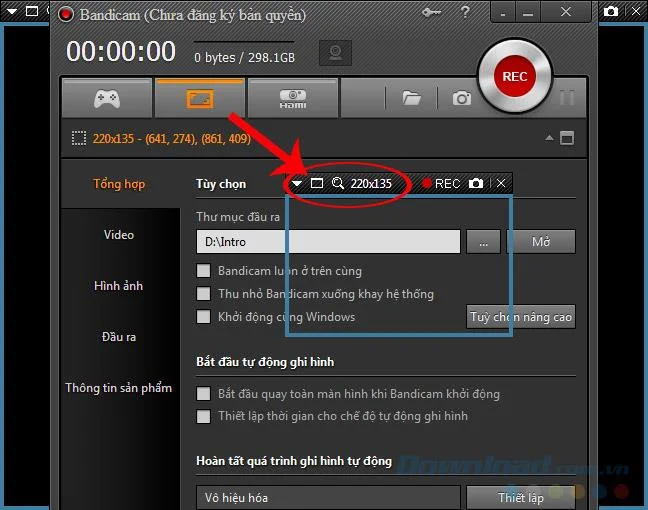
Bandicam supports separate, separate recording modes, each with their own different settings. One handy feature of Bandicam is that it will display the mode and frame size directly on the rotating window for users to see.
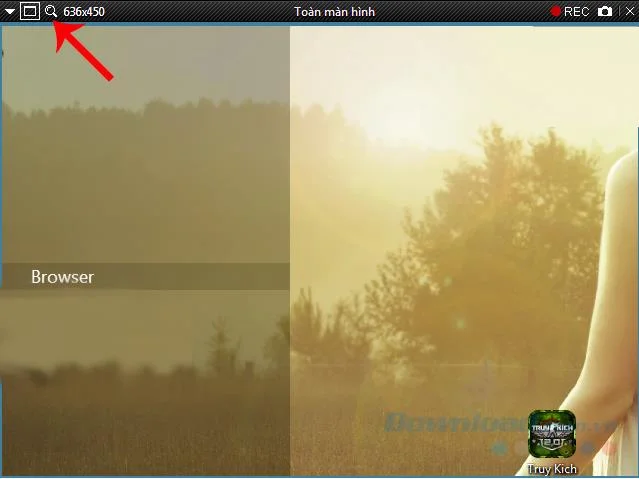
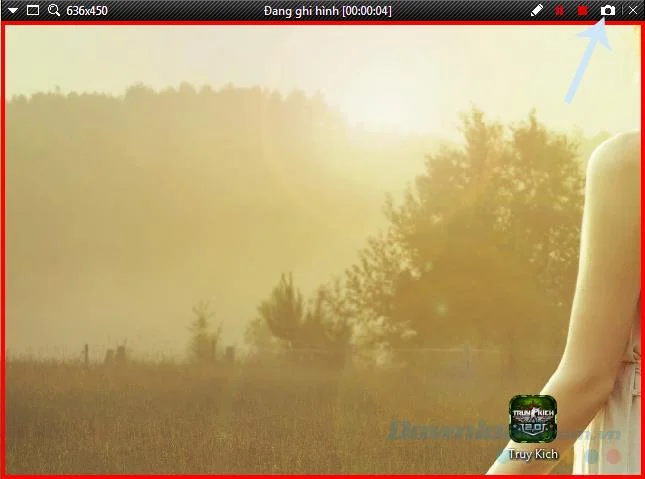
We even point the mouse at the edge of the window, left mouse button, hold and drag to resize without having to access any other settings. Right here, we also have some quick options as follows:
Down arrow icon : Dials in selected mode.
Square icon : Turn full screen.
Magnifying glass icon : Search standard screen mode.
REC : Start recording.
Camera icon : Screen capture.
Note:
Screen capture is effective only within the selected window size range.
When the record window is active, it will change from green to red, and will display the message " Recording " and duration.
The screen recording window will automatically change color when activated
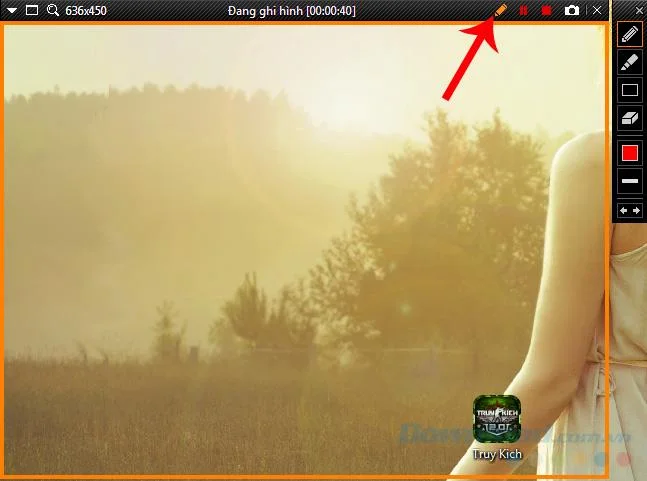
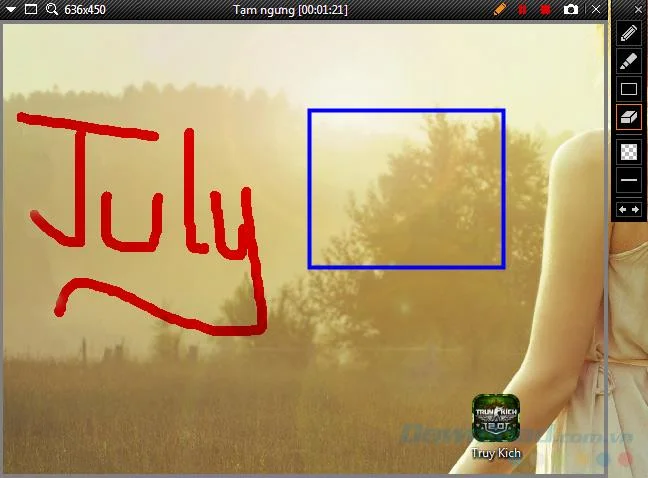
If you had to vote for the most convenient and versatile screen recording software, surely there would be no tools that could surpass Bandicam. Because right from the rotating frame, there is also the Pause, Stop, screenshot, pencil icons for users to hand-write notes, highlight or simply make their videos more vivid.
When you select the pencil icon, the rotating window will once again change color (to yellow), and there will be an additional vertical Menu on the right, including:
Pencil, marker : Change the writing stroke (big, small).
Grid: Insert a frame.
Eraser : Delete.
Color box : Change the color of the brush stroke.
Dash : Change the size and density of the brush strokes.
Click the Stop icon to stop the recording process. Then left-click on the icon Open or Open for quick access to recent files folder containing the filming.
Typically, other screen recording software (such as Camtasia ) will only export the raw file, then the user will add video editing steps and export it into another format.
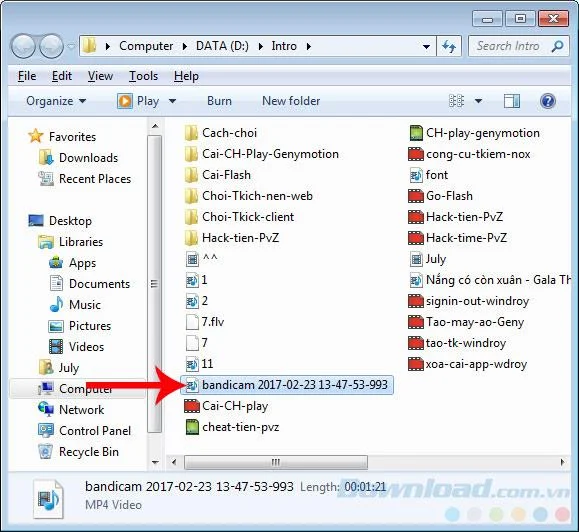
The file after recording will automatically be in the user-selected format
But with Bandicam, the output file will be in the format that the user has chosen from the beginning and can use popular video presentation software to view, upload to social networking sites or share with others without need convert. The only downside of Bandicam is that the free version will have its logo inserted.
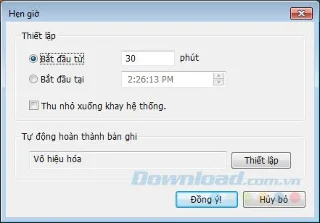
Even this computer recording software can also record timer ( start and end time ) as well as set the computer to turn itself off when recording is completed, switch to a new record when finishing the old record. ..
Those are the most detailed and specific Bandicam instructions. If you are looking for a perfect screen capture tool, choose Bandicam. Lightweight (installer 16MB), fast, stable, lots of handy features, simple interface but effective and powerful. Experiment and evaluate for yourself, whether Bandicam really deserves one of the best computer recording software or not?