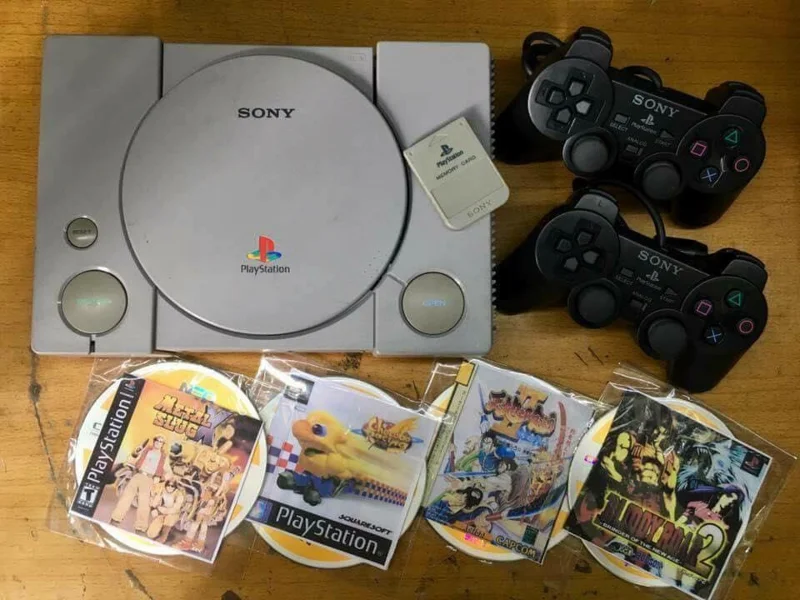
If you are looking for your old childhood experiences like the legendary four-button or 6-button electronics or specifically the experience on PlayStation or PS1 from the past 9x with exciting games like Duel School of Animals, Animal Racing, Black Dragon,... Surely you should not ignore this article, WebTech360 will guide you to use the best emulator software on PS1 that is ePSXe so you can play all games. Old PS1 without having to find the PS1 product which is already rare on the market.
The best emulator for playing PS1: ePSXe.
Currently on the market there are many PlayStation 1 emulators, the most prominent of which is ePSXe, a software for the Windows operating system. With ePSXe you can experience almost all the released PS1 titles. The advantage of ePSXe is that it's simple to install, configure and plug in more joysticks or handles, add speakers or headphones to experience it like a real PS1 machine.
ePSXe is a PlayStation 1 emulator for the Windows operating system. With ePSXe on PC you can play most PS1 games. This is the best PS1 emulator on PC today that early 8x and 9x gamers need to have on their computers. Your job after installing ePSXe is to configure and plug in the control keys, sound to be able to use it. In addition, this emulator can also upgrade the game's graphics to be more beautiful than the original version many times.
Introduction to PS1
For early 8x, 9x gamers, the name Playstation or PS1 is not far away. PS1 has been produced in Japan since 1994 and published by Sony Corporation. With good prices and quality exclusive games, Playstation dominates the Console segment.
Up to now, Playstation has the 5th version, but the popular games on PS1 in the past such as Animal Arena, Animal Racing, Chicken Racing, Black Dragon, .... There are still many people in the world playing. , setting new records for the game.
So ePSXe is released to help you satisfy those old games without having to hunt for these more than 25-year-old machines or game discs.

Instructions for complete installation of ePSXe software on PC:
Things needed to experience ePSXe
Surely the first thing you need is a desktop computer, or a laptop.
Then you download the ePSXe browser on your PC here
Bios to launch PS1 games here
Plugins of ePSXe, used to configure for PC, download here.
Instructions for installing ePSXe on PC:
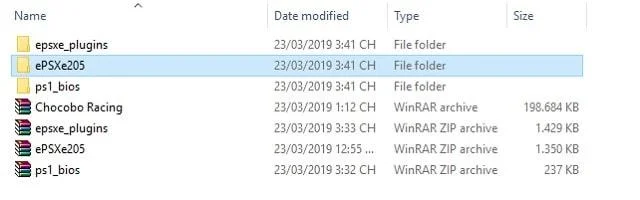
After you have finished downloading all the links above, put them back in a fixed file folder and extract as shown in the image:

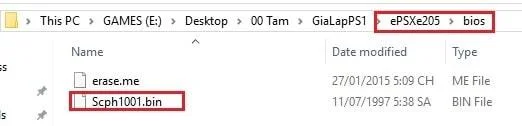
Then you copy the file “Scph1001.bin” in the folder “ps1_bios” to “ePSXe205/ Bios“

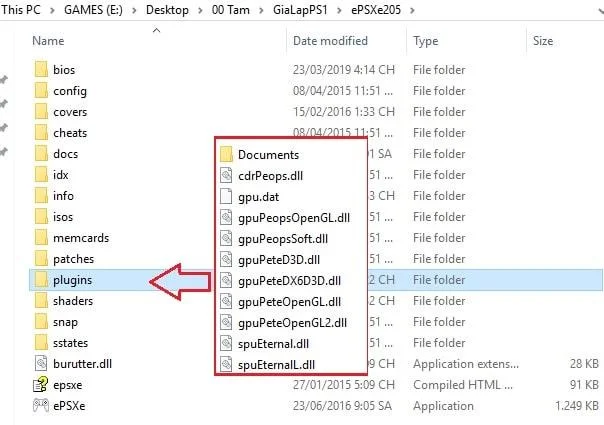
The next step is similar to Copy files to Bios, we copy all the files in the folder “epsxe_plugins” into the folder “ePSXe205/Plugins”

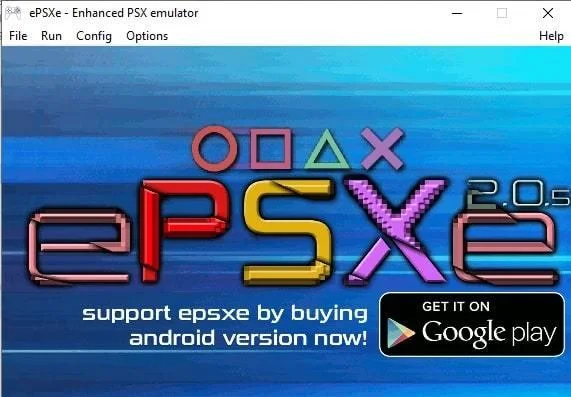
So you have completed a part of the PS1 experience already, next comes the part to install the emulator's features to the fullest. You will need to run the file “ePSXe.exe” located in the folder “ePSXE205”. The program will run and have the interface as shown below.


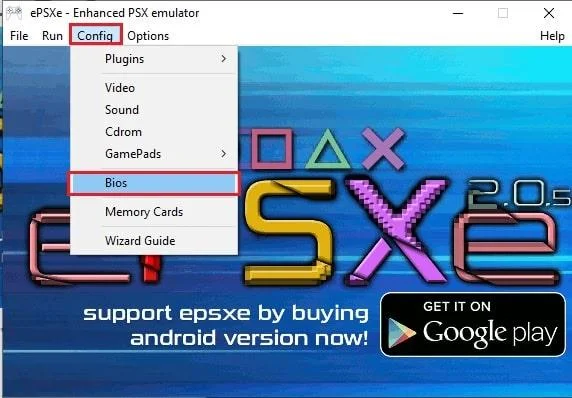
Next you will see a menu bar with different options, choose "Config"->"Bios"

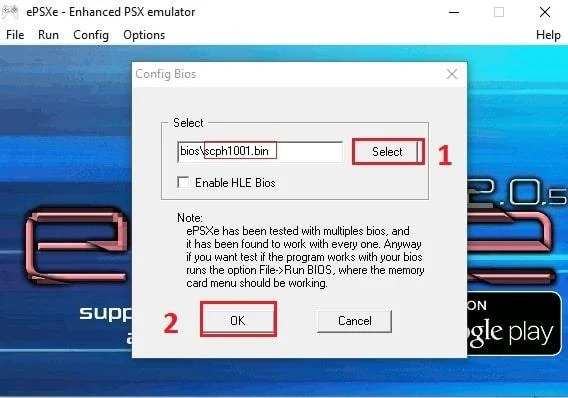
Then click “Select“, select the file “Scph1001.bin” and then click “OK”

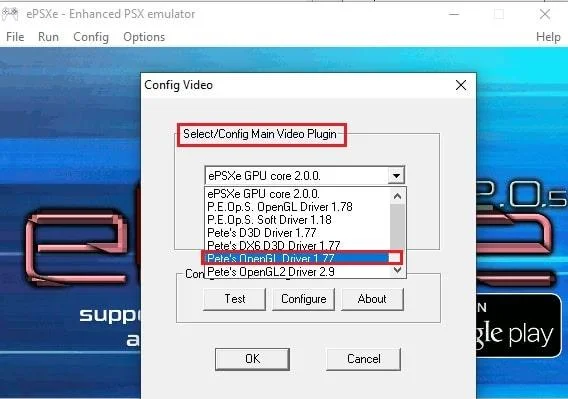
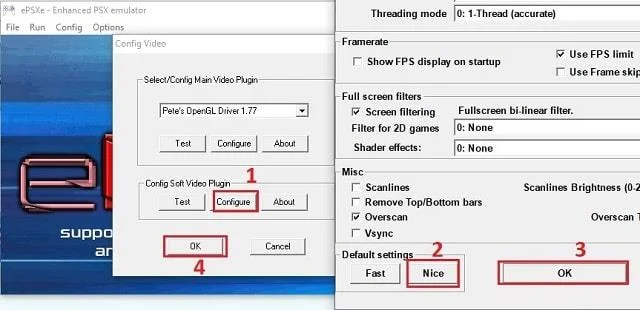
We go to Video Plugins, select Video Plugins, Select "Config" on the menu bar, in the "Plugins" section, click "Video". Go to the "Select/Config Main Video plugin" section and select "Pete's OpenGL Driver 1.77".

Next, click on the "Configure" item, the program will display the Video config interface, click "Nice" to be okay. Then press “OK” to exit.

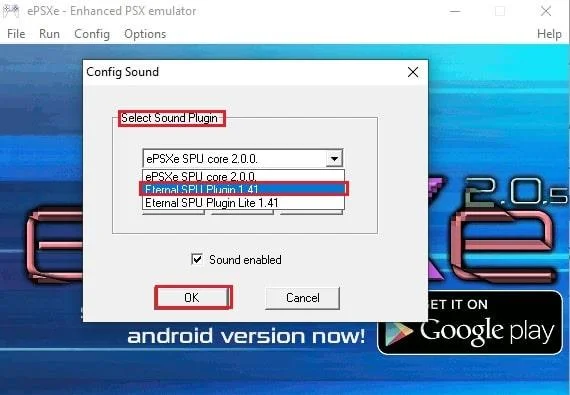
Then we go to the Audio section. Similar to the above 2 installation steps, we go to the menu “Config“-> “Plugins” -> “Sound“. You will see the Config Sound interface appear. In the "Select Sound plugin" section, select "Eternal SPU plugin" and then "OK".

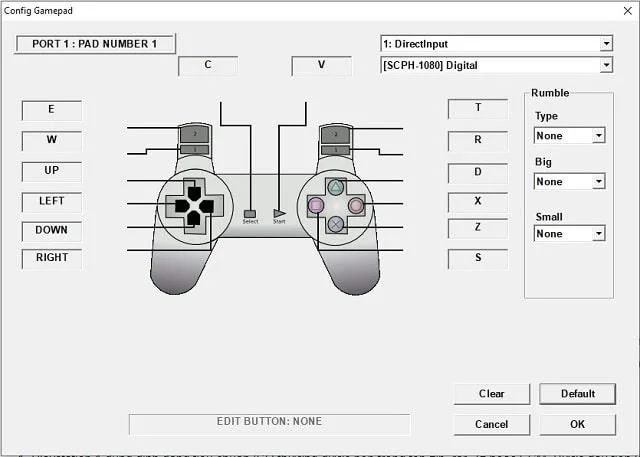
Now is the last and very important step leading to your game experience happy or not. You will go to “Config” -> “GamePads” -> “Port 1” -> “Pad 1” for the first controller similar to “Pad 2” for the second controller for your friends. All you need to do is adjust the button to suit you, then press “OK” similar to the handle for your friends.

The installation steps have been completed, we will proceed to the step of downloading the game on the PS1 emulator ePSXe software on the PC. Let's go!!
To download more than 2000 PS1 emulator games you can download it here
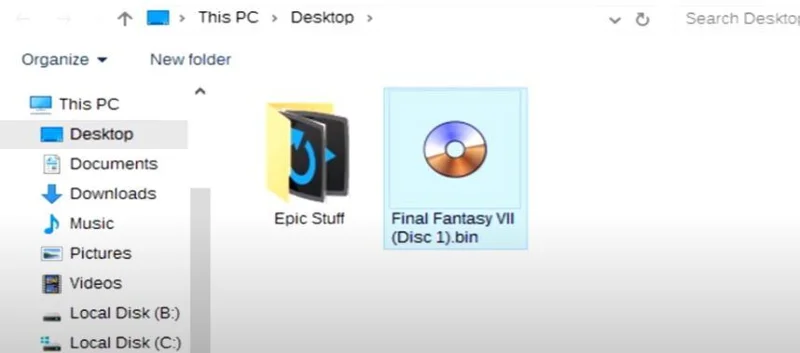
After downloading, you will extract it in ISO or BIN format. (As shown below)

To be able to run the game, you will press “File”->“Run ISO“. Select the .BIN file again. Click “Open” and enjoy the best PS1 emulation experience (Here I play Final Fantasy VII game)


summary
It can be said that the ePSXe emulator on PC is the perfect choice for users who love PS1 games, owning for themselves the smoothness, the speed of experience is almost no different from the real machine, but provide better graphics and frame stability. This will definitely be the choice for those of you who want to experience the previous hit games.
What you need to do is experience, plug in the controller, turn on the speaker volume and play PS1 games. WebTech360 hopes this article will help you in a good PS1 game experience. In addition, you can refer to the PC configuration or build your own PC at WebTech360 to be able to play the smoothest PS1 emulator.
You can refer to more graphics PC configurations to play the smoothest PS1 emulator below:
==> See More: Configure professional video editing and editing computers