You often use Viber to chat, make free calls or exchange jobs. However, by default, Viber chat will save your entire chat so that you can easily find information when you need it, but also for this reason, many people have trouble.
Because when using Viber on your computer you can not log out as usual, so the personal information and chat history very bad people "snooping " affect you. So today, Download.com.vn will guide you how to delete Viber chat history as well as set up to turn off the ability to save chat history of Viber. Please refer to the following article:
How to delete Viber chat history, Viber chat history on computer:
Method 1: From the list of friends cick on the name of the person to delete the Viber chat history. Then click on the Conversation tab on the menu bar, select Delete Conversation.
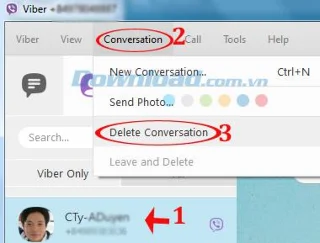
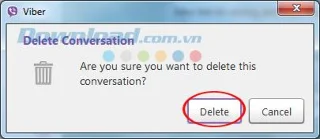
Shortly after, the Delete Conversation dialog box asks if you really want to delete this chat history? Click the Delete button to delete the chat history of the selected person.

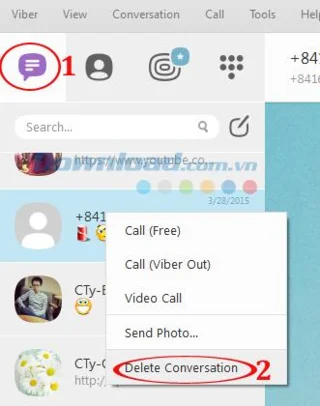
Method 2: Or one more way is to click the Conversations tab . Here will list the whole group or individual that has ever chat with you, just right-click on the name and select Delete Conversation to delete, then a message box will appear asking if you are sure to delete or not, then proceed. Similar to Option 1, the entire chat history with that person will be completely deleted from your computer

How to turn off the history of chatting on Viber:
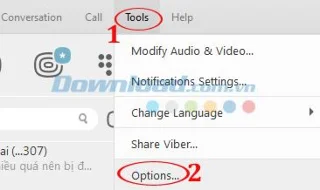
Step 1: To disable the feature to save chat history on Viber, in the main interface of the program, click on the Tools tab and select Options.

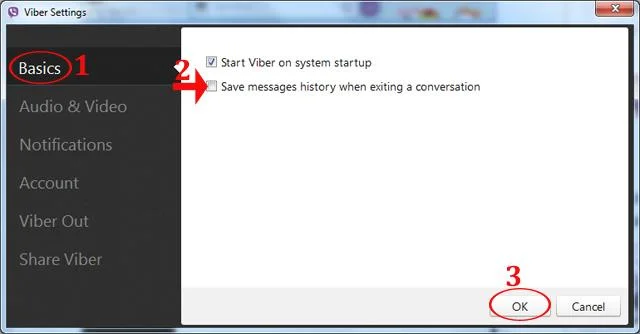
Step 2: In the Basics tab, uncheck the Save messages history when exiting a conversation box. Then click the OK button to close the window.

So your entire chat history on the computer will not be saved for later times, ensuring your safety and privacy. In addition, if you use Skype, you can also delete chat history easily.
I wish you successful implementation!