There is a simpler way to install Win is that we will replace the USB for traditional DVD or CD, if you use a PC, then installing Win with a DVD or CD will not be possible when you do not have a drive like a Laptop , now you will need a USB.
You will have to create a Windows 10 installation file using Windows 10 ISO file or other versions of Windows that you can use if you want. Or you can run two different operating systems in parallel if you want.
And below Download.com.vn will guide you how to install Windows 10 on your computer with USB without the need for a CD / DVD drive. In addition, before installing, you need to note some points as follows to avoid unfortunate situation during the installation process.
Requires the device to use Microsoft .NET Framework 2.0 or higher. If you have an older version of the .NET Framework, you can use the higher version. At the same time you will need a USB with a capacity of at least 4GB or more, and they must be empty data. Also make sure your power supply will not be interrupted when installing Windows 10. And finally a standard Windows 10 ISO file from Microsoft.
Windows 10
Instructions for installing Windows 10 with USB
Step 1: After downloading Windows 10 in the download button above, please refer to the article How to create a Windows 10 installation USB to create a Windows 10 installation file on your USB.
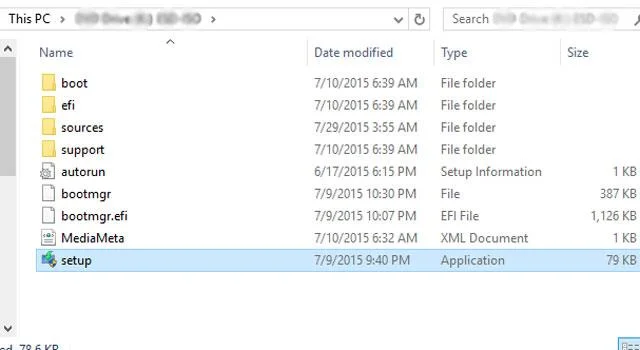
After installing Windows 10 ISO file on USB, your USB will have files like this.
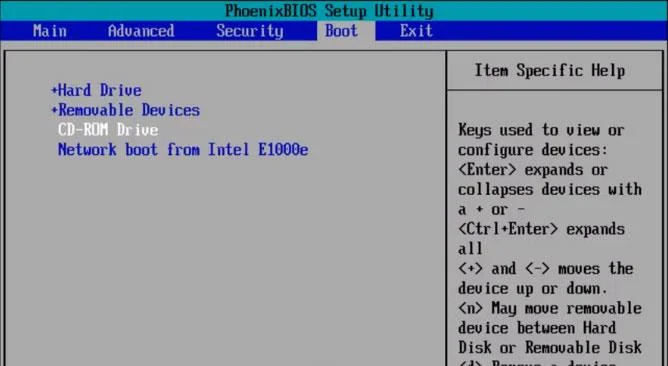
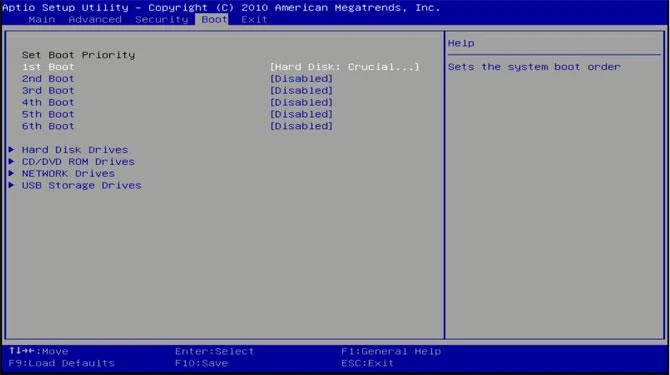
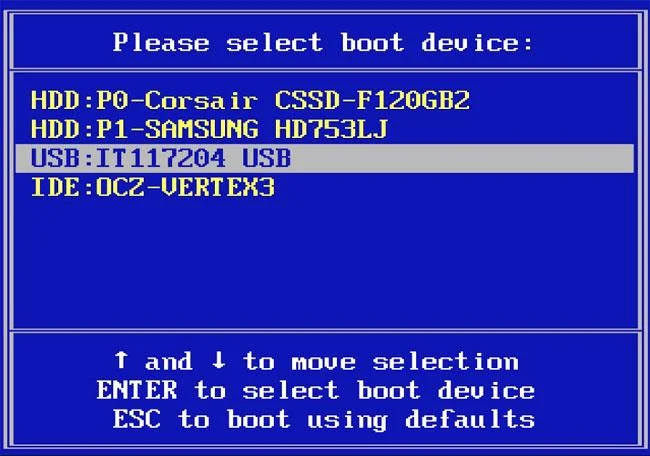
Then restart your computer, plug the USB into the machine and choose to boot from USB instead of the hard drive as usual, you can go to the BIOS of the computer to adjust the boot from HDD to USB in Boot section , see more articles Summary of shortcut keys to access the Boot and BIOS of the computer to know how to enter the Boot menu in each model.
In the BIOS menu of each model, you can go to the boot menu, select Removable Devices, in this menu, use the + key to move Removable Devices to the first place, replacing Hard Drive. Because you are installing Windows 10 from a USB. Finished press save and exit with F10.

Or there are other menus like this, click on 1ST Boot, in which you will find the memory being used on the computer, Hard Disk: is the hard drive, select that line and press Enter and you can choose USB: if the USB containing the Windows 10 installer is plugged into the computer.

Or you can immediately open the external Boot menu without having to go into the BIOS in some models, now you will see your storage tools here, select USB and press Enter to boot Windows 10 installation file. is already in USB.

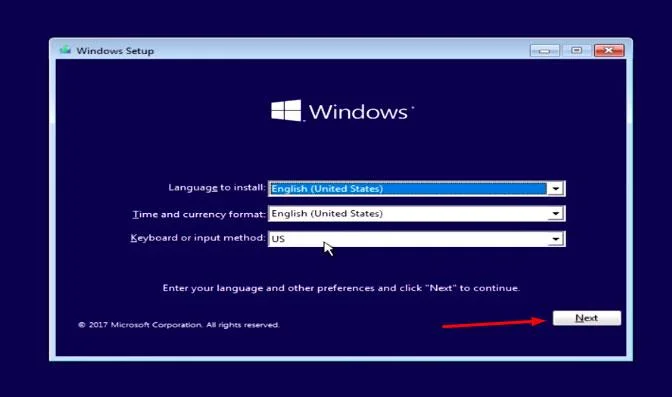
Step 2: Once the Windows 10 installation file has been booted from your USB, select the installation language, time and typing method as shown in the picture and click Next.

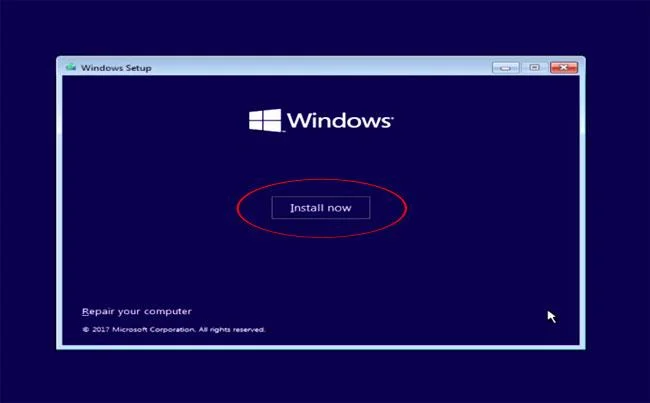
Then click Install Now to proceed with the installation.

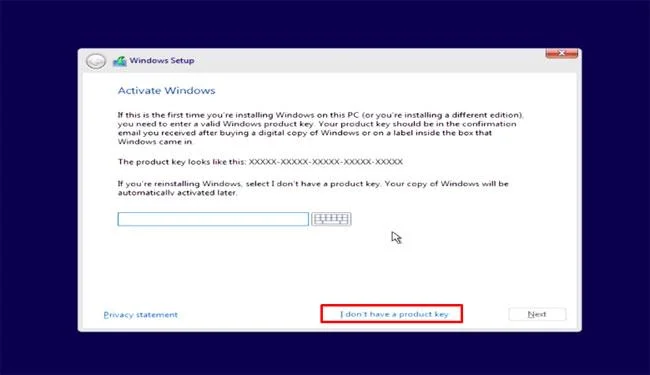
Click I don't have a product key to continue the installation.

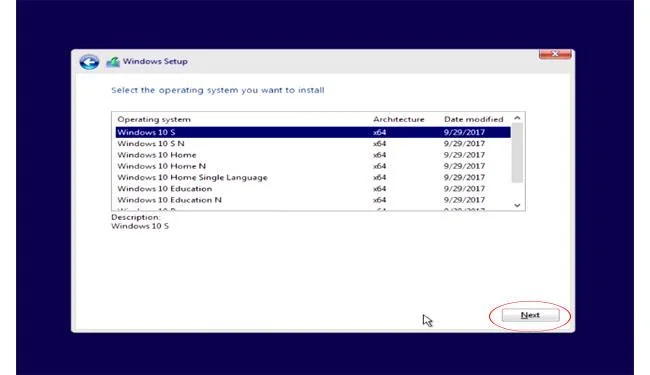
Select the version of Windows you want to install and click Next.

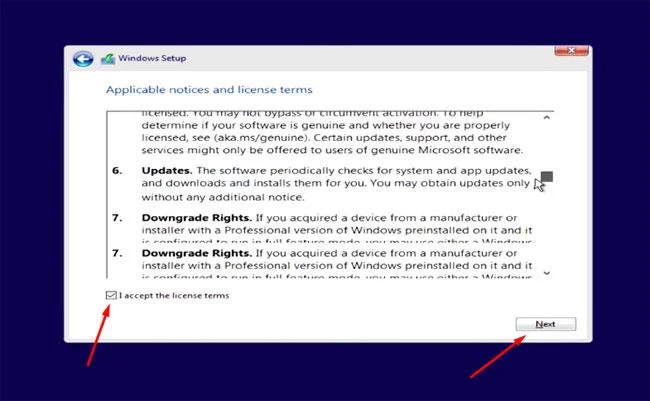
Check I accept the license terms to agree to the terms and click Next to continue.

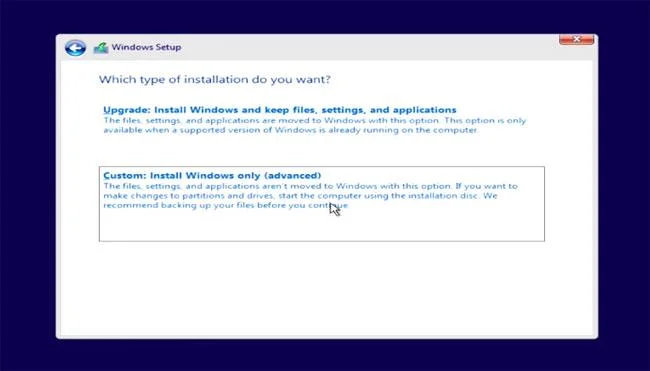
Select Custom: Install Windows only (advanced) to install

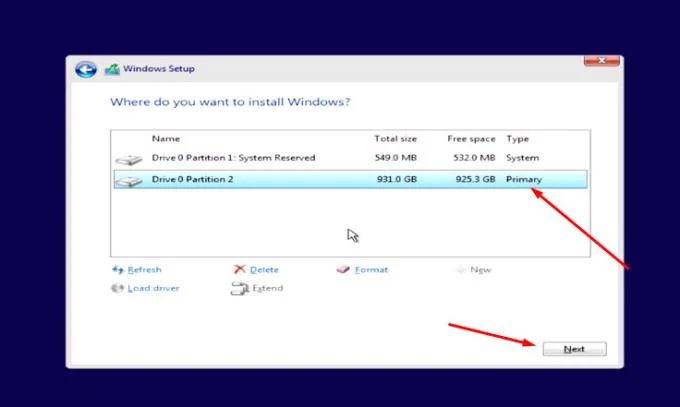
In the Windows Setup menu you will see the partitions (C :, D :, E: ...) of the hard drive on the computer, in this Menu you can also create new partitions with New , delete all data partition by Format , Delete is partition deletion, refresh the hard drive with Refresh ...
This step you should carefully select the partition you want to install the operating system, if there is only one partition, just select it and click Next. If there are many, you should consider Primary as the primary partition (drive C :), select it and click Next , or you can pay attention to the capacity of each partition to see which partition is the system (drive C :).

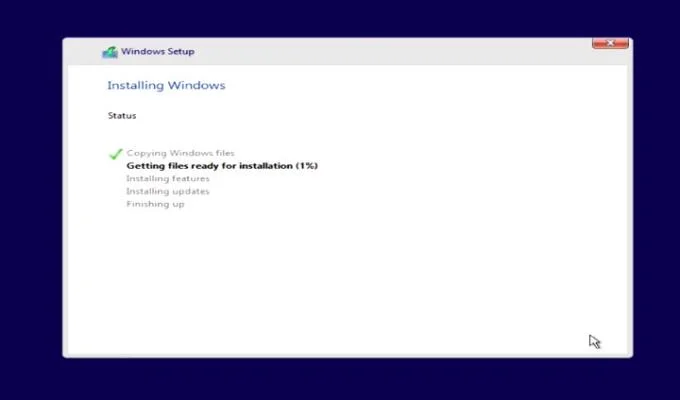
After selecting the partition, wait for the Windows installation process to take place. May take about 10-15 minutes depending on the configuration.

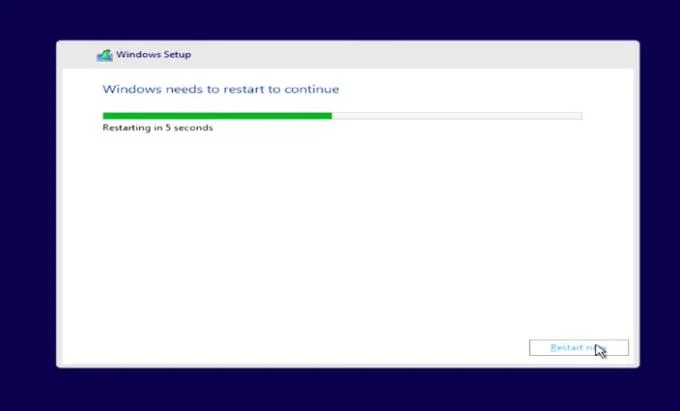
After installation is complete you will see a message to restart the computer appears. You can wait at this step or click Restart now to reboot always.

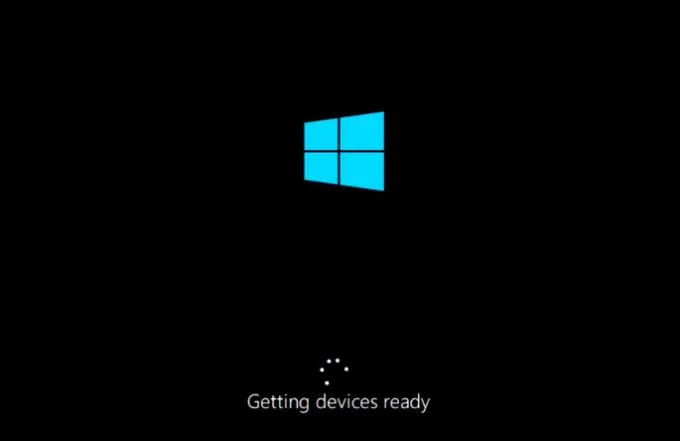
Next, you just need to wait for the computer to boot up.

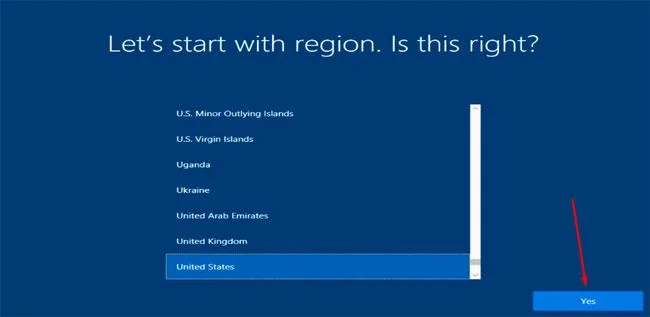
Note that in these steps you select quickly, if left for a while Windows 10 will default and glance at it, first is to adjust the timeline, select Vietnamese and press Yes.

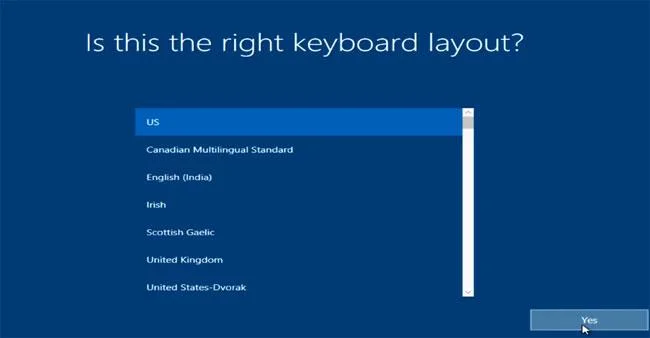
Next is to select the typing method, select US and click Yes.

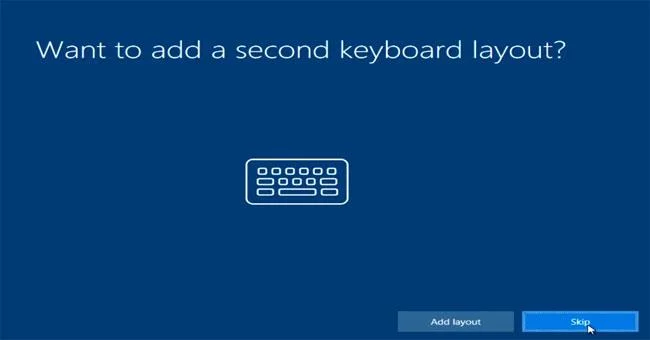
This item is the option to add a second keyboard, click Skip to continue if you only have one keyboard, and if you have many keyboards you want to install on your computer, please refer to the article How to use multiple mice and keyboards on computers.

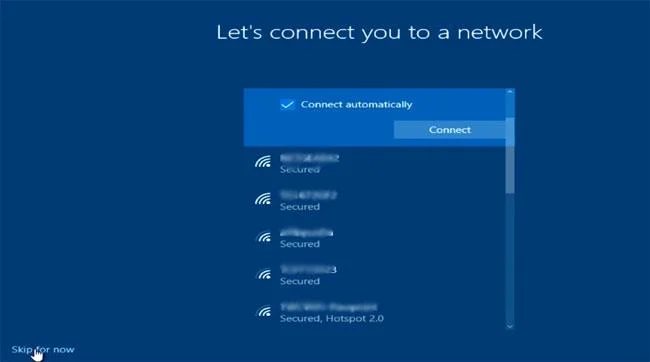
In the section to select the network to connect to if you do not want to select you click Skip for now .

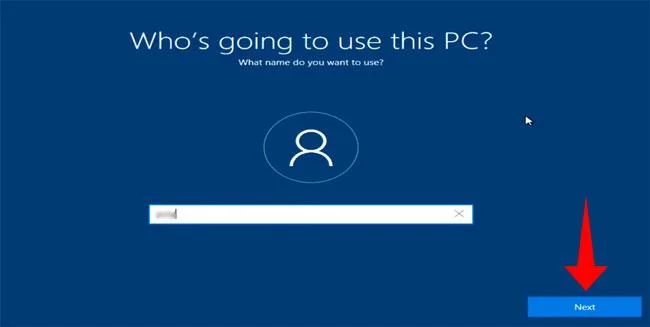
Next is to name the computer, you can write whatever name you want.

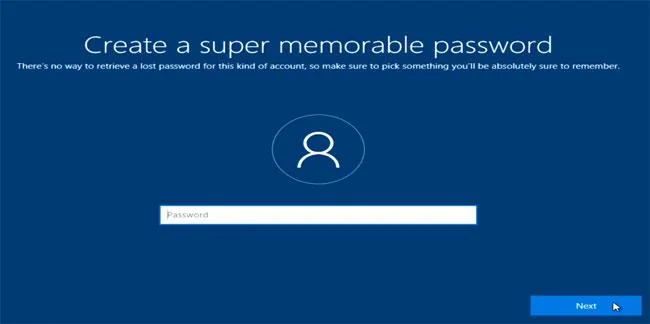
Part of creating this password you can write a password for your computer, but if you do not like click Next.

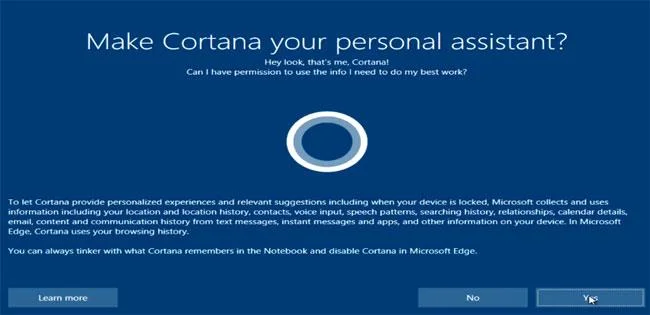
This step will be to set up the Cortana virtual assistant application , which can click Yes or No.

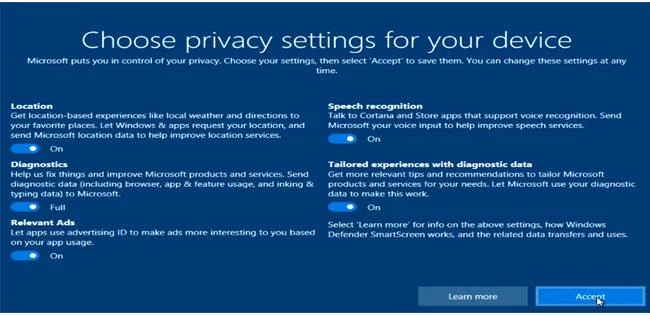
Finally, choose the security settings for your device, leave the default and click Accept to agree.

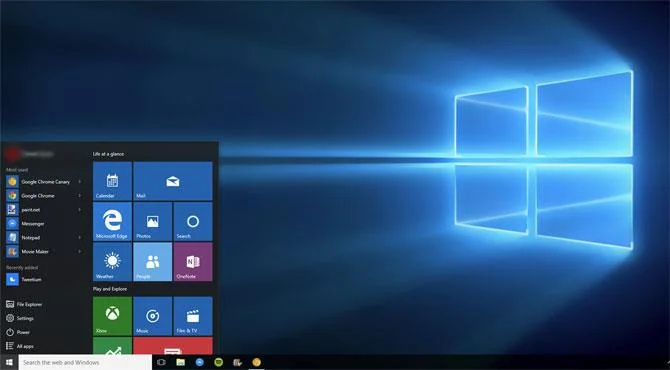
And wait until you see the main screen of Windows 10 and you can use it already.

Above is a guide to install Windows 10 with USB, now installing Windows with USB has become quite popular than a DVD / CD drive like before, after installing Windows 10, you can downgrade Windows 7 or Windows 8.1 to use.
As for Windows 10, the latest version is Windows 10 Creator Update, if you are using Windows 10, you can upgrade to Windows 10 through the article Instructions for upgrading Windows 10 Creator Update .
Good luck!