Have you ever been in a situation where you deleted all the important files from your computer and didn’t know how to get them back? Or when you were working on a super confidential document and accidentally deleted it from your system, what would you do? In this case, you will need the help of Piriform Recuva software.
The free Recuva app can still help you recover deleted files or increase file security.
Recuva File Recovery – features
• Undelete deleted files on your computer : Accidentally deleted a file? Recuva delivers lost files back to your computer, USB, Camera or iPod.
• Recover data from damaged or formatted drives: Even if you've just formatted a drive, Recuva can still find your data.
• Recover deleted emails: Want to retrieve a full mailbox trash after emptying it? Recuva can do it with full support for Microsoft Outlook Express, Mozilla Thunderbird, or Windows Live Mail.
• Recover deleted music files from iPod: Accidentally deleted songs from your iPod or Mp3 player? No problem, Recuva will get them back for you.
• Recover unsaved Word documents: Microsoft Word is corrupted or you forgot to save an important Word document? Recuva will restore your document in a temporary file.
• Quick-Start Wizard: If you want to get your data back immediately without complicated options, Recuva's Quick-Start Wizard is the best answer.
• Deep Scan: Recuva can find most files in just one minute. Or, you can choose Deep Scan (scan your entire computer) to get more thorough results
• Guaranteed deletion of files you want to delete forever: Want deleted files to stay there forever? Recuva also lets you delete these files permanently.
• Portable version: you can take Recuva anywhere with the portable version.
• Support for multiple languages: Recuva can support all the latest versions of Windows along with 37 languages
Now, let's see how Recuva recovers your lost files.
How to recover deleted files or permanently delete files with Recuva.
1. Download Recuva setup
2. The installation process is very simple, just a few clicks of Next .
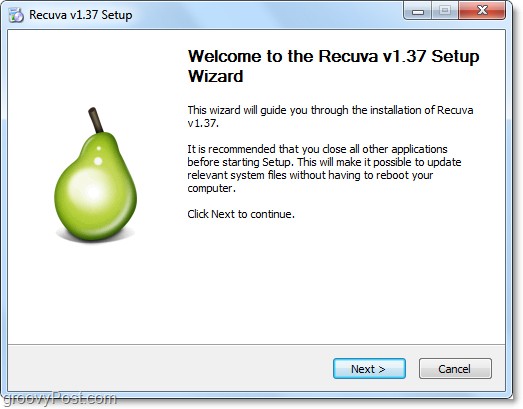
3. During the installation process, remember not to check if you do not want to install Yahoo! Toolbar
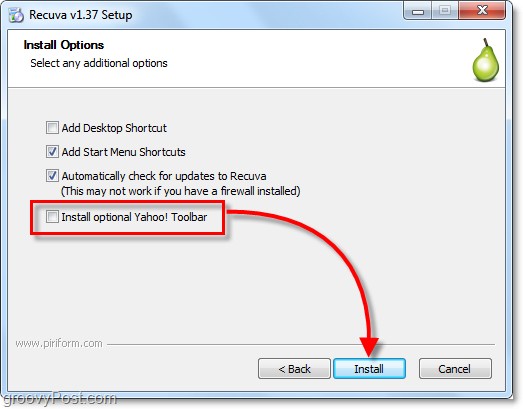
4. When the installation is complete, the Recuva wizard will run. You can turn it off if you want. Then, click Next.
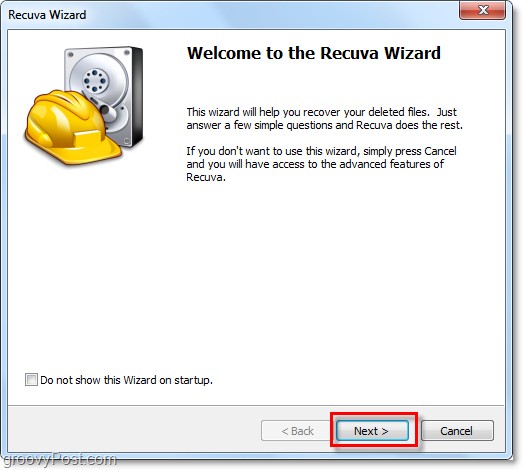
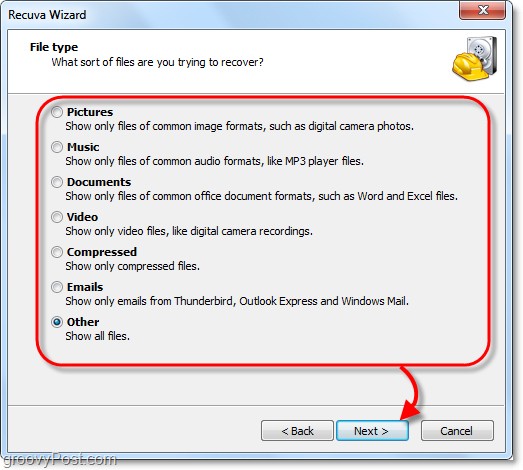
5. On the next page of the wizard, you will be asked to select the types of files you are looking for. If you want to display all files, select Other. Then click Next to continue.
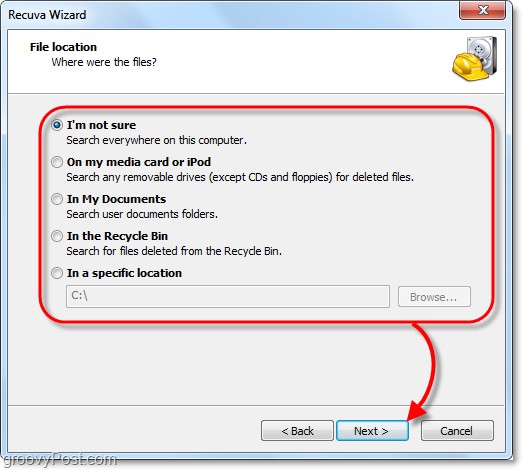
6. Next, the program will ask you to choose where to save the file. This is one of the most convenient features of the wizard as it allows you to choose a save location, saving you time. This is especially true if you are recovering data from an external device such as an iPod, iPhone, USB, etc. After choosing where to save the file, click Next.
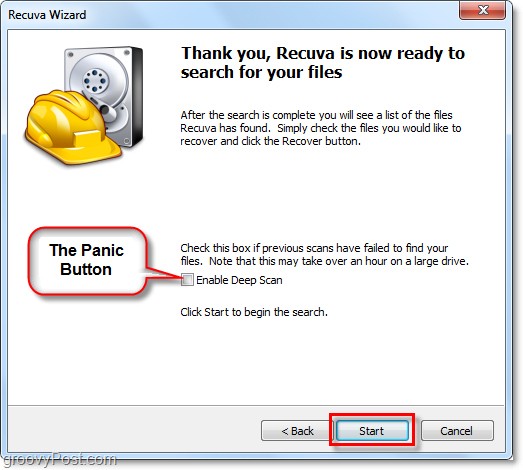
7. On the last page of the wizard, you will have one more option, let's call it Panic Button. You should only check this option if you have previously tried to recover files without success. Click Start to begin the search.
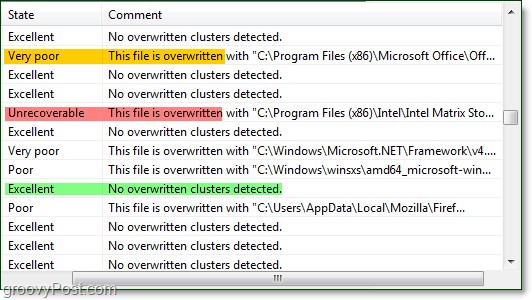
8. The search will finish quickly. Once complete, Recuva will display a list of deleted files it found that are related to the file type and location you selected in the wizard. Here, you can select a file and click Recover to restore it. However, not all files can be restored.
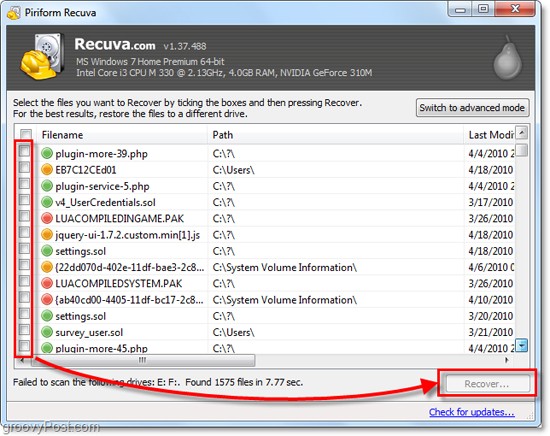
9. The green circle next to the file shows that the file is in good condition and can be restored.
The red circle indicates that the file cannot be recovered because it has been completely overwritten.
The orange circle indicates that the file has only been partially overwritten, and there is still a chance to recover it. However, some errors may occur.
10. For most users, the basic functionality is enough. However, to be able to use all of Recuva's features, you will have to use Switch to advanced mode
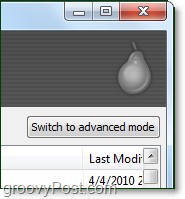
11. When in advanced mode, you can see the displayed image and file information along with the new search mode without having to repeat the wizard steps.
12. Even in advanced mode, you can adjust a lot of Options from the settings tab like changing the language of the steps.
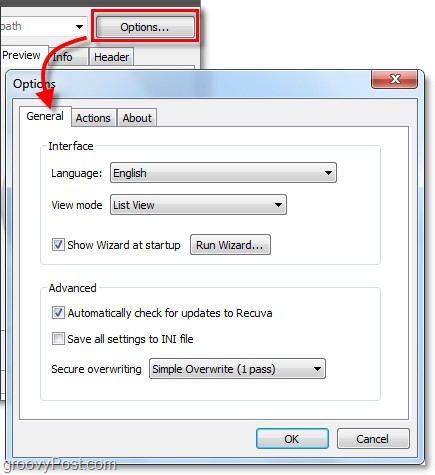
13. In the Options menu , on the Actions tab , you can choose which file types to display. If you want to search for the oldest files possible, select Show zero byte files . Files with a size of 0 bytes cannot be recovered, but it helps you check the history of files that have been written to the drive.

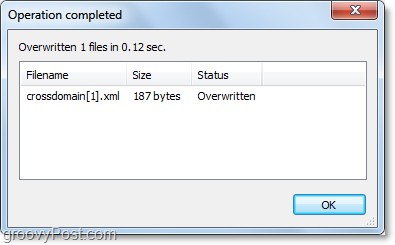
14. If you want to be sure that a file has been completely deleted and cannot be recovered, simply right-click on the file and select Securely Overwrite Highlighted . Once the file is overwritten, you will see a confirmation window.
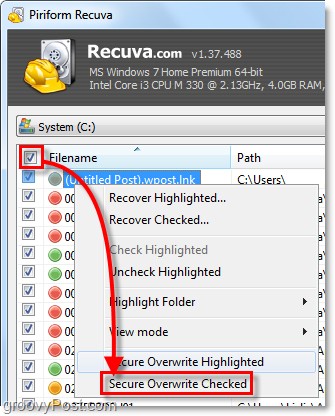
15. To delete a batch of files, click the Checkbox in the menu bar near Filename , then right-click any file and select Secure Overwrite Checked .
Done! So we have learned about the functions of Recuva. Hopefully this utility program can satisfy you when finding lost important files.


