BlueStacks is rated as one of the best Android emulators today. Although quite heavy, but the convenience that this software brings to users is indisputable. Apart from familiar names like NoxPlayer , LDPlayer or Genymotion ... if you are installing and using BlueStacks, you will surely wonder how to exchange data between computers and BlueStacks?
Previously, Download.com.vn had instructions on how to take photos and data from BlueStacks to your computer , if necessary, you can review it to know how to do it. As for copying data from a computer, copying photos to BlueStacks, we will follow in the article below.
Copy data from the computer to BlueStacks
ATTENTION:
Currently this Android emulator has version 4, but if you are using the older version, the implementation will not be the same. So the article will guide you how to retrieve data from a computer to simulate in both cases.
Case 1: Using the latest BlueStacks (BlueStacks 3 or 4)
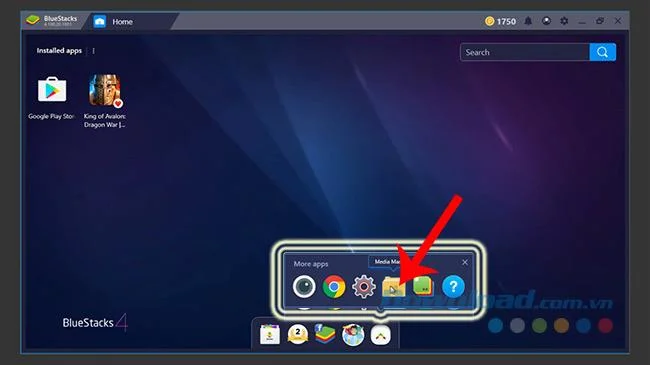
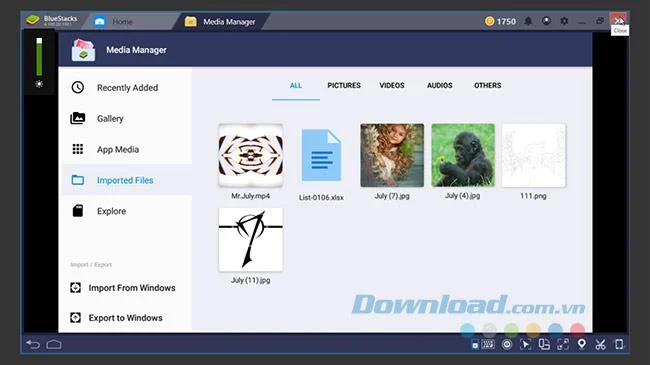
Step 1: You start up the BlueStacks emulator, from the main screen, we click on the More app icon below and select Media Manage (yellow folder icon).
The main interface of Bluestacks
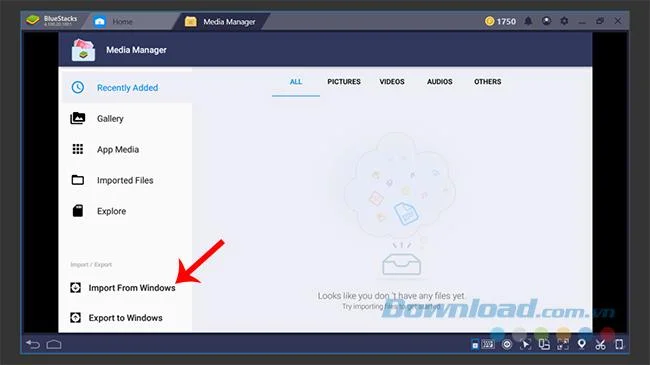
Step 2: In the new interface, left-click Import From Windows to get data from the computer to.
Select Import from Windows
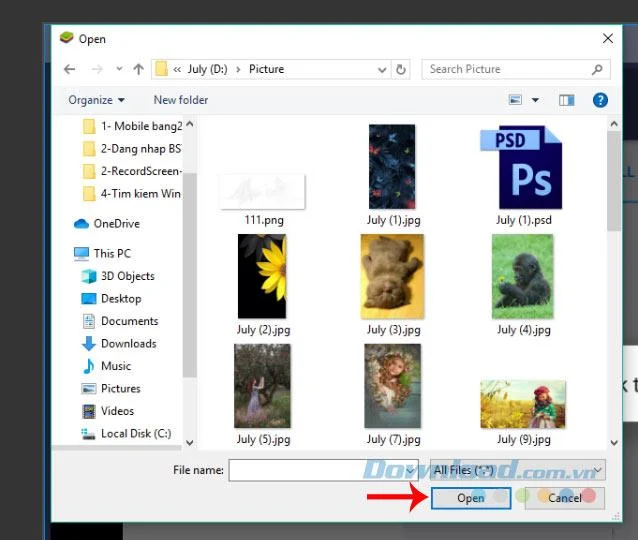
Step 3: A Windows window appears, find the location of the data you are moving to the emulator, left click to select them, then Open to perform.
Select the data to put from the computer into the simulator
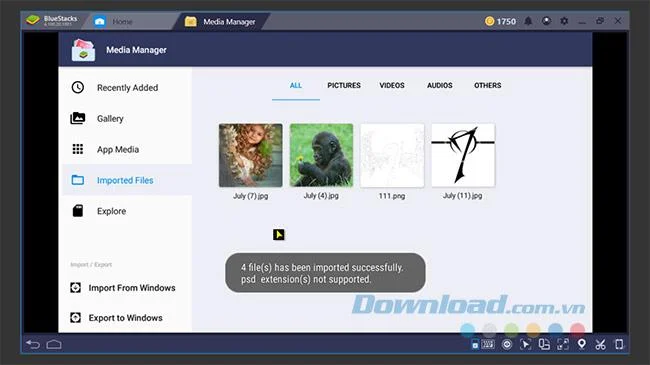
Step 4: Depending on the type of data, their size, the time to copy to the emulator will vary. But you can see, when the migration is complete, they retain the same format, file name and quality as when we saved it on the computer.
Get photos from your computer to Bluestacks
In addition to photos, BlueStacks can also accept other types of media data such as video, audio or text files with different extensions.
Copy data from computer to Bluestacks
Video tutorial to get data into BlueStacks from computer
Case 2: Using an older BlueStacks
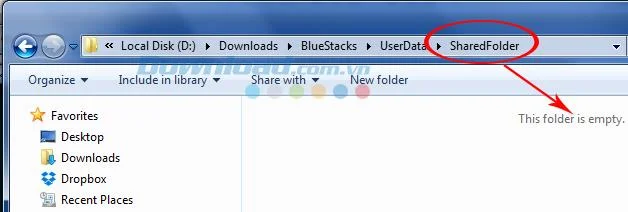
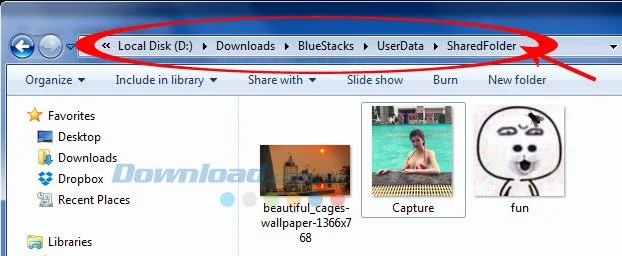
Step 1: After finding the BlueStacks installation drive, go to BlueStacks / UserData / SharedFolder.
Step 2: If you want to share information on your computer with BlueStacks, put that data into this folder.
ATTENTION:
This method does not apply to applications, games, utility programs.
Only possible with image, text, music, or video clip data.
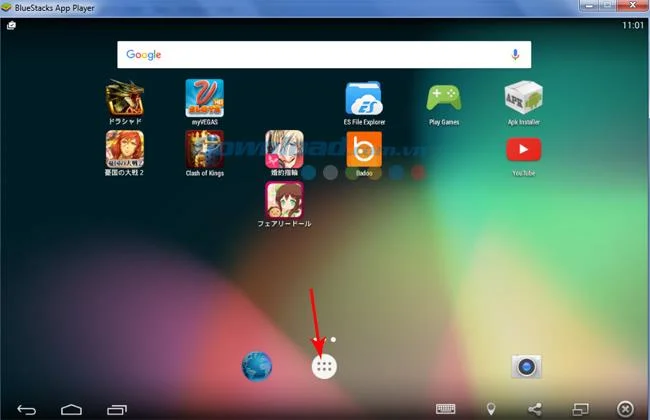
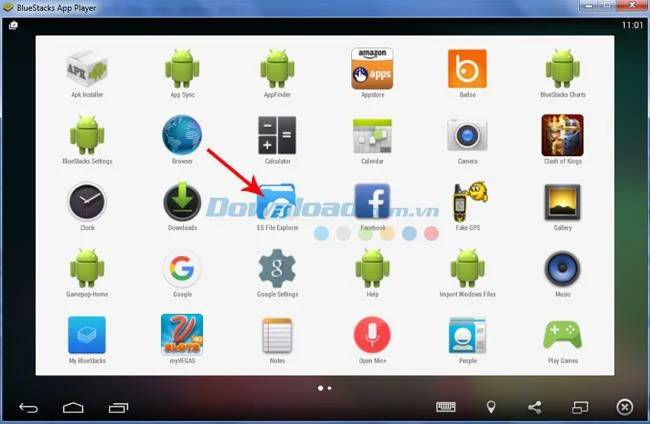
Step 3: Open up the BlueStacks emulator, then click the white circle icon in the middle of the screen.
Continue to find and select the ES File Explorer application.
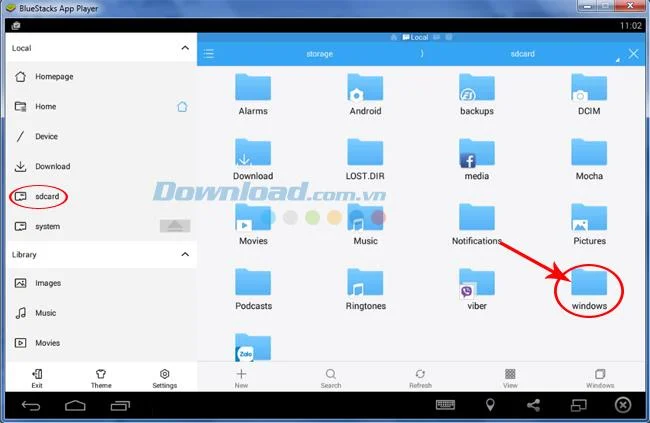
Step 4: New interface appears, left click and hold, drag scroll up or down in the white bar on the left. Find and click sdcard, then select the Windows folder on the right.
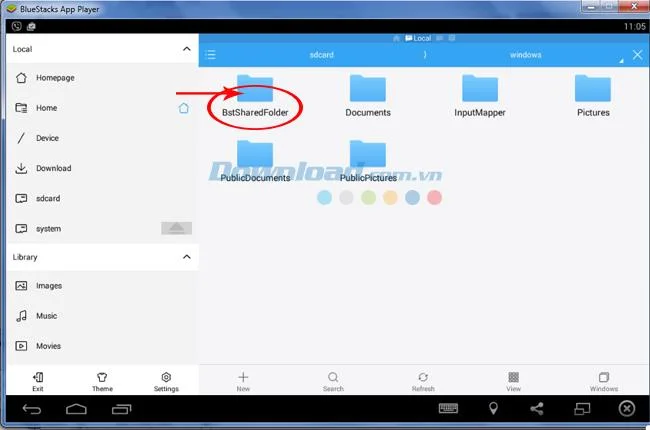
Step 5: In the Windows folder, click on BstSharedFolder.
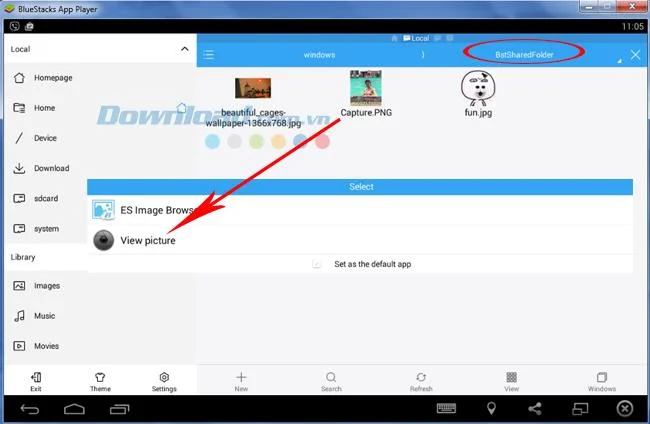
Here, you will see all the photos and data that we copied into from the SharedFolder folder outside of Windows. To use any photo, just left click on it, select View picture in the new interface.
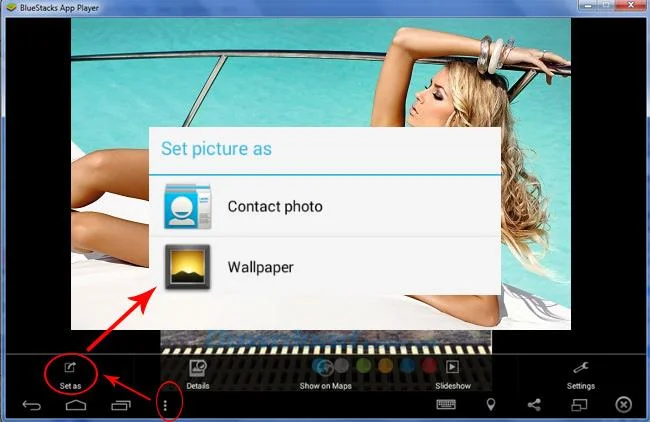
Step 6: While the image is displayed large, you can check to see if this is the right image, and click the three dots at the bottom , when the options bar appears, click select. Set as and choose this photo as background image, or for contact avatar.
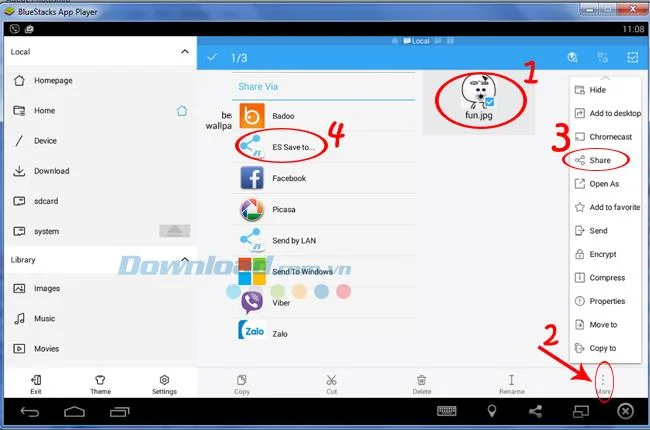
Step 7: In addition to clicking each image to display, if you are sure, you can apply the following method to open up more options. That is left-click on any image you want to use, wait about 2-3 seconds for the interface to change. Now, below the photos is a small blue square, tick this box in different photos to select multiple photos at once.
Also, you can see after the interface changes, at the foot of the interface and an extra bar as the other option: Copy, cut, delete .. . Click the More icon (three dots) to open up the options panel. Please select the corresponding item that you are looking for, for example, here, Download.com.vn will choose the sharing feature - Share photos.
After selecting the Share icon, a small window appears, allowing you to choose where you want to share this photo, such as Facebook , Picasa , or the application Viber , Zalo ... To save the image, click ES Save to ...
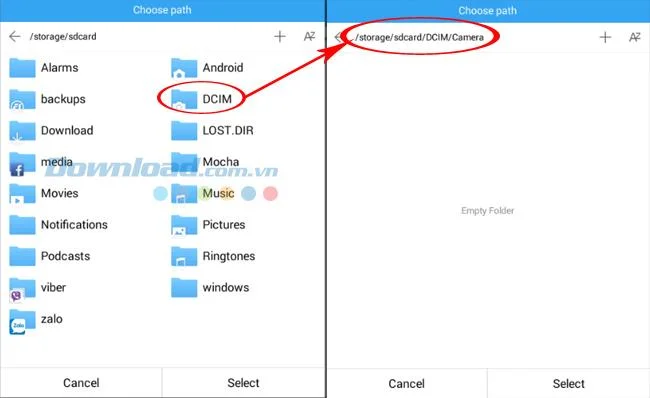
Step 8: A list of folders appears for you to choose, you can choose any suitable file to save . Here, we will perform an example on the DCIM file, Camera section. This way will help you filter different photos into separate folders, convenient for later use.
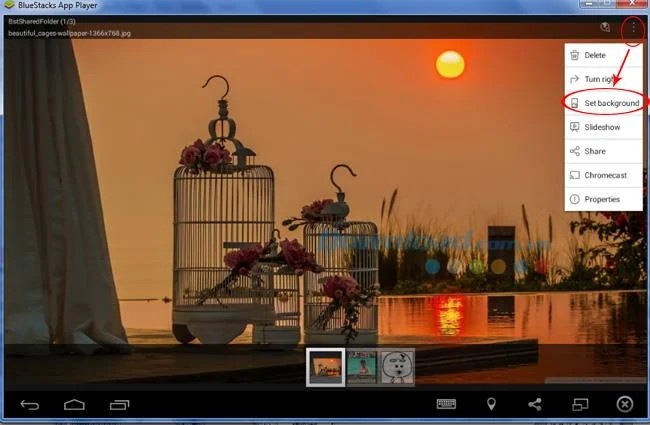
Once saved, left click to open the image you want to view. If you want to perform any action, just click the three-dot icon (upper right corner of the interface) to display details.
Click Set background to select an open image as the background image for BlueStacks
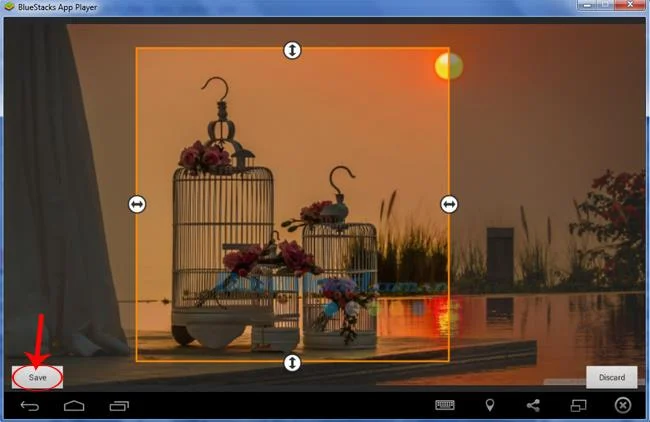
Click and hold the left mouse button to move, resize the image, get the ratio of the image in accordance with the requirements. Click Save to finish.
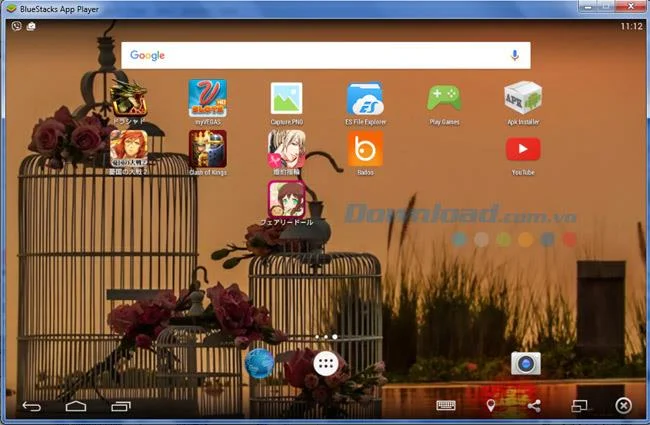
And this is our achievement.
In addition to clicking on More, users can also identify photos to take by clicking and holding the mouse, tick the boxes to check, then select the cut or copy below to perform the operation.
ATTENTION:
In this article, you will see the same way of viewing images, but the display is different, that is because the end of the image, (PNG image or JPG image) the image is saved with different formats, will display differently.