Home
» How to
»
How to synchronize data on Windows 10 using SyncToy
How to synchronize data on Windows 10 using SyncToy
What tool do you usually use to sync data on your computer? Currently, there are many data synchronization software such as Dropbox , Onedrive , etc. that can synchronize continuously during working process. However, there is one more outstanding tool developed by Microsoft that many people overlooked is SyncToy.
SyncToy is a data synchronization tool that has been around for a long time. Below we will show you how to use SyncToy to synchronize and backup computer data extremely effectively, along with sharing files with other computers and creating backup copies of files and mail. the item.
Instructions for installing SyncToy Windows 10
Step 1:
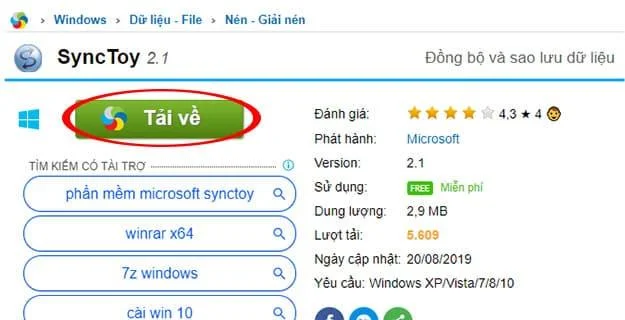
Click to download the SyncToy software to the download link above or go directly to the website: https://download.com.vn/ to search for the SyncToy keyword to download.
The main interface of the SyncToy software
Note: The website will provide 2 links including download link for 32bit and 64bit versions, so please select the appropriate Windows operating system that you are using.
Step 2:
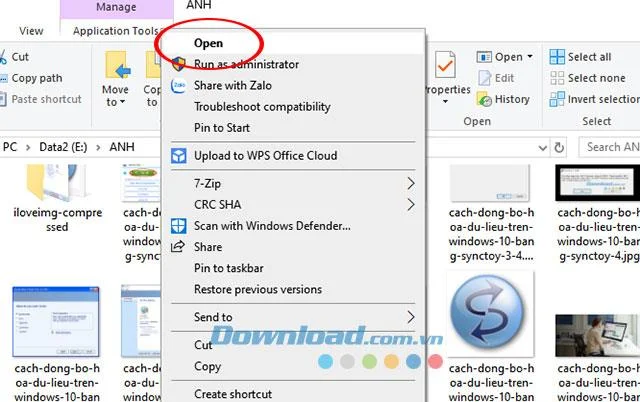
After finishing downloading the SyncToy installation file to your computer, right-click the file and select Open or you can double-click the .exe file to proceed with the setup.
Click Open to launch the software
Step 3:
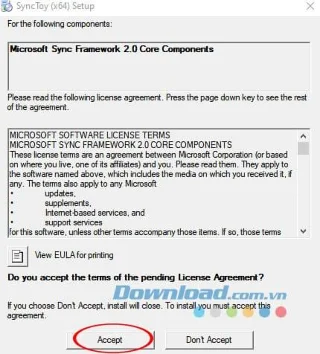
A new window will appear shortly, read the agreement about configuring Microsoft Sync Framework 2.0 and click the Accept button to continue.
Review the software installation configuration
Step 4:
Windows will proceed to install Microsoft Sync Framework 2.0 please wait a few minutes.
The system must install Microsoft Sync Framework 2.0
Step 5:
Next, click Accept to understand the warnings that Microsoft issued as well as agree with the developer agreement.
Step 6:
Select the folder where you want to install SyncToy, then confirm the installation to complete all operations.
Select the installation directory of the SyncToy software
The system will notify after your installation is completed.
How to use SyncToy Windows 10 to sync data
Step 1:
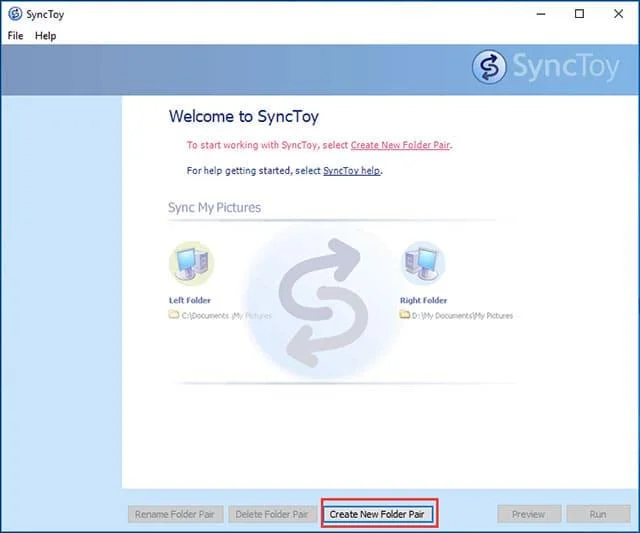
Open the SyncToy software installed above, in the main interface of SyncToy, click Create New Folder to create data synchronization folder.
The main interface of the SyncToy software
Step 2:
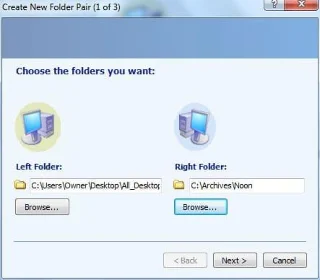
A new window of Create New Folder appears, click the Browse button of both Left Folder and Right Folder to select the folder on the computer. After choosing, click Next .
Note:
The Left Folder is a folder on your computer that contains personal information such as photos, documents, videos, etc.
Right Folder: is a folder outside of a computer such as a USB, portable hard drive, etc.
Select folders inside and outside the computer
Step 3:
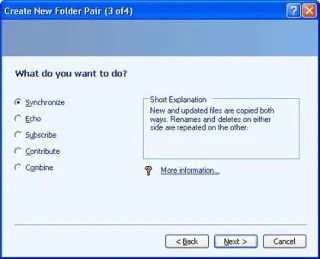
A new window allows you to select the synchronization method:
Synchronize : This option will synchronize any new files, updates, renames or deletes. This means that when you make any changes to this file, it will continue to the other folder.
Echo : This option works the same as the previous one, but the difference is that the changes are only applied from the left folder to the right one. Ie the changes take place in one direction.
Contribute : This option is similar to the Echo option but it does not allow deletion. That is, if you delete any file in the directory on the left, that directory will not be deleted from the directory on the right.
Select synchronization method
Step 4:
Enter a name for the 2 directories then click the Finish button .
Step 5:
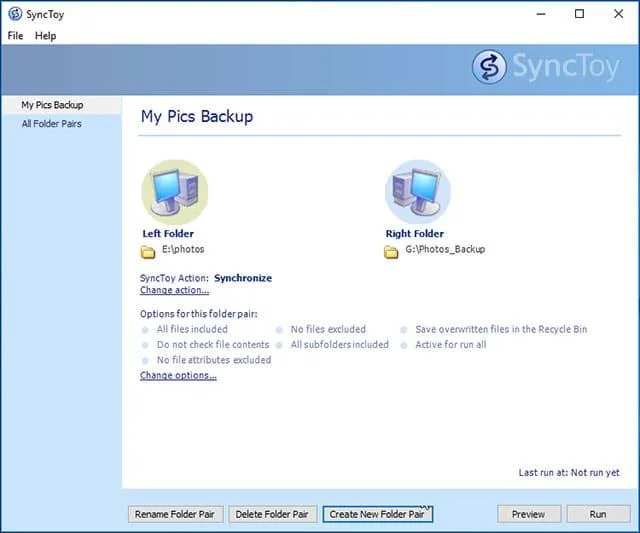
Next you can Preview to see the files are synchronized and have changes as you like. If everything is correct click Run to run.
Preview data synchronization on SyncToy
Step 6:
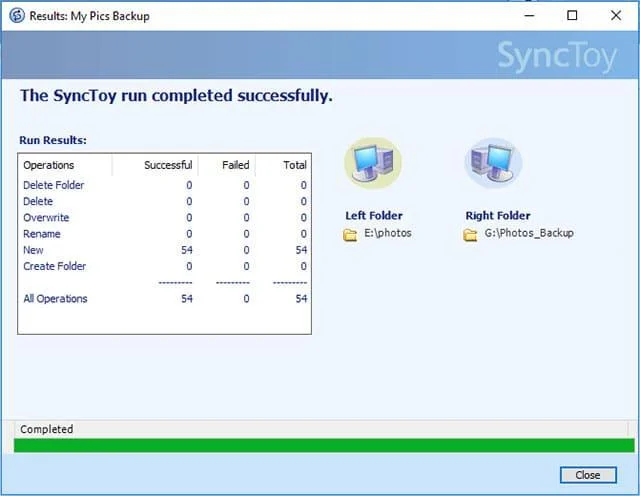
After a successful directory synchronization created by SyncToy Windows 10 you can see the detailed report displayed on the screen.
Detailed reports are displayed on the screen
Above we have shown you how to synchronize data of Microsoft SyncToy tool computer. Hopefully the article will help you quickly back up the data to achieve the desired effect.