VIDEO
Video: How to Change the NoxPlayer Installation Folder on Your Computer
Understanding Data Transfer Between NoxPlayer and Computer
Copying data between NoxPlayer and your computer is essential for users of this popular Android emulator. This process differs from simply moving data from NoxPlayer to your PC. The two types of operations can be summarized as follows:
Copy/Paste: Transferring data between your computer and the emulator.Move: Relocating all data from NoxPlayer to a specific place on your computer.
Download NoxPlayer for Windows
Download NoxPlayer for MAC
How to Transfer Data from NoxPlayer to Your Computer
Before starting, ensure you have enough free space on your computer. Here’s how to calculate the necessary space:
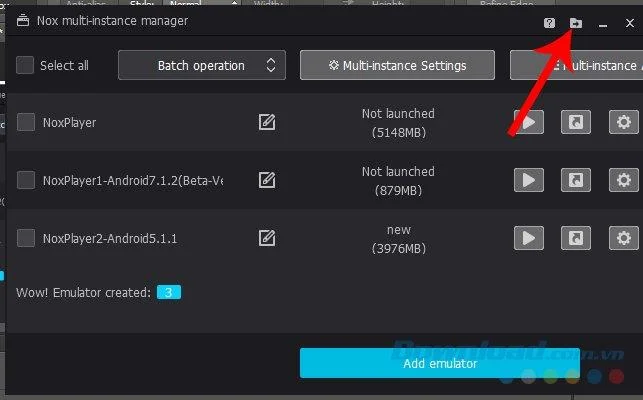
Version
Size (MB)
Version 1
5148
Version 2
879
Version 3
3976
Total required space = 5148 + 879 + 3976 + 2GB (buffer) = 12GB
Step-by-Step Guide to Move NoxPlayer Data
1. Initiate Multi-Drive
Open Multi-Drive and click on the Relocate Emulator Data icon in the upper right corner.
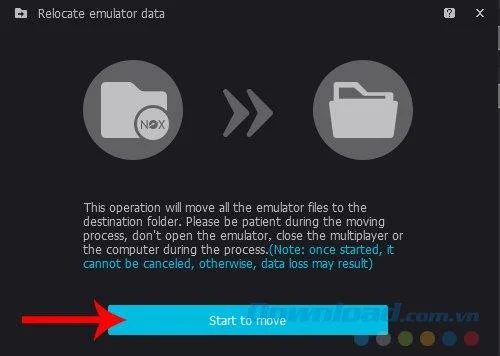
2. Start the Data Transfer
In the window that appears, click on Start to Move to begin the transfer.
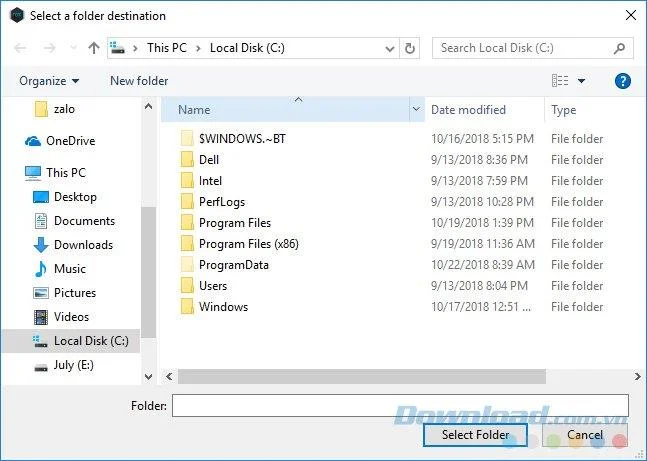
3. Select Destination Folder
Choose a location on your computer to save the data by clicking Select Folder .
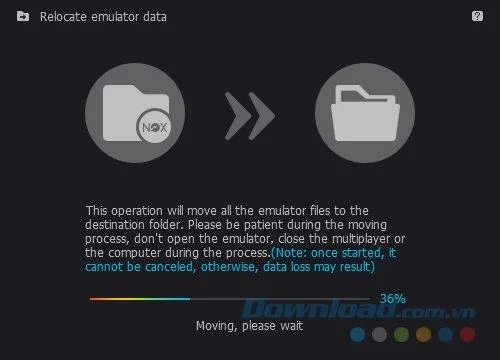
4. Await Completion
Wait until the data transfer process is completed. This may take some time depending on the amount of data.
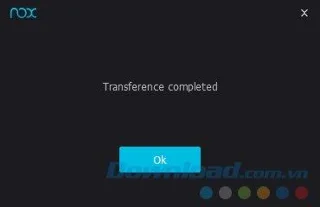
5. Confirm Completion
Once finished, NoxPlayer will notify you that "Transference completed." Click OK to close the window.
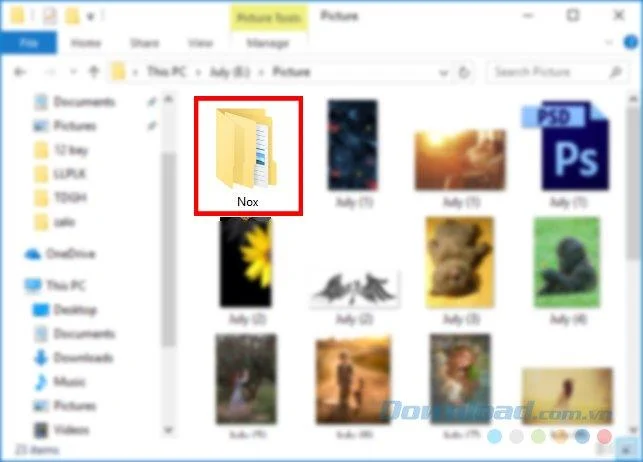
Check the defined directory for a folder named NOX , which will contain your emulator data.
Important Tips during the Transfer
Do not shut down or close the Multi-Drive or NoxPlayer during transfer.
Ensure no interruptions occur.
Minimize other operations to avoid slowing down the transfer.
Once the move starts, it cannot be canceled without data loss.
Updating Storage Location for Shared Data
NoxPlayer provides options to change the storage location for shared files. Follow these steps:
Change the Nox File Sharing Location on PC
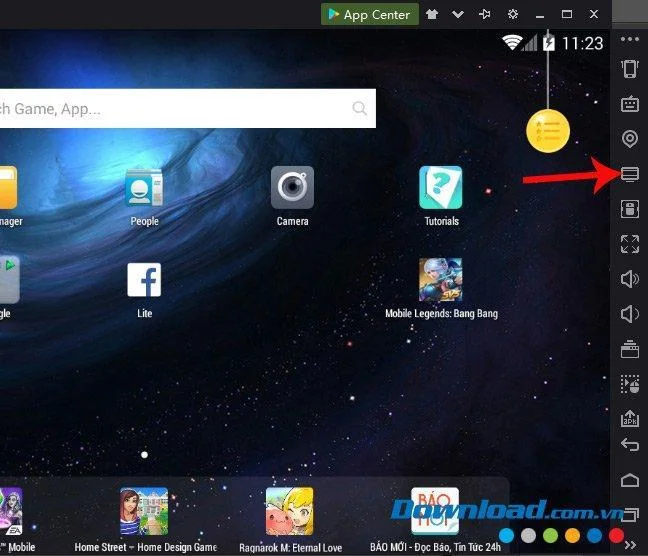
1. Access File Transfer
Open the emulator and navigate to the file transfer icon.
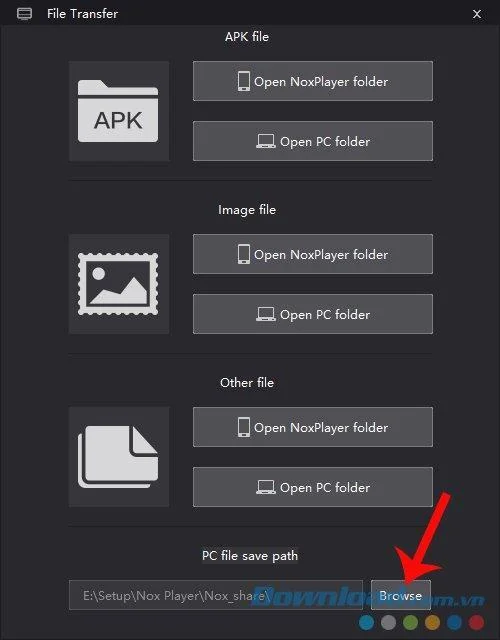
2. Browse for New Location
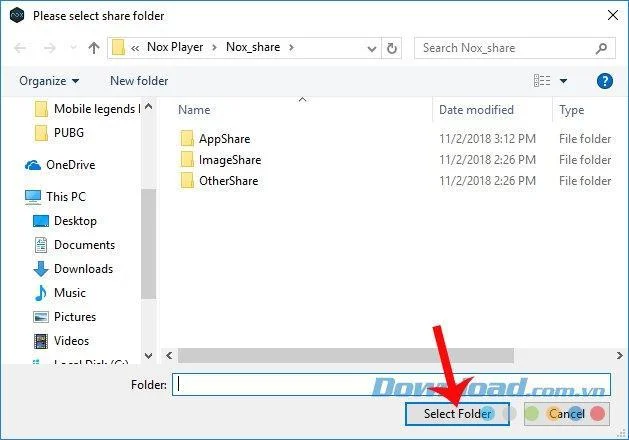
In the File Transfer dialog, click on Browse to change the path.
3. Confirm Changes
Select the new folder and click Select Folder . Now all shared files will direct to this new location.
New Update for 2021: Relocating Emulator Data in NoxPlayer V6.0.3.0 and Above
Why Relocate Data?
If NoxPlayer is installed on a nearly full drive, relocating can significantly improve emulator performance.
How to Do It:
Click Multi-Drive on the toolbar.
Select Relocate emulator data .
Click Start to Move and select a new location.
Wait for the operation to complete and click OK .


Leo123 -
Does anyone know if there’s a way to revert back to the default installation folder once it’s changed
Quang vn -
Big shoutout to the author! I was struggling for weeks. Finally, I sorted out my installation folder
Rocky -
Just did it! I’m so relieved! I didn’t know it was so simple. Feeling accomplished
SummerWaves -
Could you elaborate a bit more on how to ensure that my existing apps will work after changing the installation folder
Tommy G. -
This is such a useful tip! I’ve been looking to make more space on my computer. Thanks for the share
Sandy M. -
I really needed this guide. Thank you for providing such clear and precise instructions!
Kevin Y. -
I have a question: If I change the installation folder, will it affect the performance of NoxPlayer in any way
Bob O. -
This was exactly what I was looking for! NoxPlayer was taking up too much space on my drive. Thank you
Trúc Nguyễn -
Has anyone tried changing the folder on a Mac? I’m curious if the process is similar.
John Doe -
Great article! I always struggled to change the NoxPlayer installation folder, but this guide made it super easy. Thanks for sharing
Phúc IT -
Awesome guide! I didn't even know this was possible. Your details made it so simple. Thank you
JennyP -
Super helpful! Can’t believe I was struggling with this for so long. You’ve made my day!
Ruby K. -
Anyone else had issues with starting NoxPlayer after changing the folder? Mine didn’t launch properly
Huyền Lizzie -
I tried changing the folder, but I still can't find where NoxPlayer is installed now. Any tips
Crystal H. -
Just wanted to say a quick thank you! I can finally free up some space and organize my programs better
Mèo con -
I tried changing the installation folder, but it didn't work as expected. Anyone else facing issues
Jackie T. -
Such a detailed post! I wish all tech guides were this easy to follow. Definitely saved this for future reference
Hương KT -
The instructions were really helpful! Thanks for breaking it down step by step. I appreciate it
Ricky T. -
I’m curious, what happens to updates? Do they automatically go to the new installation folder?
Lila P. -
Wow, just made the change! It feels good to have more control over my installation paths. Good job, author
Duy Sinh 6789 -
Hey everyone, just finished the process, and I’m so relieved! No more clutter on my main drive. Highly recommend!
Alice B. -
Wow, I'm impressed! Changing the NoxPlayer installation folder was a breeze with your guidance. Thanks a ton!
Jessica L. -
I'm so glad I found this article! I was about to uninstall NoxPlayer, but now I can just change the folder instead!
AndrewP -
I followed this guide and everything worked smoothly. I love how straightforward it is. Great job
Anna W. -
Thanks for the awesome guide! It makes things so much easier when you show the exact steps
SarahJane -
Just changed my NoxPlayer installation folder following your steps. It worked perfectly! I appreciate the clarity in your instructions
Ryan Q. -
I’m inspired! Thinking of customizing all my application installations now. Great guide
Hương Đà Nẵng -
Thank you for this! I’ve been needing to clear up some space on my C drive, and this tip will really help
Mark S. -
This was exactly what I needed! Changing the installation folder was something I overlooked. Thanks for highlighting it
Thùy Linh -
Can anyone tell me if changing the installation folder affects my saved games or settings?
Tom & Jerry -
Hilarious! I thought I broke NoxPlayer, but turns out, I just needed to change the folder! 😂
Linh mèo -
What a lifesaver! I was running out of space and didn’t know how to change the installation folder. Really appreciate it