Home
» PC Tips
»
Instructions for using the Auto click feature on NoxPlayer
Instructions for using the Auto click feature on NoxPlayer
Video Instructions for using the Auto click feature on NoxPlayer
NoxPlayer is not just an emulator for those who want to use Android applications on their computer, in addition to installing and using Android applications or games on NoxPlayer , this software has many other features to support. User support during use.
One of them is the Macro Recorder feature , which is a special feature that will allow users to record mouse and keyboard actions such as clicking, moving the mouse on the NoxPlayer emulator screen. This is very convenient when users want to click auto when playing games or using in the software, how to use the Macro Recorder feature you can follow in the article below.
Instructions for using the Macro Recorder feature on NoxPlayer
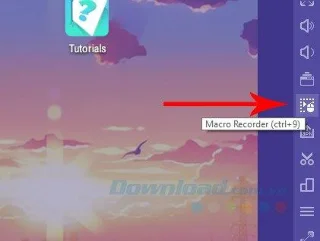
Step 1: Download and install NoxPlayer on your computer, boot up and select the Macro Recorder feature in the list of features on the right.
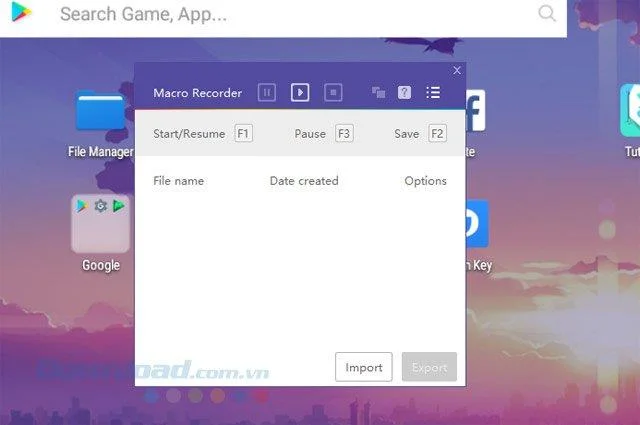
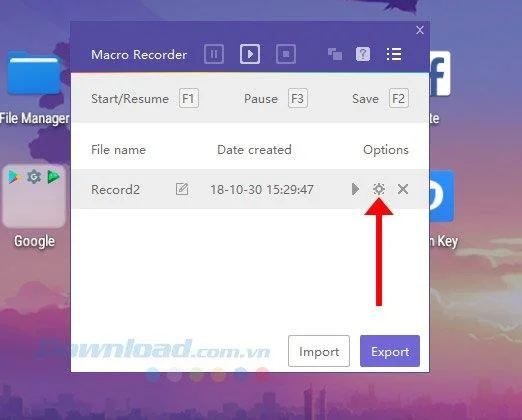
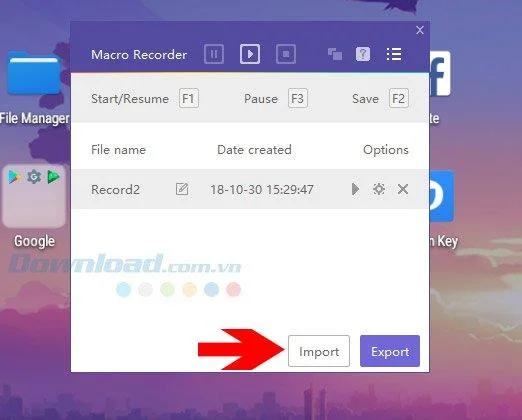
Macro Recorder window will have function keys for you to use, you can press F1 to start recording mouse or keyboard actions on NoxPlayer, use the F2 key to save the actions you have just done, and F3 key to pause recording your actions.
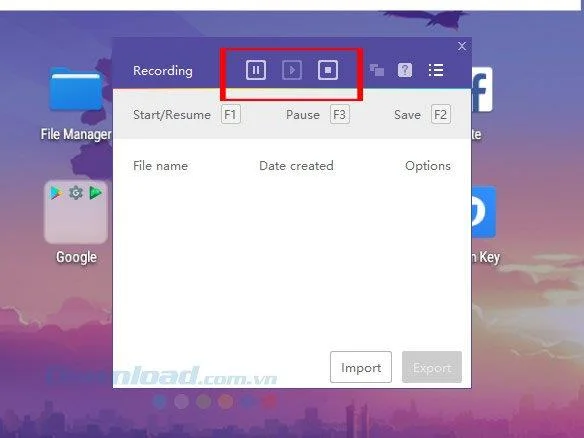
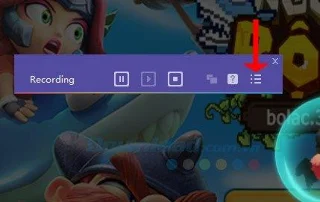
If you can't use the keyboard shortcut, use the icon on the Recording window . In the middle is the Start icon, the outermost is paused, and the last is stopped completely.
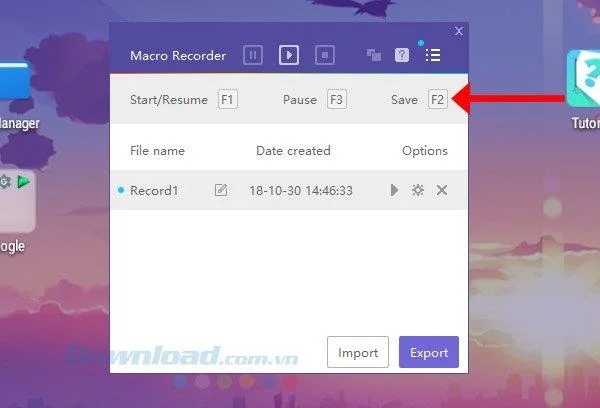
After pressing F2 to save, there will be a record of your action on NoxPlayer, you can click the icon next to the name of the record to rename, you can name it for the name of the software or game you want to save. .
To adjust your action log, click the custom icon as shown below.
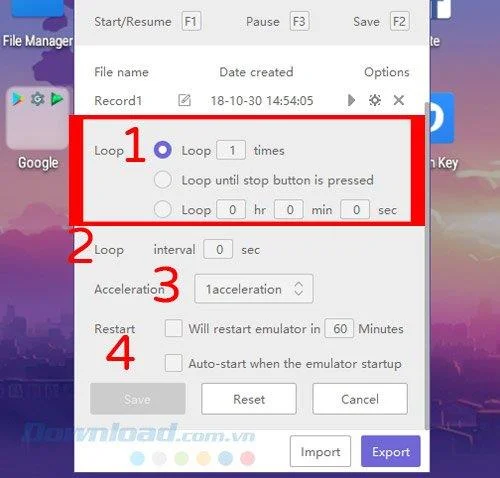
And here are the advanced settings for your record, including:
Loop 1:
Loop option 1: Loop the number of times, where the number of repetitions of action will be the number that you put in the middle box, it will stop after enough times you have written in that empty box. For example, your record is click 10 times, you enter the number 5 in that box, the number of clicks will become 50 times.
Loop option 2: Loop until stop button is pressed , when you click on the NoxPlayer screen, the repeat action will stop.
Loop option 3: Set the time for the number of repetitions of action, which will automatically stop when the timer runs out.
Loop 2:
Interval number of secs, here is the number of pauses of the action record, for example, you enter the number 5, equivalent to 5 seconds of stopping between repetitions, to use this option, you must tick Choose Option 1 in Loop 1 above.
Acceleration:
The time it takes to fast forward the action of the log, the higher the number you choose, the faster the action speed of the record.
Restart:
Will restart emulator in minutes: This is the interval setting before restarting NoxPlayer.
Auto-start when the emulator startup: Checking this option will help you automatically run the action log when.
Click the List icon at the bottom of the image to collapse the list of records.
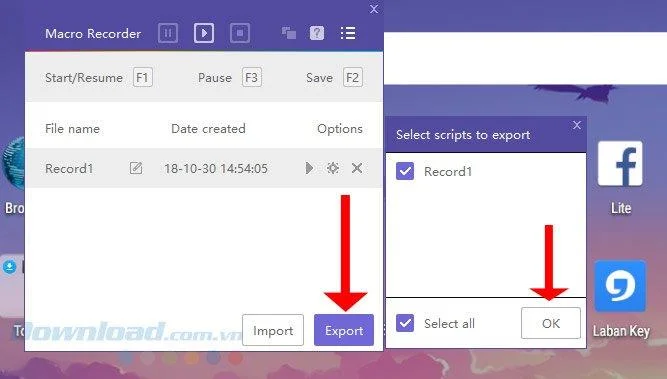
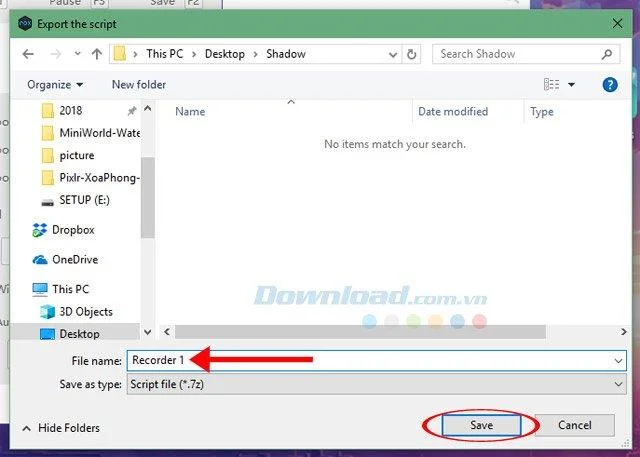
You can publish the action log on NoxPlayer by clicking Export , selecting the record at the list and clicking OK.
Enter the name of your action log in the File Name and click Save.
Conversely, to add a previously recorded action log file, click Import.
That's the information you need to know to use this feature on NoxPlayer, obviously this feature is extremely useful and saves you time when you do not need to sit by clicking.