The Best Diets for Heart Health

In addition to regular exercise and not smoking, diet is one of the best ways to protect your heart. Here are the best diets for heart health.
In addition to using the Yandex.Mail web interface , you can also work with mailboxes using different email clients on the desktop. The article will suggest you some email client settings on mobile and tablet via Yandex.Mail .
To access the email server, enter the username and password in the Yandex mailbox. If you are configuring outbound mailboxes from a mailbox like [email protected] , the username is the first part of the address before the @ . If using Yandex.Mail for Domain , enter your full email address when logging in.
Note: You should not use the provider's mail server to send mail on Yandex.
When using the IMAP protocol, the email client synchronizes with that server and saves the folder structure to the mailbox. Messages you send from email clients will be saved on both the computer and the server. You can access them on many different devices.
Enable IMAP protocol before configuring email client:
Click  in the upper right corner.
Click All settings .
Click Email clients .
Enable From the imap.yandex.com server via IMAP .
Save changes.
To set up an email client for the IMAP protocol, you need to do the following:
Inbox
Inbox
IAMP support will be enabled automatically the first time you log in to this mail program.
When using POP3, all mail in the folder you select in the Settings → Email clients menu will be saved to the mail client on the computer in Inbox. If needed, you can set up a filter in the email client to automatically send messages to the desired folder. Messages you send will only be saved on your computer.
Note: When downloading email from the server via POP3, Yandex.Mail backs up the messages on the server automatically. However, you can manually delete them on the web interface. To delete emails using an email client, use IMAP.
Enable POP3 protocol before configuring email client:
Click Settings in the upper right corner.
Click All settings .
Click Email clients .
Activate From pop.yandex.ru server via POP3 .
Save changes
To set up a mail client for the POP3 protocol, you must choose the following configuration:
Inbox
Inbox
You can set up POP3 mail delivery from any folder, including Spam . To do this, go to Settings → Email clients and select that folder.
By default, when you want to download folder contents with email clients, messages are not marked as read. If you want to mark received messages as read, activate the corresponding option.
Open the software and click Next in the initial screen.
In the Account Setup window , set Yes as the default value and click Next . If you already have an Outlook account and want to add another, File → Details and click Add a new account .
Select Manual setup or additional server types > click Next .
Leave the default value for Internet email and click Next .
Set up the following account settings:
Go to the Outgoing mail server tab , check the box for SMTP server requires authentication and select the Same as incoming mail server value .
Go to the Advanced tab . For the Use the following type of encrypted connection option, select SSL for the IMAP and SMTP servers . Set the following parameters and click OK .
To complete the account configuration, click Next in the Add a new account window to check the account settings. If all settings are correct and confirmed, click Finish . If not, make sure all the correct information has been entered.
Synchronize the newly created account with the server to get a list of folders.
Open menu File → Account settings , select the account in the Email tab and click Change .
Click Other settings and go to the Sent tab .
Set the Save the sent items in the following folder on the server field and select Sent folder .
Open the software and click Next on the first screen.
In the Configure your Microsoft Outlook account window , set Yes as the default value and click Next .
Select Manual setup or additional server types > click Next .
Select POP or IMAP > Next .
Set up the same account settings as Outlook 2010 .
Go to the Outgoing mail server tab > check the box for SMTP server requires authentication and select the Same as incoming mail server value .
Go to the Advanced tab . For Use the following type of encrypted connection , select SSL for the IMAP and SMTP servers. Set the following parameters:
Ignore the default values for all other parameters and click OK .
To complete the account configuration, in the Change account window , click Next to check the selected account settings. If everything is fine, click Finish . If not, please correct the incorrect information.
To receive mail via Mozilla Thunderbird, enable POP3 or IAMP protocol in mailbox settings.
Open the program and click Skip this and use my existing email on the welcome screen.
Enter account information including name, email address, password in the Configure mail account window . Click Continue .
Click the Manual setup button and enter the following parameters for the mail server.
Inbox
Inbox
Username - Yandex credentials (ex: WebTech360.meta)
Click Re-test to verify that the information entered is correct. If the process is successful, click Done .
If you want to use Mozilla Thunderbird by default , click Set as default in System integration .
Right click on the account name and select Settings .
Go to Server settings and under When I delete a message , select Move to deleted items folder .
Go to Copies and folders and enter a Yandex mailbox name for the entire folder.
Click OK to apply the changes and restart the program.
To receive mail using The Bat!, enable the POP3 or IAMP protocol in the mailbox settings.
Open the software and configure it according to the setup instructions.
Enter the following account information into Create a new mailbox :
Click Next .
If you have already set up an account in The Bat! and want to add another account, go to Account → New.... Enter the following account settings in the Inbox window:
Click Next .
Enter the following account settings into the Outbox:
Click Next .
Click Done in Account details .
Synchronize the newly created account with that server to get a list of folders. To do this, right click on the mailbox name and select Update folder tree .
Right click on the mailbox name and select Account properties . Go to Mail management on the left. Find For pre-defined folders , use these IMAP mailboxes in the box on the right. Turn on Sent mail and select Sent from the list. Turn on Trash and select Deleted from the list. Click When the Bat! Starts in Connect to the server .
Click Message filtering → Deleting , and select the Trash folder as the standard folder and delete it instead. Also, disable the Use alternative deletion for old messages option and enable Automatically compress folders after emptying .
Click Options > enable Check mailbox at start-up and Compact all folders on exit .
Click OK to apply the changes and restart the program.
To receive emails using Mail, enable POP3 or IMAP support in the mailbox settings.
Run the application and open the Mail → Add account menu to run the instructions for creating an account. Note: Instructions for creating an account open automatically with the program at the first time.
Select Another Yandex.Mail account > click Continue .
Fill in the username, email address, password and click Log in to verify the accuracy of the selected information.
Open Mail → Settings .
Go to the Server settings tab .
In Incoming mail server (IMAP) , turn off Set up connection settings automatically . In the Port field, enter 993 .
In the Outgoing mail server (SMTP) section , turn off Set up connection settings automatically. In the Port field, enter 465 .
Click Save .
To receive email using Opera Mail, enable the POP3 or IMAP protocol.
Open the program, select the Email item in the list of account types and click Next .
Fill in your username and email address. Click Next .
Fill in the following account parameters:
Click Finish .
Click  in the mailbox name and select Properties .
Go to IMAP tab and configure Sent , Trash , Spam folders .
Click OK to apply the changes and restart the program.
In addition to regular exercise and not smoking, diet is one of the best ways to protect your heart. Here are the best diets for heart health.
Diet is important to our health. Yet most of our meals are lacking in these six important nutrients.
At first glance, AirPods look just like any other true wireless earbuds. But that all changed when a few little-known features were discovered.
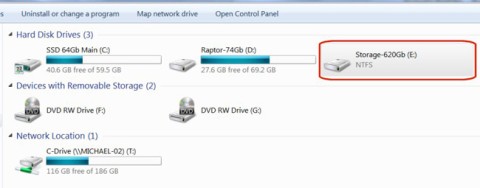
In this article, we will guide you how to regain access to your hard drive when it fails. Let's follow along!
Dental floss is a common tool for cleaning teeth, however, not everyone knows how to use it properly. Below are instructions on how to use dental floss to clean teeth effectively.
Building muscle takes time and the right training, but its something anyone can do. Heres how to build muscle, according to experts.
The third trimester is often the most difficult time to sleep during pregnancy. Here are some ways to treat insomnia in the third trimester.
There are many ways to lose weight without changing anything in your diet. Here are some scientifically proven automatic weight loss or calorie-burning methods that anyone can use.
Apple has introduced iOS 26 – a major update with a brand new frosted glass design, smarter experiences, and improvements to familiar apps.
Yoga can provide many health benefits, including better sleep. Because yoga can be relaxing and restorative, its a great way to beat insomnia after a busy day.
The flower of the other shore is a unique flower, carrying many unique meanings. So what is the flower of the other shore, is the flower of the other shore real, what is the meaning and legend of the flower of the other shore?
Craving for snacks but afraid of gaining weight? Dont worry, lets explore together many types of weight loss snacks that are high in fiber, low in calories without making you try to starve yourself.
Prioritizing a consistent sleep schedule and evening routine can help improve the quality of your sleep. Heres what you need to know to stop tossing and turning at night.
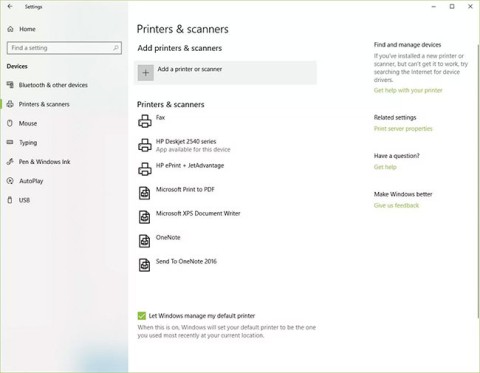
Adding a printer to Windows 10 is simple, although the process for wired devices will be different than for wireless devices.
You want to have a beautiful, shiny, healthy nail quickly. The simple tips for beautiful nails below will be useful for you.


