The signature in a PDF file is not merely a notification to others of the owner of the "work" they are viewing, but also inserting the signature into the PDF file also has the effect of "registering copyright", preventing people from another copy the original (screen capture, copy the content of the file ...) and use it without your consent.
The software that supports reading and editing PDF files like Foxit Reader or Adobe Reader can do this, although the implementation may be different, but you can refer to the article below to know how Create and use signatures on Foxit Reader.
Using signatures has long been a way for the sender to notify the recipient that they are receiving information from whom. Later, along with the development of science and technology, "signature" was also raised to a new level, a mark, a brand, a symbolic image, representing individuals and organizations. ...
How to create a signature in Foxit Reader
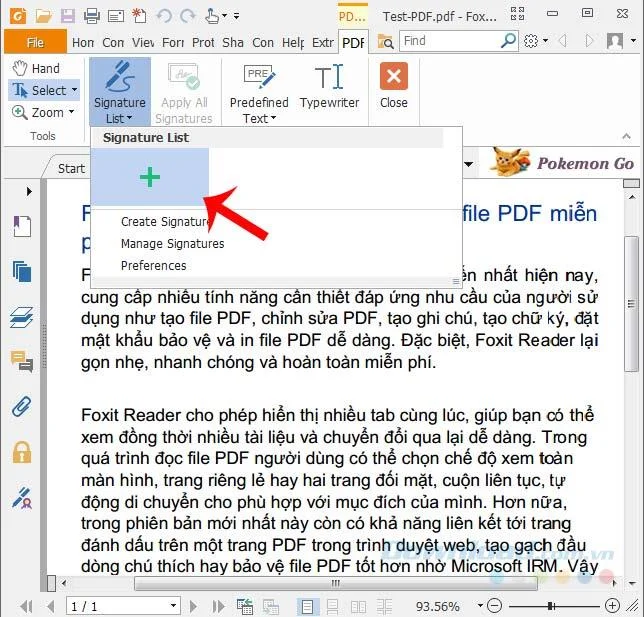
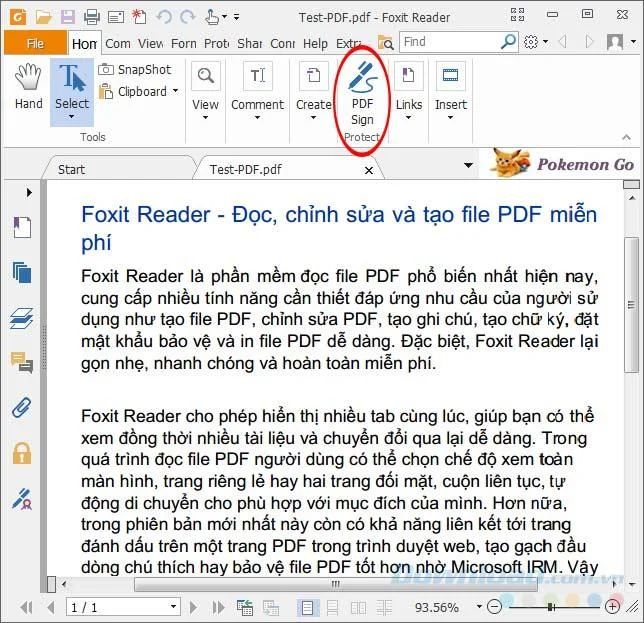
Step 1: Open the PDF file to insert a signature, or maybe a new file also. Then left-click on the blue pen icon on the menu bar - PDF Sign (Protect) .
Step 2: Click on Signature List and select the blue plus icon (or select Create Signature ).

Select the plus icon or Create Signature to create a new signature
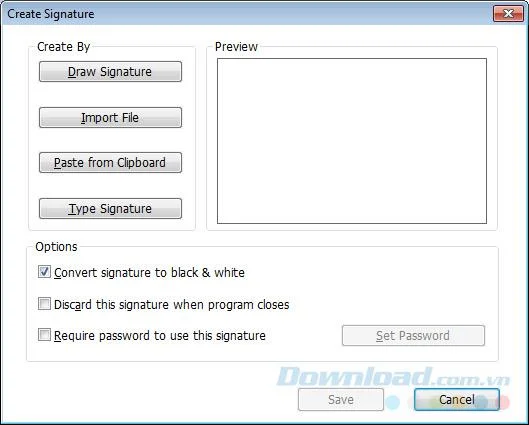
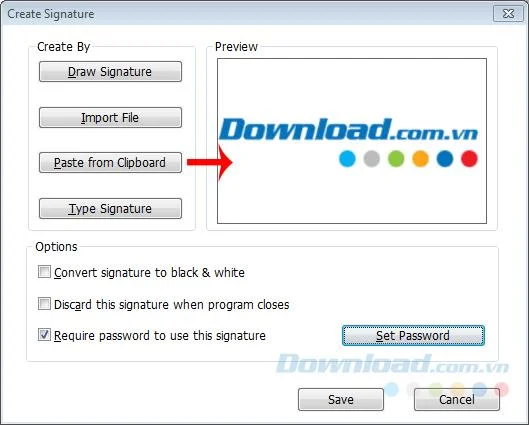
Step 3: A new interface appears, Foxit Reader provides users with 4 options to use to create new signatures for PDF files, including:
- Draw Signature : Draw a signature (using the mouse, create hand-drawn strokes).
- Import File : Insert file available in the computer.
- Paste from Clipboard : Use the screenshot as a signature (click on this and then press CTRL + V to paste the image into the adjacent Preview box).
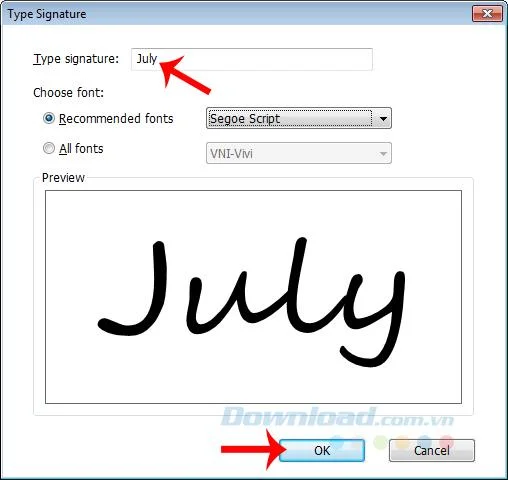
- Type Signature : Create a signature in different styles.

Specifically:
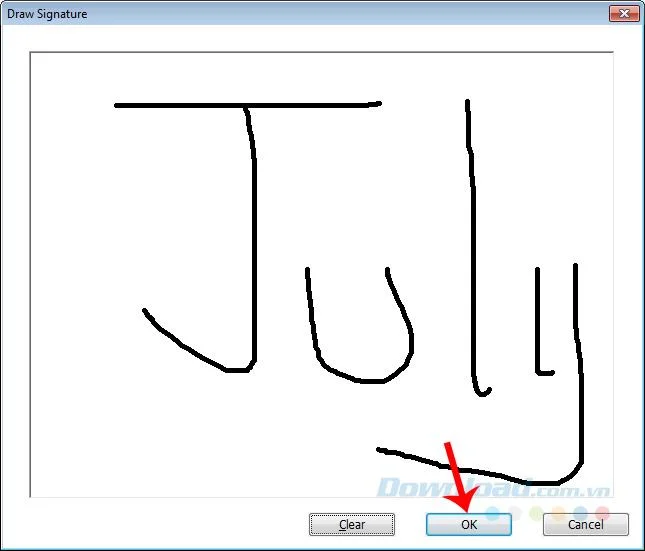
You can draw, write, do whatever you want with Draw Signature . Just left click, hold and drag to create an image, release your hand to finish, click OK to save and Clear to delete the signature just created.

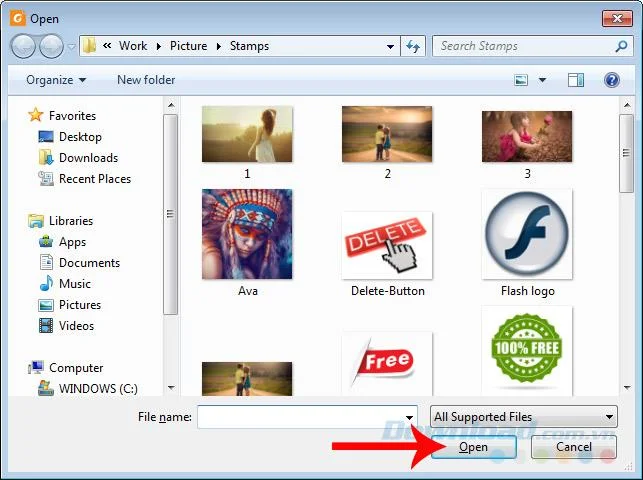
Whether it's photos, logos, backgrounds, etc. as long as they're available on your computer, you can use Import files to use as your digital signatures. Just left-click on the image and then Open is okay.

Press the screenshot key ( PrtSc SysRq ) to capture the image you want to use as a digital signature on PDF, then select Paste from Clipboard and CTRL + V to use, remember Save again.

Screen capture and paste here
Or simply, just select Type Signature , write the signature you want to use in the frame as shown below and select the font in Recommended fonts .

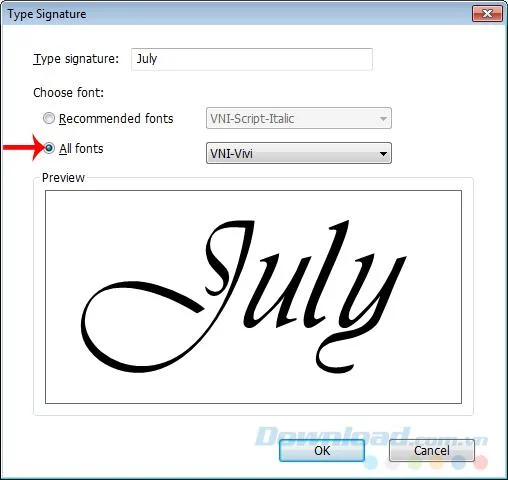
Or All fonts for Foxit Reader to design for you, OK to use immediately.

ATTENTION:
- Only one signature type can be created at a time.
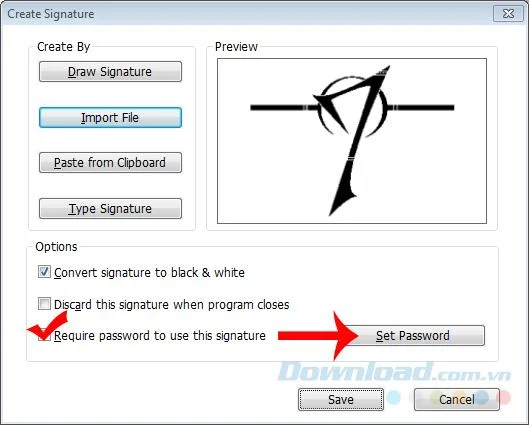
- Convert signature to black & white will change the signature color (photo) to black and white or return to the original image color.
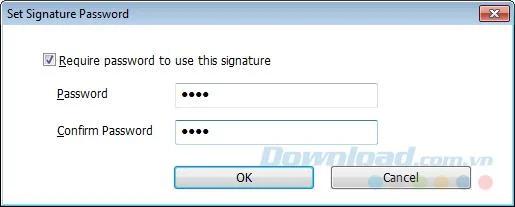
- Require password to use this signature helps create a password for the signature that no one can change.

Enter the password twice in the fields below and OK .

Set a password for your signature and then OK to save
How to use signatures on Foxit Reader, insert signatures into PDF files
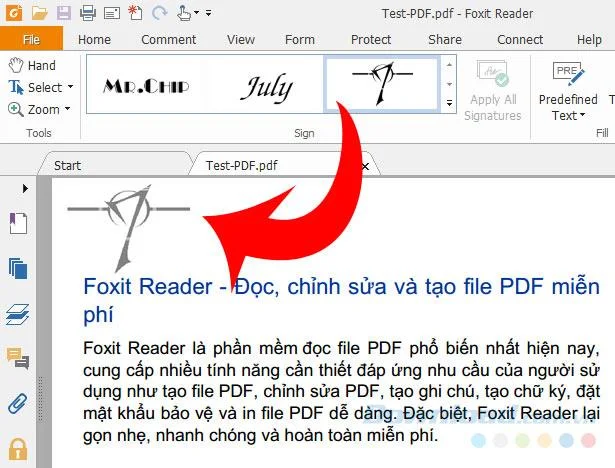
At the end of the signature creation process, you can use it immediately (the signature will automatically appear in the interface of the open editing page). Or if you already have a signature, you can click on the PDF Sign section and move it to the location you want to use, finishing step 1.

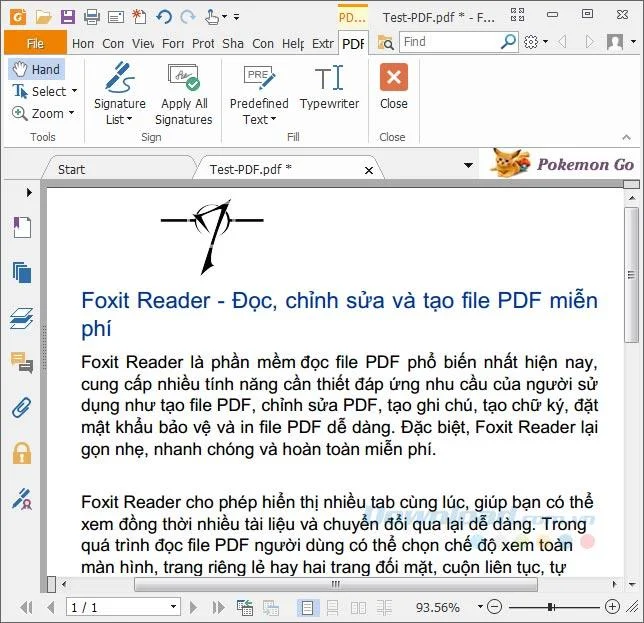
Step 2: After selecting the position where you want the signature, left-click outside the space to perform (the signature will be displayed darker).

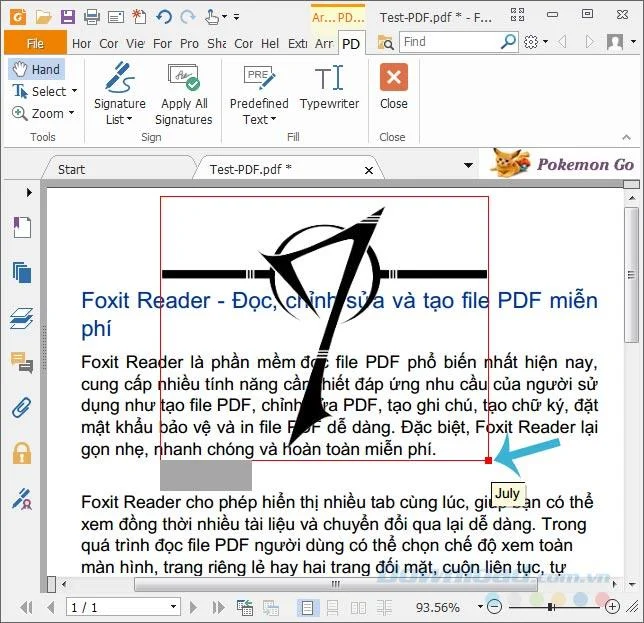
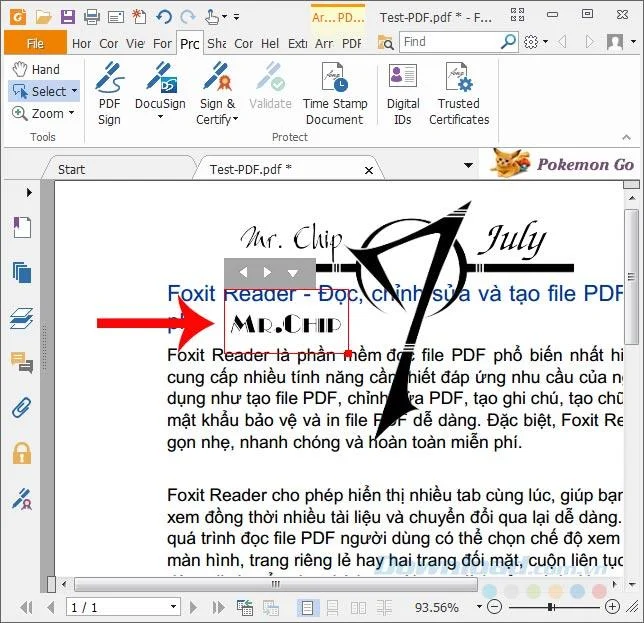
Step 3: To change the position or size of the signature, just left click on it to make a red frame appear. Later:
- Hold the left mouse button on it and move to change position.
- Or left click on the lower right corner, hold and drag to change the size.

Click, hold and drag the left mouse button to change the size and position of the signature
Step 4: You can create many different types of signatures for your own use or use them all at the same time, up to you. If you do not like, you can left-click on any signature to display a red frame, then press the Delete key on the keyboard to delete.

One of the important things to keep in mind is:
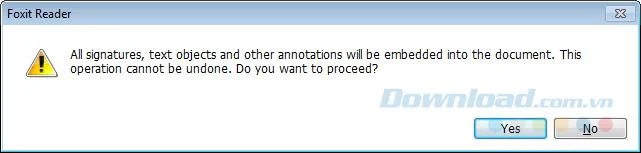
- Once you have located the signature, left-click on the Apply All Signatures section to insert the signature into the text.
- However, once you have clicked this item, you will no longer be able to move, change, resize or delete them.

A message appears, select Yes to agree and No to cancel.

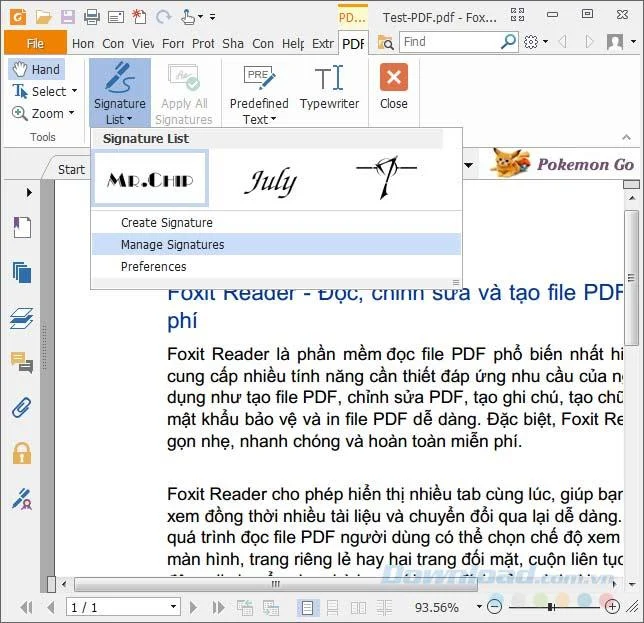
Step 5: You can review all the signatures you have created by clicking on Signature List .

List of signatures created on Foxit Reader
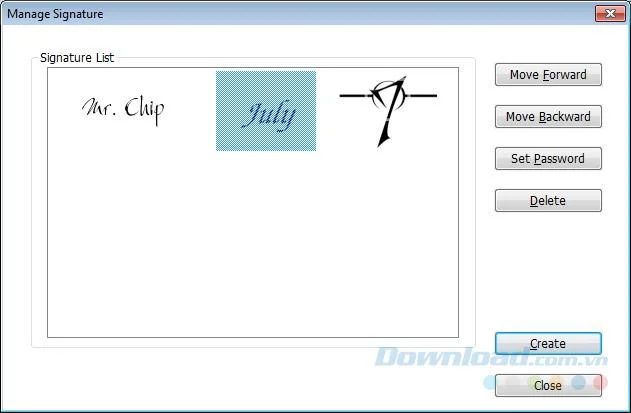
Here you can create new ( Create Signature ) or manage ( Manage Signatures ), change the location, set a password or delete a signature in this list (deleting the signature in the list will not lose the signature already. in addition to the text editor).

If you regularly use and work with PDF files in general and Foxit Reader in particular, you cannot ignore this article. This is also a very useful and useful PDF trick for users.
Clip creating and inserting signatures into PDF files in Foxit Reader: