Home
» PC Tips
»
How to Fix “No Boot Device Found Press Any Key to Reboot the Machine“ Error on Windows
How to Fix “No Boot Device Found Press Any Key to Reboot the Machine“ Error on Windows
When you turn on your Windows laptop or computer, do you see a black screen that says "No Boot Device Found Press Any Key to Reboot the Machine"? This issue primarily affects Dell PCs and laptops, but it can also occur on devices from other manufacturers. What causes the problem, and how can you fix it? We'll discuss that in this article.
1. Make sure the hard drive can be detected and plugged in properly
Since your device cannot access the storage drive containing the operating system, check to see if the Windows installation drive is properly inserted and available for access. Follow these steps to find out:
Hold the power button for a few seconds to turn off the device.
Restart your computer by pressing the power button and continuing to press F2 until your BIOS settings appear. (See our guide on how to enter the BIOS for the keys you need to press to access the BIOS on devices from manufacturers other than Dell.)
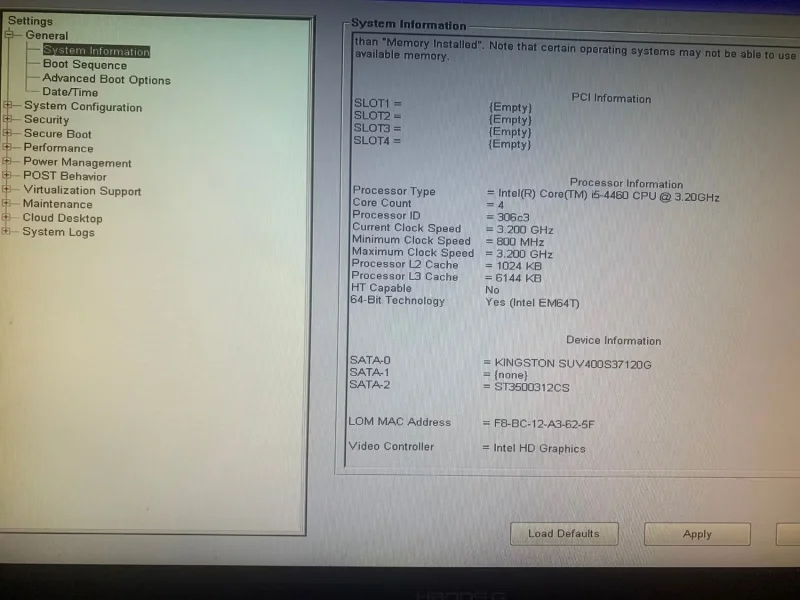
Go to System Information on the left.
Look for the Device Information section on the right and check if your primary hard drive is listed there.
Check device information in BIOS
If your computer has multiple drives installed, check that your system can access the drive containing the operating system, meaning the drive details will appear in the device information section.
If your device can access the storage drive where Windows is installed, you can proceed with the third fix. However, if the drive does not appear in the device information section, it is not detected. In that case, run the diagnostics process.
2. Run the diagnostic process
Diagnostics helps us identify the problem hardware on our device. Since the storage drive may be the problem in this situation, we recommend running diagnostics to confirm our suspicions. Follow these steps to run the diagnostics process:
1. Hold the power button for a few seconds to turn off the device.
2. Restart your computer by pressing the power button and keep pressing F12.
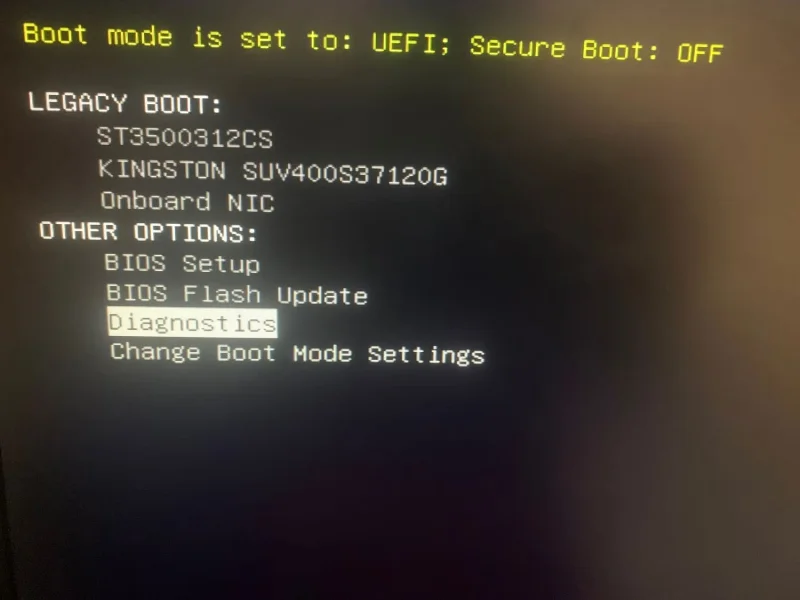
3. Select Diagnostics and press Enter.
Select the Diagnostics option in BIOS
4. Click Yes in the next window.
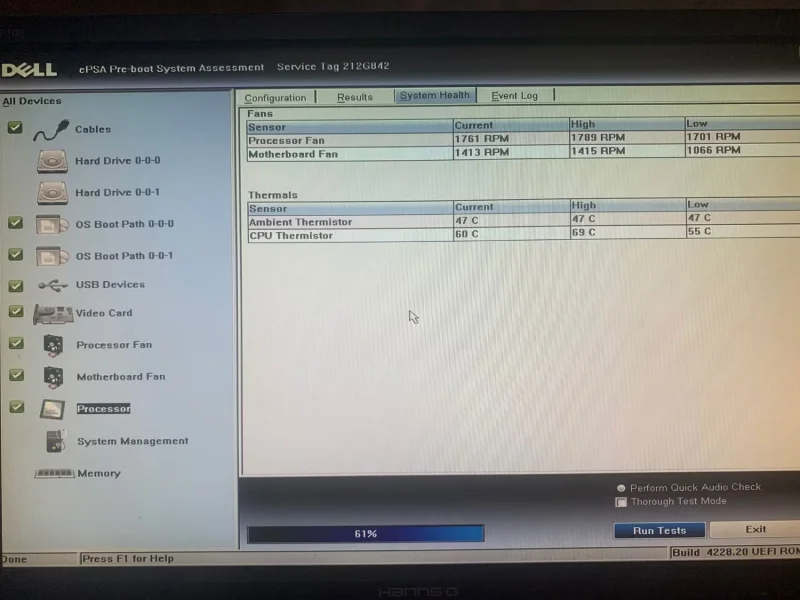
5. Once the diagnostic test is finished, it will tell you if there is a problem with your hard drive or any other component.
Run diagnostic tests in BIOS on Windows laptop
If the diagnostic test indicates that your storage drive is not plugged in properly, check to see if its cable is properly connected. If the drive is plugged in properly, disconnect and reconnect it as this may fix the problem.
If you can't find the problem or if the problem occurs on a laptop where you can't quickly check for hard drive connection issues, have a technician check your device.
3. Change the boot sequence
The boot order refers to the order in which your computer searches for bootable data. If your computer has multiple storage devices installed, placing the drive where your operating system is installed first will help your computer access bootable data faster. Doing so may fix the "No boot device found" error.
Follow these steps to change the boot sequence:
1. Hold the power button for a few seconds to turn off the device.
2. Restart your computer by pressing the power button and continuing to press F2 until your BIOS settings appear.
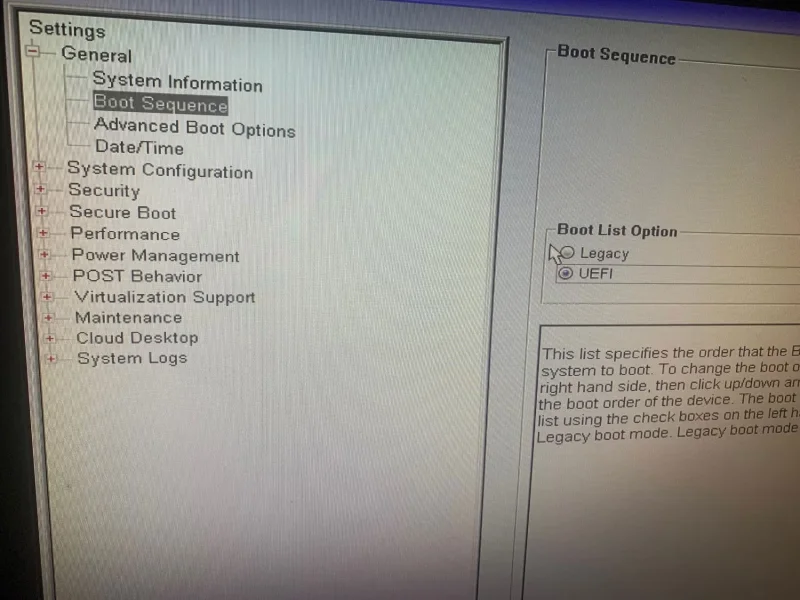
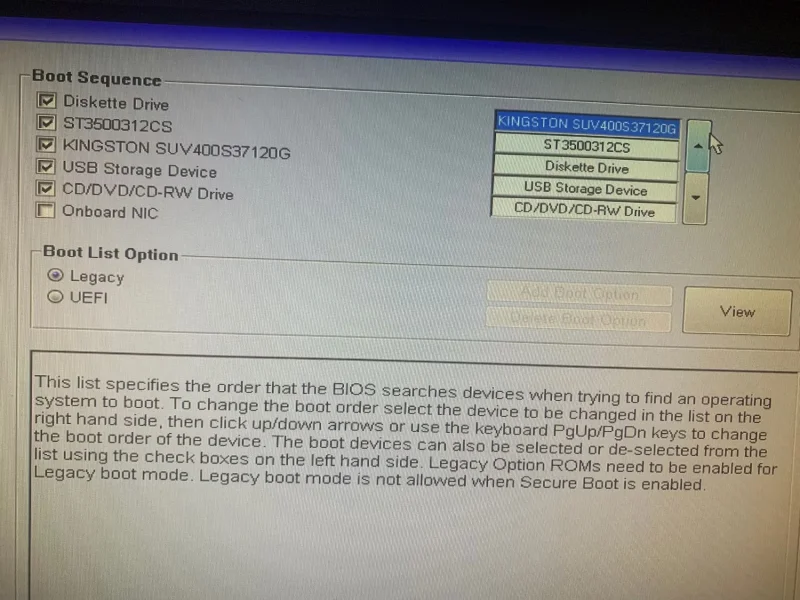
3. Go to Boot Sequence from the left menu.
4. Select Legacy in the Boot List Option if it is not already selected. Changing the boot options will display the Boot Sequence settings .
Change boot mode in BIOS
5. In Boot Sequence , make sure the box next to the storage device you are using to boot the operating system, most likely an HDD or SSD, is checked.
6. Then, locate the storage device containing the operating system in the chain. If it is not at the top, select it and click the up arrow to move it to the top.
Set the operating system drive to the top in the BIOS Boot Sequence
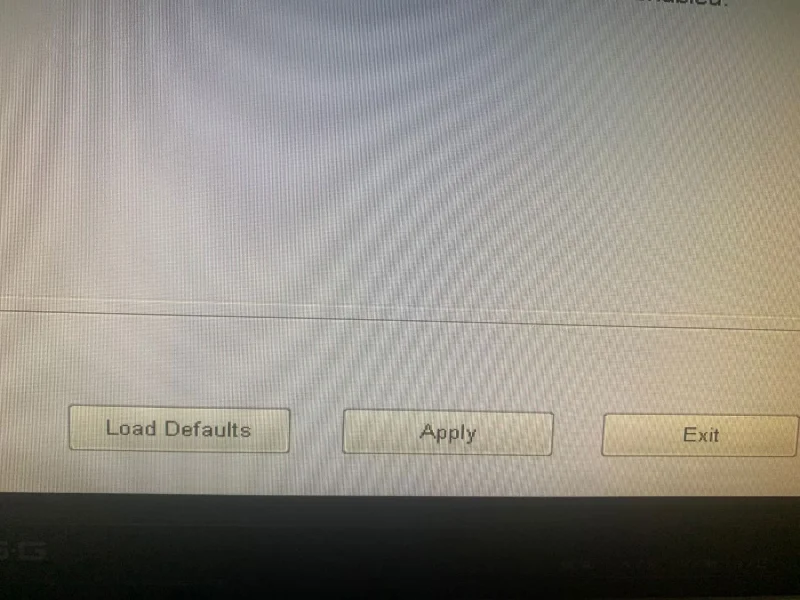
7. To save the changes, click Apply.
8. Then click Exit and your computer will restart.
Hopefully, changing the boot order will fix the problem. But what should you do if your BIOS is missing Legacy Boot or the boot option is grayed out? You can easily fix the grayed out Legacy Boot option in Windows. However, if it doesn’t work, try the next fix.
4. Reset settings to default
If the Legacy Boot option is not available in your BIOS, you can restore the default settings by following these steps:
1. Hold the power button for a few seconds to turn off the device.
2. Restart your computer by pressing the power button and continuing to press F2 until your BIOS settings appear.
3. Select General on the left.
4. Then click Load Defaults .
Click Load Defaults to reset BIOS settings
5. Click OK in the warning pop-up window.
6. Click Exit .
Warning : Performing this step will restore BIOS settings to default, so you may lose any customizations you've made.