How to record videos on PowerPoint is not difficult. Let's learn with WebTech360 how to record videos with PowerPoint !
Microsoft PowerPoint is not only a professional presentation slide creation software, but also supports you to record the screen. If you need to record your computer screen to illustrate a process and include it in your presentation, you can use the tools available in Microsoft PowerPoint. Here's how to record a video in the latest PowerPoint .
To record your screen with PowerPoint, your computer needs:
- Sound card, microphone and speaker for audio and video recording.
- Make sure the drive has enough free space to save the recording.
Video tutorial for recording screen video with PowerPoint
How to record a video on PowerPoint
- Record a video of your computer screen and embed it in PowerPoint
- Record a video of your computer screen into a separate file with PowerPoint
- Video start settings
- Trim video
- Set playback rules
- Apply frames to videos
Record a video of your computer screen and embed it in PowerPoint
Step 1 : Open the slide where you want to place the screen recording video.
Step 2 : On the Insert tab , select Screen Recording .

Step 3 : On the control panel, press Select Area ( Windows+Shift+A ) to select the video recording area or if you want to record the entire screen, press Windows+Shift+F .
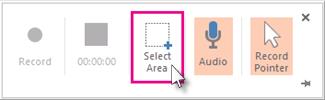
The minimum size area is 64x64 pixels.
When you see a thin crosshair pointer  , click and drag to select the area where you want to record the video. (If you recorded the screen during the current PowerPoint session, your previous area selection will appear on the screen. You can continue recording if that selection area works for you, or you can click go to the Select Area to start over.)
PowerPoint automatically records the sound and the mouse pointer. If you want to turn off the sound press Windows+Shift+U , turn off the cursor recording press Windows+Shift+O .
Step 4 : Click Record ( Windows+Shift+R ).
If you do not pin the console to the screen, it will slide to the top margin while you record. To show the Control Panel again, point the mouse pointer to the top of the screen.
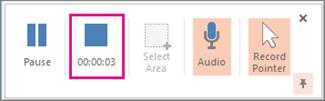
Step 5 : Control the video recording
- Click Pause to pause the recording (Windows+Shift+R).
- Click Record to continue recording (Windows+Shift+R).
- Click Stop to end the recording (Windows+Shift+Q) (shown below).
Step 6 : Once done, save the recording by going to File > Save . The video will be embedded in the selected slide.
To save the video as a separate file on your computer, right-click the video on the slide, select Save Media as . In the Save Media as dialog box , name the file, select a save location, and press Save .
How to record video on PowerPoint 2013
To use the screen recording feature in PowerPoint 2013, you need to install the February 16, 2015 update for this software.
1. Open the slide you want to record.
2. On the Insert tab , click Screen Recording .
3. On the Control Dock , click Select Area ( Windows key +Shift+A ). You can record videos in PowerPoint 2013 at the minimum size: 64x64 pixels. Icons  appear. Click & drag to select the area of the screen you want to record.
Tip: PowerPoint automatically records sound and mouse pointer, so by default, these options are on the control dock. To disable them, uncheck Audio ( Windows key +Shift+U ) and Record Pointer ( Windows key +Shift+O ).
4. If the screen recording has been completed during the current PowerPoint session, the previous priority area selection will appear on the screen. You can continue recording if the selection is right for you, or you can click Select Area to start over.
5. Click Record (Windows key + Shift + R).
6. Recording control keys:
- Click Pause to temporarily stop recording (Windows key + Shift + R).
- Click Record to continue recording (Windows key + Shift + R).
- Click Stop to end PowerPoint video recording (Windows key + Shift + Q).
When finished recording the PowerPoint screen, save the presentation: File > Save . That recording file will now be embedded in the slide you selected in step 1.
Record a video of your computer screen into a separate file with PowerPoint
Step 1 : Right-click the video frame, select Save Media as...
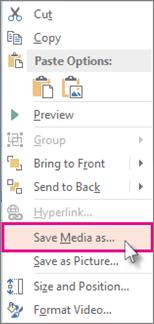
Step 2 : In the Save Media a s box . Name the file, choose a save location.
Step 3 : Click Save.
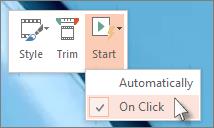
Video start settings
Right-click the video frame, click Start, and choose how you want the video to start in the slide: automatically when a slide appears or when you click.
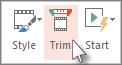
Trim video
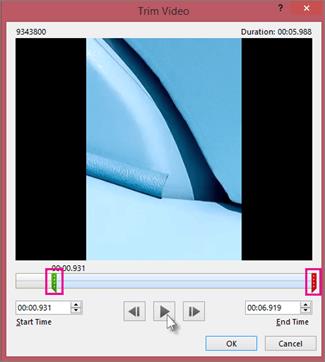
Step 1 : Right-click the video frame, and then click Trim .
Step 2 : To specify where you want to cut the scene in the video, in the Trim Video box , click Play .
Step 3 : When you reach the point you want to cut, click Pause
Tip : You use the Next Frame and Previous Frame buttonsto specify the exact time.
Step 4 : Do the following:
- Trim the beginning of the clip: Click the start point and drag it to where you want the video to start.
- Trim the end of the clip: Click the end point and drag it to where you want the video to end.
Cut video
Step 5 : Click OK .
Set playback rules
You can tell PowerPoint how to play a video in a presentation. To do this, right-click the video and select Start from the menu.
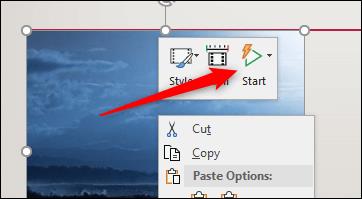
A sub-menu appears, giving you 3 playback options:
- In Click Sequence : The video will play in the order you selected in terms of the action sequence.
- Automatically : The video will play automatically when it appears.
- When Clicked On : The video will play when you click on it.
Click on the option you want.
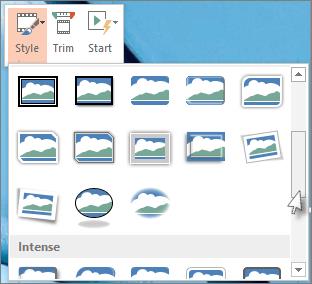
Apply frames to videos
Right-click the video frame, select Style . Choose the frame style you like.
Apply frames to videos


")


