Slide Master is a useful PowerPoint feature . Here's how to use Slide Master in Microsoft PowerPoint .
- Microsoft PowerPoint Online
- Microsoft PowerPoint
- Microsoft PowerPoint for iOS
- Microsoft PowerPoint for Android
When you choose a different theme in PowerPoint, it rearranges the content on your slide and adds shapes to the background. That's because each theme has built-in slide layouts and background graphics. You can edit these layouts using the Slide Master View feature. Learn how to use Slide Master, you can customize your entire slide show in just a few clicks.
How to use Slide Master in PowerPoint
- What is Slide Master in PowerPoint?
- Use the Slide Master viewer
- How to make changes on the whole slide
- Customize slide layouts in PowerPoint with Slide Master
- Customize existing slide layouts in PowerPoint
- Customize the text format in PowerPoint
- Create a new slide layout
- Rename a custom layout
- How to use custom layouts
- Video on how to use Slide Master in PowerPoint
What is Slide Master in PowerPoint?
Slide Master in PowerPoint is a special feature that allows you to quickly edit the slide and its layout in the presentation. Thanks to it, you can edit the entire slide in the presentation. You can also change each slide layout.
For example, you find a theme that you like but don't like some of its layout. You can use Slide Master to change the way the slide is displayed exactly as you want.
In the Slide Master viewer, the Slide Master tab will appear first on the Ribbon, but you can still access commands on the different tabs as usual.
Use the Slide Master viewer
Whether you're making a bunch of changes on your slides or just a few minor tweaks, Slide Master can help you create a professional and consistent presentation without much effort and effort. You can use Slide Master to see any changes in your presentation. Here are some of the most common changes:
- Modify backgrounds - Easily edit backgrounds for all slides at once.
- Rearrange placeholders - Save time arranging placeholders in PowerPoint.
- Customize text formatting - Support to change the text color on the entire slide at the same time.
- Create unique slide layouts - Create special slide layouts , including background images and placeholders.
Some general changes in the presentation, such as customizing fonts, theme colors - can be made quickly from the Design tab.
How to make changes on the whole slide
If you want to change something on all slides of your presentation, you can edit the Slide Master. In this example, the article will add the logo to each slide.
![Learn PowerPoint - Lesson 27: How to use Slide Master]()
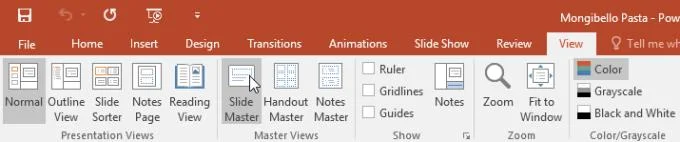
1. Select View > click Slide Master .
![Learn PowerPoint - Lesson 27: How to use Slide Master]()
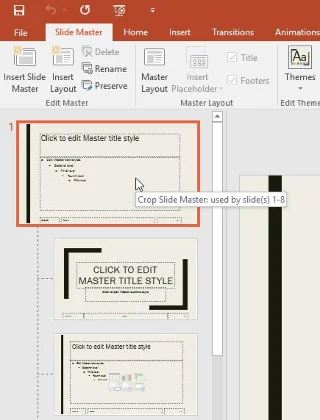
2. The presentation will switch to the Slide Master viewer and its tab will be selected on the Ribbon.
3. In the left panel, scroll up and select the first slide.
![Learn PowerPoint - Lesson 27: How to use Slide Master]()
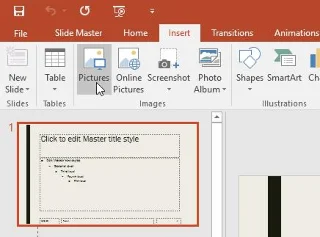
4. Make the desired changes. The article inserts the Mongibello logo.
![Learn PowerPoint - Lesson 27: How to use Slide Master]()
5. Move, resize or delete the objects on the slide you want. The article resizes the logo and moves it to the lower right corner.
![Learn PowerPoint - Lesson 27: How to use Slide Master]()
6. Once done, click the Close Master View command on the Slide Master tab .
![Learn PowerPoint - Lesson 27: How to use Slide Master]()
7. This change will appear on the entire slide of the presentation.
![Learn PowerPoint - Lesson 27: How to use Slide Master]()
Tip: You should review the presentation when using Slide Master to make changes to see how it affects each slide, so you can make the right tweaks more easily.
Customize slide layouts in PowerPoint with Slide Master
Customize existing slide layouts in PowerPoint
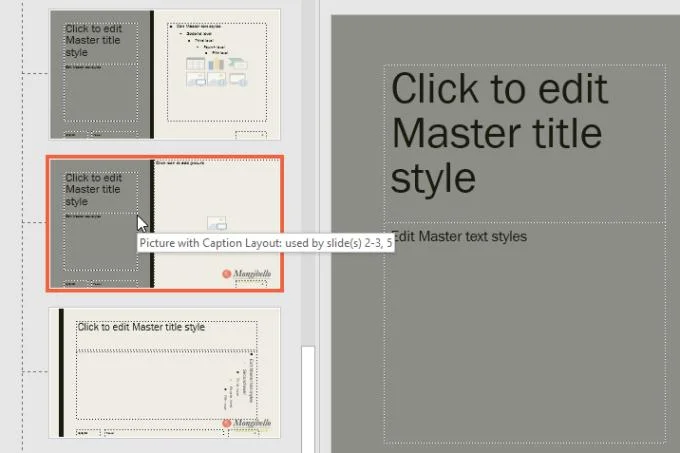
For example in this article the newly added logo is hidden behind the image in Picture with Caption Layout . We will customize this layout to make room for the logo.
1. Navigate to the Slide Master viewer.
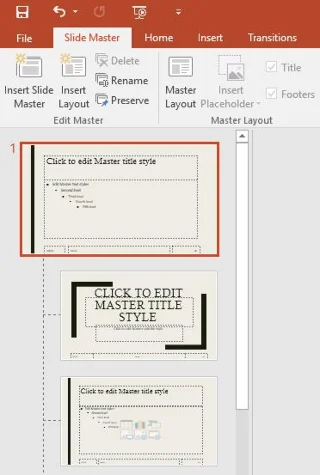
2. Locate and select the desired layout in the left panel. You can hover over each layout to see which slide is using that layout in the presentation.
![Learn PowerPoint - Lesson 27: How to use Slide Master]()
3. In some layouts, background graphics may be hidden. To show graphics, uncheck the box next to Hide Background Graphics .
![Learn PowerPoint - Lesson 27: How to use Slide Master]()
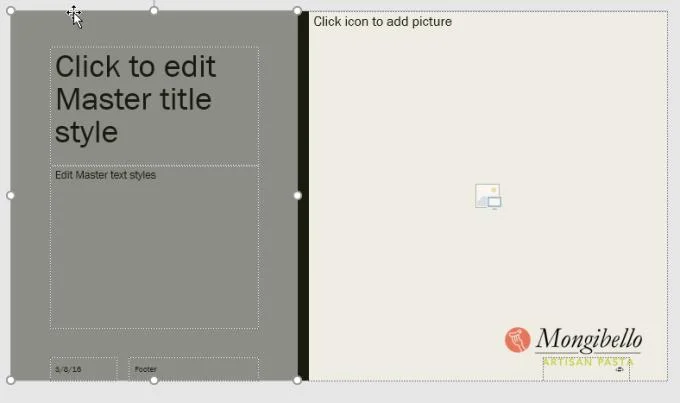
4. Add, move or delete any desired object. In this example, the article will remove the gray background image.
![Learn PowerPoint - Lesson 27: How to use Slide Master]()
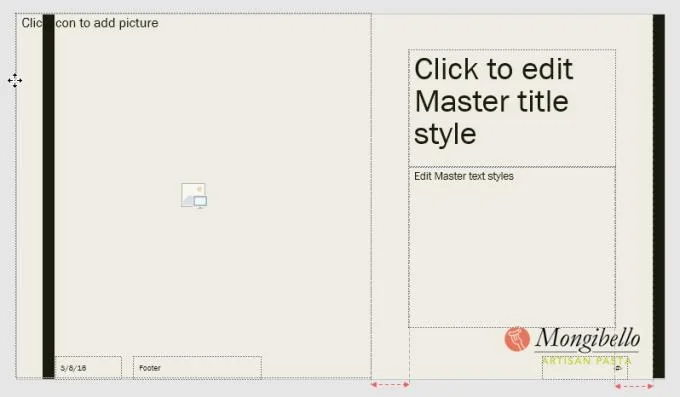
5. If you want to change the arrangement of the placeholders, you can move, resize, or select any of them. Here, move the text placeholder and the black bar to the right, the image placeholder to the left.
![Learn PowerPoint - Lesson 27: How to use Slide Master]()
6. Once done, click the Close Master View command on the Slide Master tab .
7. All slides using this layout will be updated.
![Learn PowerPoint - Lesson 27: How to use Slide Master]()
You can also move placeholders on the Slide Master. This action will move the placeholders on multiple slide layouts at once. However, some slide layouts can still be adjusted manually.
Customize the text format in PowerPoint
You can also customize the text format from Slide Master, including font, font size, color, and alignment. For example, if you want to change the font for each title placeholder in your presentation, you can edit the main title style on Slide Master.
![Learn PowerPoint - Lesson 27: How to use Slide Master]()
Each title field is connected to the main title style on the Slide Master. Take a look at the photo below to see the difference.
![Learn PowerPoint - Lesson 27: How to use Slide Master]()
Now look at those slides again after changing the title font.
![Learn PowerPoint - Lesson 27: How to use Slide Master]()
Instead of customizing each placeholder, you can change the font theme for the presentation. From the Slide Master tab , click Font in the Background group , and then select your favorite font.
Create a new slide layout
One of the most powerful features of Slide Master is the option to create new slide layouts. Here's how to add a unique, fun and easy slide layout to an existing theme. You can even use this feature to design a completely new theme as shown below.
To insert a new slide layout
Go to Slide Master tab > click Insert Layout .
A new slide layout will appear.
This layout will include the header and footer placeholders by default. Click the Title and Footer boxes in the Master Layout group to enable/disable placeholders.
You can now add background graphics, shapes, and photos to the slide layout. You can also move, adjust, and delete existing placeholders. This example removes the title placeholder in the lower right corner, and changes the text alignment to the right.
To add a new placeholder, click Insert Placeholder , then select the desired placeholder style. This example uses Picture.
Click & drag the placeholder on that slide.
Rename a custom layout
Once you've finished designing your custom layout, give it a unique name.
From the Slide Master tab, select the desired layout, and then click Rename .
Enter a name in the dialog box that appears, click Rename .
How to use custom layouts
If currently in the Slide Master tab, click Close Master View .
From the Home tab, you can insert a new slide with that custom layout or apply it to the current slide. Here, select Layout , then apply the new style to slide 6. That's it.
Save custom themes to use in other PowerPoint presentations
From the Slide Master tab, click Themes > select Save Current Theme from the drop-down menu.
If you are not already in the Slide Master tab, you can save the theme from the Design tab . Just click the drop-down arrow in the Themes group, and then select Save Current Theme .
Video on how to use Slide Master in PowerPoint