Set Gooroom Browser Isolation Through Your Organization’s Policy
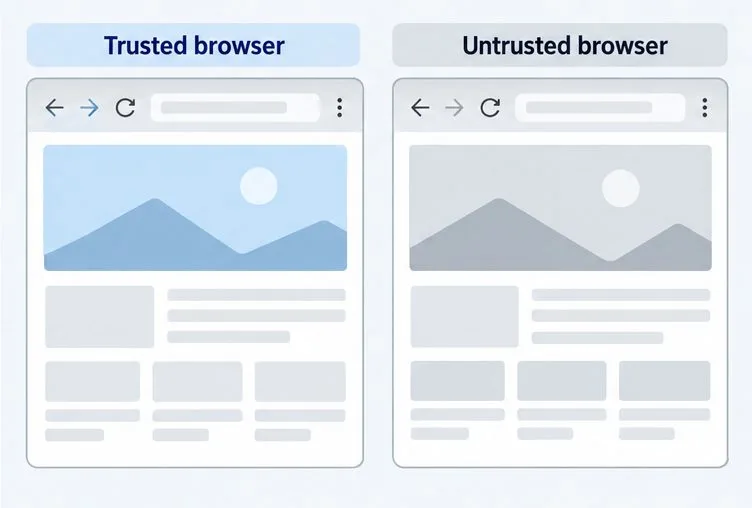
Learn how Gooroom separates trusted and untrusted browsing, what users can change, and how an administrator can safely update site policies.
Rotating the gaming screen, uploading gaming clips from BlueStacks to Youtube is the latest feature that this Android emulator has officially updated for its customers.
It is known that in this version of BlueStacks 4.110 , users experience a series of attractive and handy features, one of which is to record gaming videos on BlueStacks, then upload gaming videos from BlueStacks to Youtube to share. with other players.
Latest BlueStacks BlueStacks for Mac
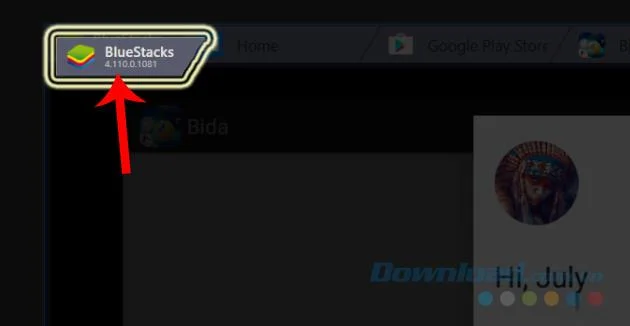
To use this feature, you must update BlueStacks to the latest version (4.110.0.1081).
There was a time when BlueStacks merged with Facebook and Twitch TV , allowing players to stream videos from BlueStacks to these social networks. However, not only the writer but also many other users feel that the quality of this service is not really good, not to mention the way it can sometimes be quite troublesome for many people.
A new replacement in this version, though not streaming video , but the Android BlueStacks emulator allows us to record the gaming screen (like when using computer screen recording software), then upload on Youtube.
Doing:
Step 1: You start BlueStacks and open the game you want to come back up (this game must be installed on BlueStacks).
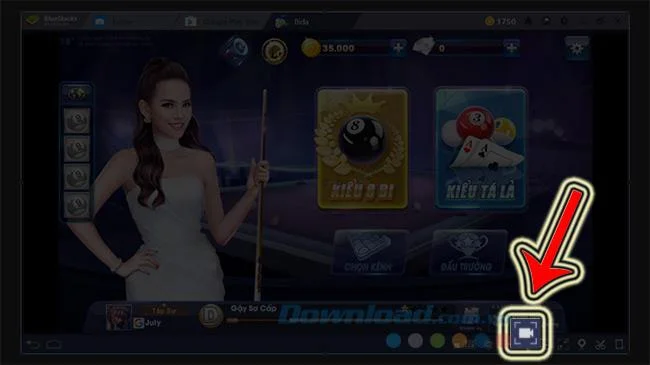
Step 2: At the game interface, you observe the bottom of the BlueStacks has a row of icons, hover over it to find the camera icon - Record Screen and then left click to select.
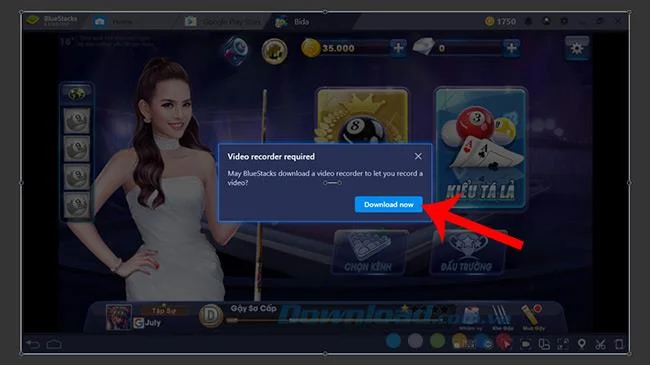
Step 3: During the first use, the emulator will require you to download a small support file, click Download Now to agree and continue.
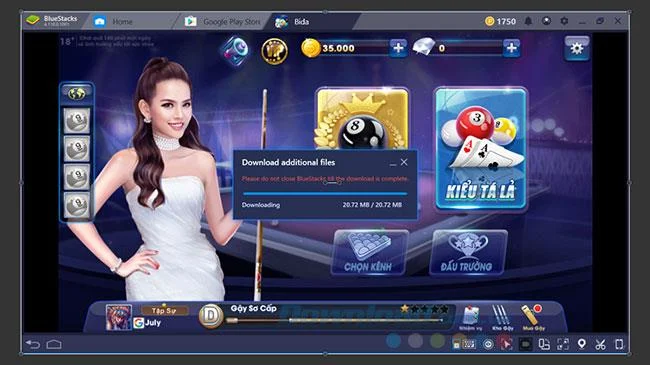
Notice, do not close this window when the process is in progress to avoid errors, moreover, this does not take too much time.
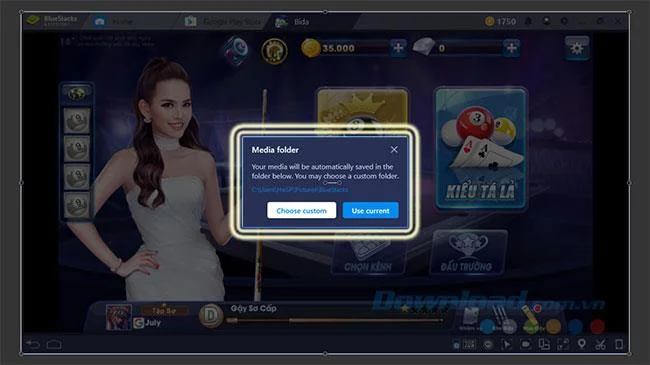
Step 4: The download is completed, immediately another window appears with two options. This is where you make the decision to save BlueStacks screen recording file, specifically:
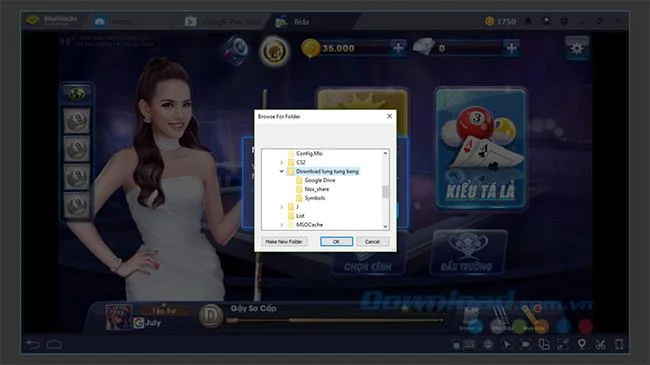
Depending on your computing habits or experience, you will choose a reasonable place. If using the default, the screen will close to continue, if you want to select, after clicking Choose custom, a small Windows window will appear as below.
Step 5: After the download is complete, go back to your gaming screen, you click once more on the Record Screen icon to start.
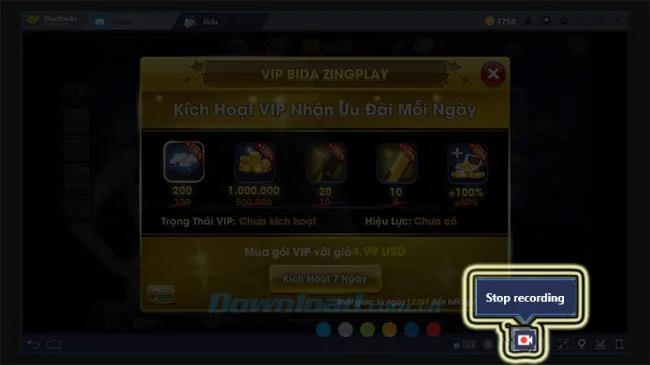
Step 6: To finish recording, click the Record Screen icon again (this time it was renamed Stop Recording ).
ATTENTION:
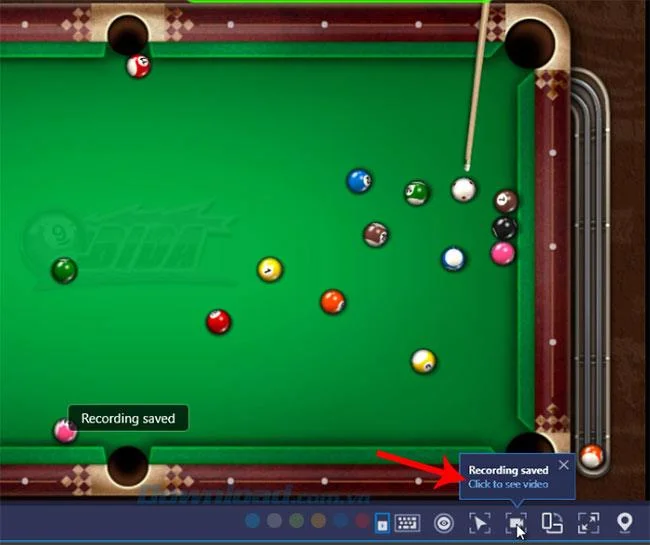
Step 1: After clicking Stop Recording, still at this location, you will see a small link named Click to see video - Click to review the video , click on this item to open the folder Contains video files.
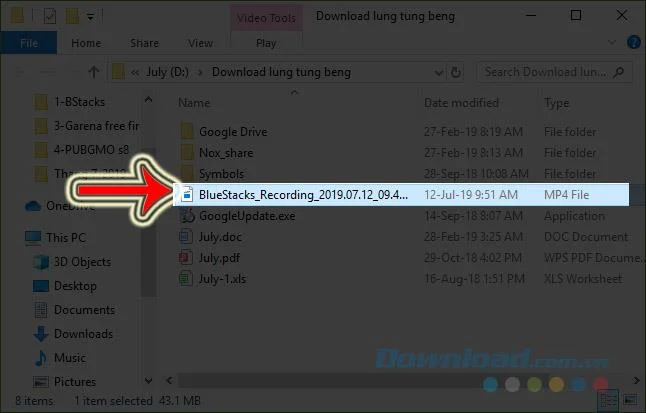
Step 2: A Windows window will appear, you will immediately see and recognize your file as BlueStacks_Recording * .mp4 .
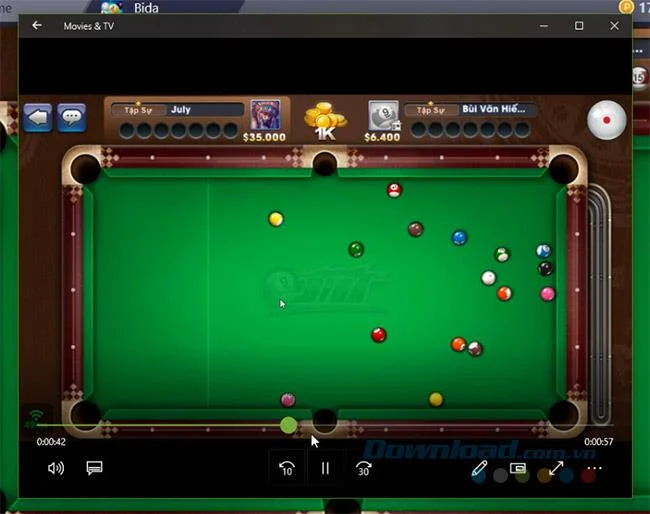
If desired, you can also double-click on the file to review it.
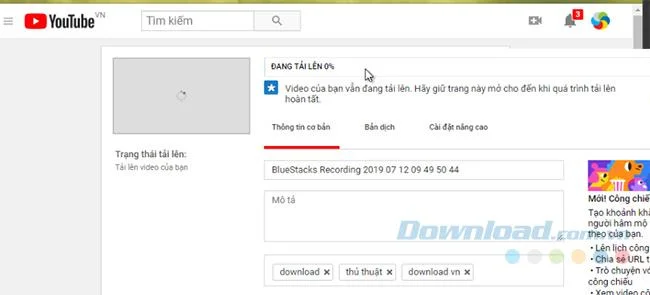
Step 3: At this time, if you want to share and post BlueStacks video on YouTube, you can do it normally, by:
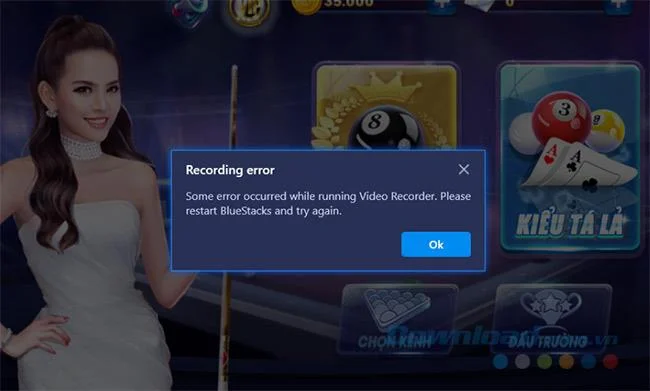
Another note, that is in some devices, the emulator when performing this screen recording feature for the first time, after downloading the support file, the emulator will report an error, unable to activate recording.
Now you just need to turn off this emulator completely, then restart it.
Learn how Gooroom separates trusted and untrusted browsing, what users can change, and how an administrator can safely update site policies.
Diagnose rotated, offset, or inconsistent touch input on a Harmonica OS tablet and choose a Linux calibration method that fits its session and driver.
Switch Gooroom’s desktop session to English, verify the locale, and identify when untranslated Korean labels need an app update instead.
Arrange Pardus XFCE as a familiar bottom taskbar with an app menu, pinned launchers, open-window buttons, and a system tray.
Check your Gooroom release and administrator rules, then follow the official Debian-based setup path for Flatpak or Snap without bypassing system controls.
Learn what Pardus Image Writer can do, how to prepare installation USB safely, and which tools fit custom live images or repeatable fleet deployments.
Install Pardus alongside Windows 11 by shrinking the Windows volume, using unallocated space, and preserving the existing EFI System Partition.
Identify the RTL8821CE, install Pardus-supported Realtek firmware, and verify the driver, Wi-Fi scan, and next troubleshooting step.
Use Pardus’s hardware-aware installer to enable the right NVIDIA driver, reboot safely, and verify the active kernel module.
Install the official Chrome package safely on Gooroom OS, check compatibility, preserve device controls, and verify browser policies before use.