Windows 10 itself has built-in tools for burning CDs / DVDs, so you can completely burn files to CD / DVD in the following 3 ways without software.
Typically, for those who specialize in video recording and video recording on CD / DVD, they often buy Cyberlink Power2Go burning software . It will provide advanced features including Blu-ray disc creation.
However, if you are not a professional, you do not need to waste money buying any software. Please follow the instructions of download.vn .
Method 1:
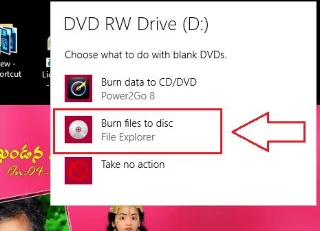
1. Insert a CD / DVD into the CD / DVD drive. Wait for a few seconds, you will see the message at the bottom right. Click on that message.
In case you missed the notification, remove the disc and reinstall it. Or skip this 1 and read how 2 we guide below.
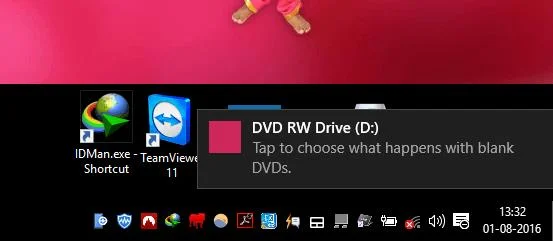
2. You will see a different message with some options (probably located in the upper right corner of the screen). Select Burn files to Disc .

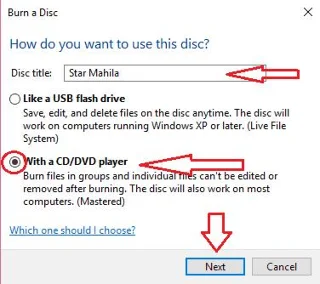
3. Burn a Disc window will appear. Write any title in the Disc Title field . Select With CD / DVD player and click Next .

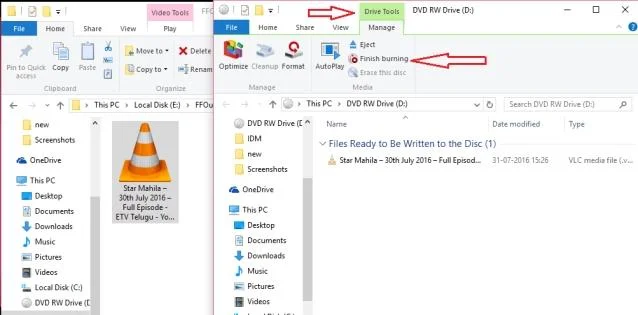
4.1 You will see a window to drag the file. Press Windows + E simultaneously , it will open another File explorer. Select the file you need. Drag that file into this Explorer window. You can drag multiple files at once or copy / paste any folder. You now have the files to write. Click Drive Tools , select Finish burning .

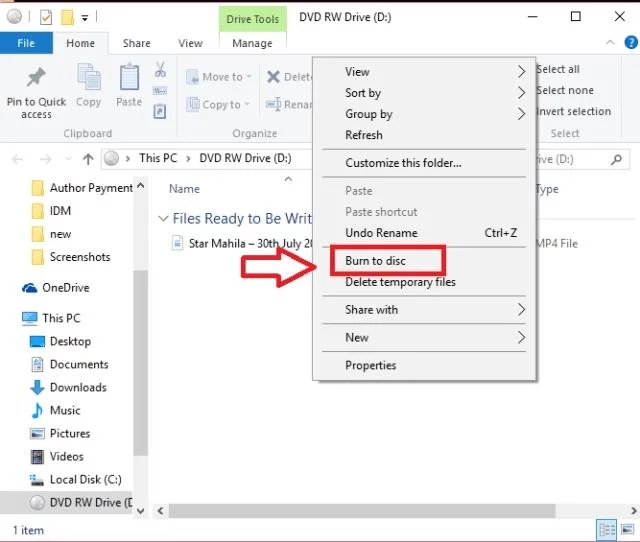
4.2 (Or) you can also right-click an empty area in the Explorer window, choose Burn to Disc .

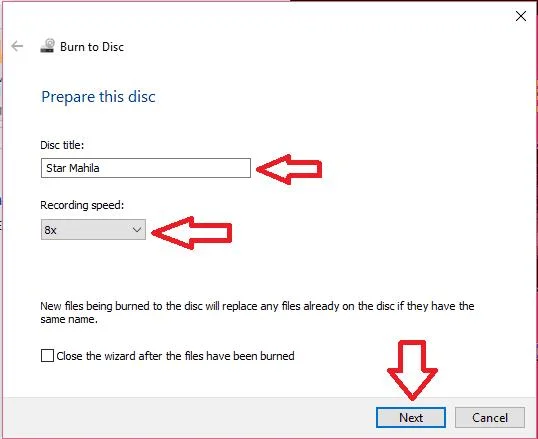
5. Users will see the Burn to Disc window . If you want, you can change the disc name and writing speed. If not, just leave it then and select Next .

The CD / DVD burning process starts. Wait for it to complete and your disc will be automatically ejected from the drive.
Remember, if your file format does not match the DVD player, your file may not be playable. So please change the file format to match the DVD player.
Method 2:
If you miss the message after you insert the disc, do the following:
1. Insert the CD / DVD into the CD / DVD drive.

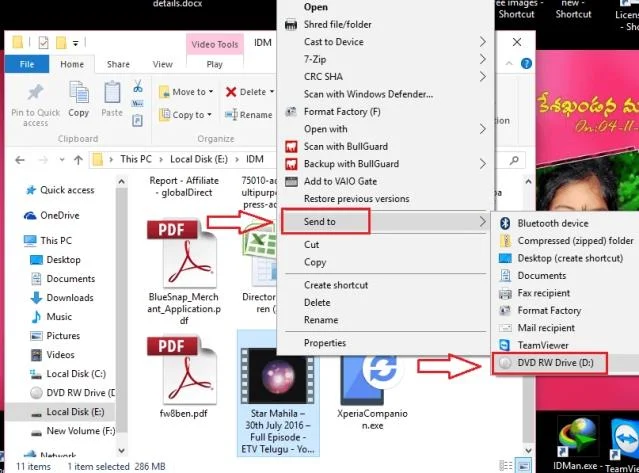
2. Open the file to be recorded, right-click and put the mouse on the Send to option . Then select DVD RW drive . If you want to save multiple files, put them all in one folder or hold down the Shift key while selecting multiple files.
After that, the user will see the Burn a Disc window . Continue to follow steps 3 through 5 as in step 1.
Method 3:
You can also burn DVDs using Windows Media Player in Windows 10.
1. Insert the CD / DVD into the computer drive.
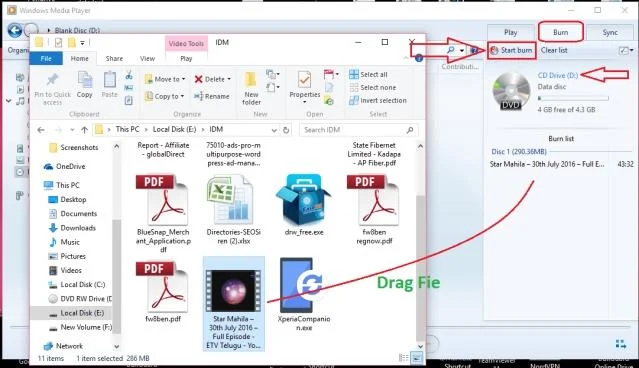
2. Open Windows Media Player. Select Burn at the top right. If you don't see your disc, just click the CD Drive option , it will show the disc. Press Windows + E to open a new File explorer window. Select the file and drag it to the burning list. Click Start burn .

Burn a Disc window appears and the user continues to follow steps 3 through 5 as in way 1. Complete the recording process, the disc is automatically ejected from the drive.
Conclusion : If you only burn DVDs to serve your personal needs, entertainment or hobby, you do not need any software, because Windows 10 can do this very well. But if you are a professional and career-oriented user who needs more effects and features, consider buying a high-end burning software .