Home
» How to
»
Change the location to save downloaded data of Internet Download Manager
Change the location to save downloaded data of Internet Download Manager
Video Change the location to save downloaded data of Internet Download Manager
During the installation of Internet Download Manager (IDM), the computer will default to its download location in the C: \ drive (operating system drive). If you regularly download games, software or applications from the network, over time, this user's drive will be occupied and make the computer run slower, operate less power, not to mention problems. secure with data of this type.
For anyone who uses a computer knows the "unwritten" rule, that is, never install software or leave data in the operating system drive, Internet Download Manager is no exception, though this is really Download software is extremely good support for download acceleration.
However, if you do not interfere and only install by default, the software will automatically place its storage folder in the C: \ drive itself and the downloaded data will make the computer slower and more sluggish.
Change the archive folder of Internet Download Manager IDM
The following article will guide you how to change the location to save files on IDM to be able to reduce the load on the system drive and is also a useful IDM trick.
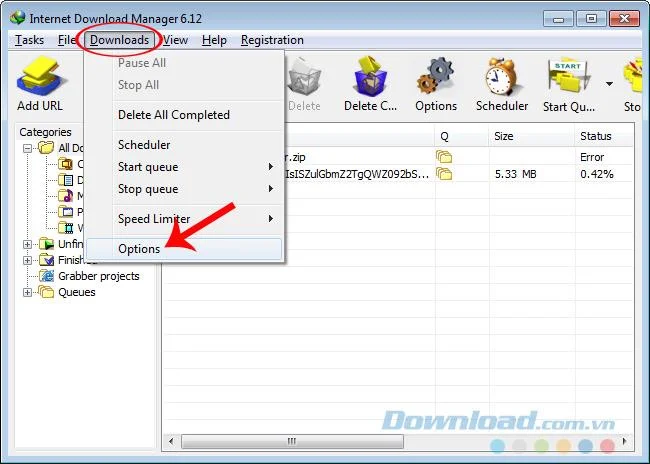
Step1: From the main interface of Internet Download Manager, left click on the Downloads tab , select Options .
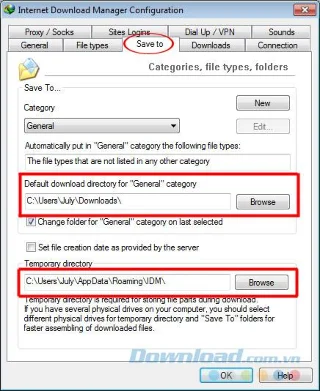
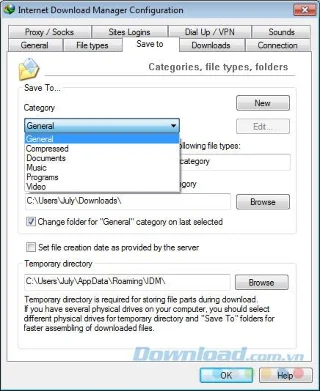
Step 2: The Internet Download Manager Configuration window appears, click Save to . Here you can see that the Default download directory for "General" category is the default file download location of Internet Download Manager.
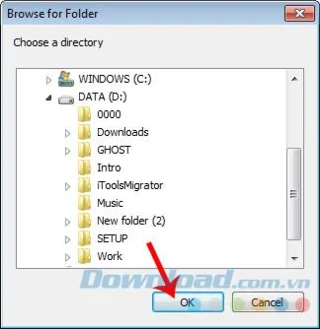
Step 3: Click Browse to select a new location for this software to store the downloaded data.
Find a new save location for IDM
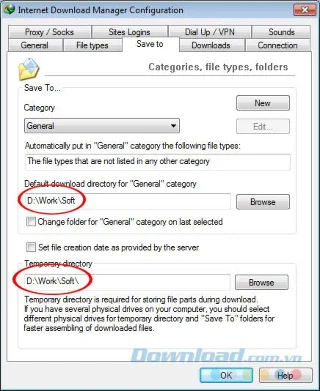
It is best to select both the Default download directory for "General" category and the Temporary directory with the same path and directory. The reason is that to avoid having to download the data to the Temporary folder, the computer will have to copy the data file to the Default Download folder again, causing the hard drive to become fragmented, reducing the efficiency and performance. Use. Set up click OK to confirm.
In addition to customizing the file location of Internet Download Manager (IDM), users can also change or add more categories as they wish.
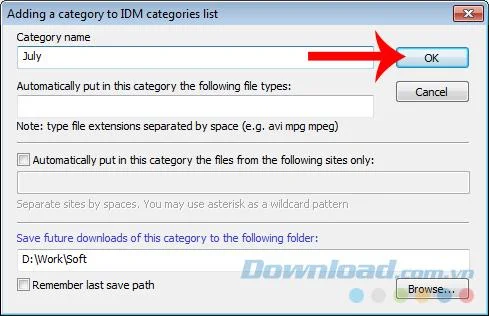
Left-click on Category and select another category or click on New to add and name an arbitrary category.
Add new Category to the list
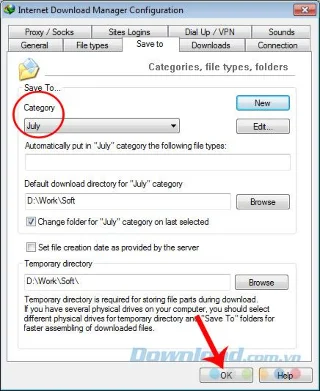
The new item will automatically appear in the Category .
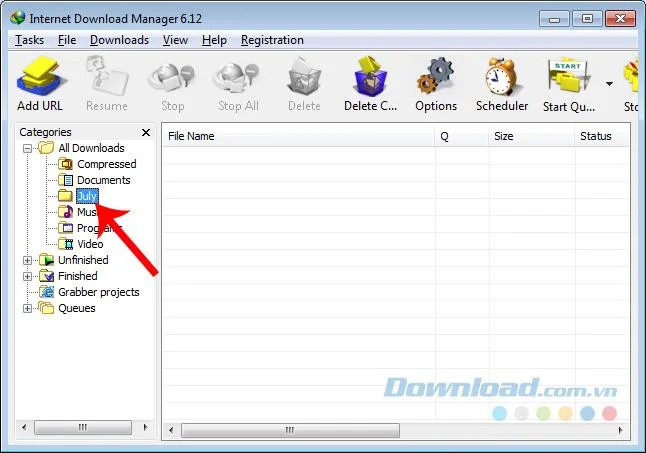
If you return to the main interface of the download manager Internet Download Manager (IDM), you will see this newly added item as shown below.
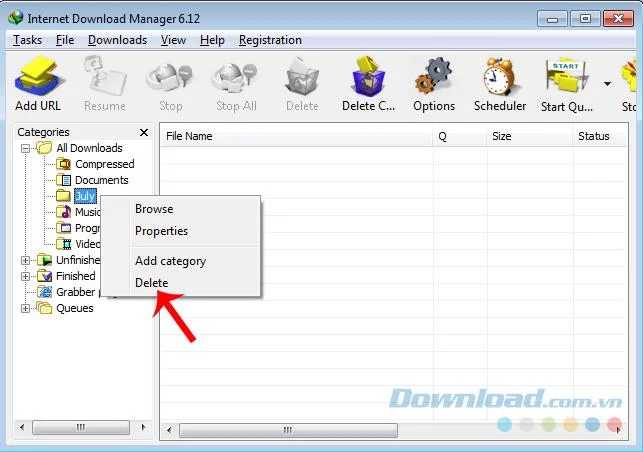
If you do not need to, can right-click on the item and select Delete .
Delete Category has been added
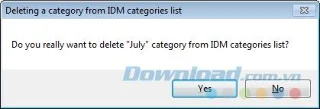
Select Yes in the following message to confirm deletion or No to cancel.
The above is a quick guide for users to change the download location themselves on Internet Download Manager (IDM). Not required and can be changed at will, we can choose any folder, where, to store our data.