Have you been facing the error Audio Renderer Error – Please Restart Your Computer recently? You are not alone. Many Windows users report encountering this error while trying to watch YouTube videos, and it doesn't seem to be restricted to any specific version of Windows.
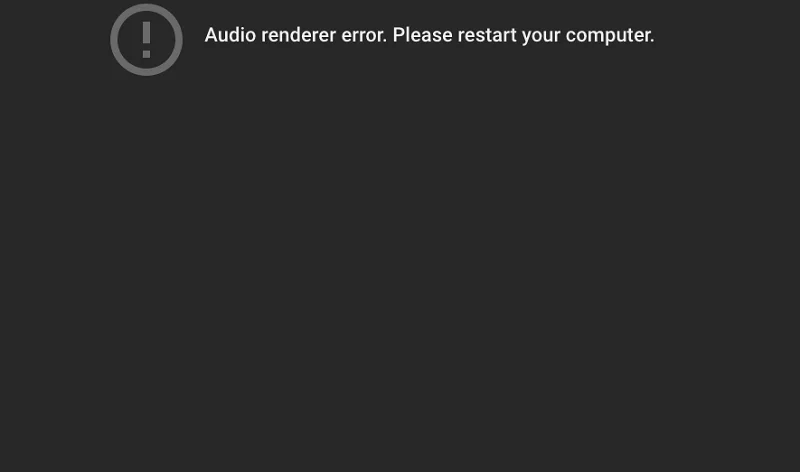
This issue can arise regardless of the browser being used—whether it's Mozilla Firefox, Opera, Edge, Chrome, or others. Users have expressed frustration with this persistent problem, as it disrupts their ability to enjoy multimedia content, including iTunes and other audio players.
Contents
- What is causing the Audio Renderer Error ‘Please Restart Your Computer’ error?
- Method 1: Unplug/Plug Headphones
- Method 2: Restarting Your Computer
- Method 3: Running the Audio Troubleshooter
- Method 4: Disabling and Re-enabling the Audio Driver
- Method 5: Rolling Back/Uninstall the Audio Driver
- Method 6: Setting the Same Sample Rate for Windows Sound Driver and ASIO Driver
- Method 7: Update BIOS (only confirmed on Dell computers)
- Conclusion
What is causing the Audio Renderer Error ‘Please Restart Your Computer’ error?
Through extensive research and user reports, we have identified several potential causes for this frustrating error:
| Cause |
Description |
| Audio Driver Glitch |
A bug in the motherboard or a glitch in the audio driver can trigger this error. Common fixes include restarting the computer or simply unplugging and replugging the headphones. |
| Driver Conflicts |
Issues may arise when both Windows Sound driver and ASIO driver are used concurrently on different sound frequencies. Synchronizing these settings may be effective. |
| Bugged BIOS Version |
Limited to Dell users, a software update may introduce bugs causing the error, which can typically be fixed by updating the BIOS. |
The above causes could lead to the Audio Renderer Error. We are here to provide solutions to resolve this problem. Follow these methods closely, and you should be able to fix the issue.
Method 1: Unplug/Plug Headphones
This simple solution has been effective for several users. Just unplug your headphones and replug them. This method applies to both jack and USB headphones. However, remember this is a temporary fix.
Method 2: Restarting Your Computer
As the error message suggests, restarting your device might help. But be warned; this often doesn't provide a long-term solution as the error frequently reappears.
Method 3: Running the Audio Troubleshooter
The built-in audio troubleshooter can assist in diagnosing and remedying audio issues. Here’s how to run it:
- Press Windows Key + R to open the Run dialog box.
- Type
ms-settings:troubleshoot and press Enter.
- Under the "Get up and running" section, select "Playing Audio" and click "Run the Troubleshooter."
- Choose your audio device and follow the prompts to fix potential issues.
- Restart your computer afterward and verify if the issue persists.
Method 4: Disabling and Re-enabling the Audio Driver
This solution can be performed without restarting your PC:
- Open the Run dialog with Windows Key + R, type
devmgmt.msc, and press Enter.
- Expand the "Sound, video, and game controllers" section.
- Right-click on your audio adapter and select "Disable." Wait a few minutes, then re-enable it.
- Check if the error resolves.
Method 5: Rolling Back/Uninstall the Audio Driver
If software bugs are present, rolling back your audio driver may help:
- Open Device Manager (as described above).
- Locate your audio adapter, right-click it, and select "Properties."
- In the Driver tab, choose "Roll Back Driver" or "Uninstall Device."
- Restart your computer to apply changes.
Method 6: Setting the Same Sample Rate for Windows Sound Driver and ASIO Driver
If using both drivers, ensure they’re set to the same sample rate:
- Press Windows Key + R, type
mmsys.cpl to access Sound Settings.
- Under the Playback tab, select your audio device and click "Configure."
- Change the default format to 16 bit (or your preferred setting) in the Advanced tab.
- In ASIO settings, align the sample rate to match the Windows Sound Driver.
- Restart your computer.
Method 7: Update BIOS (only confirmed on Dell computers)
Updating BIOS can resolve the issue for Dell users:
Please proceed with caution, as this method is not straightforward. Seek professional help or follow manufacturer specifics to update your BIOS.
Conclusion
We hope this article proves beneficial in resolving the Audio Renderer Error: Please Restart Your Computer. Implement these methods and enhance your audio experience without interruptions.










Botanist Dan -
Thanks a lot! I was worried I would lose my audio for good. A simple restart solved my issues. Keep up the great work!
Jess 456 -
Came here looking for help and found exactly what I needed. Restarting the PC solved the audio renderer issue immediately!
Sunny West -
Every time I restart, I feel relieved but then the error keeps coming back! Is it possible to make this permanent
Hannah Green -
Such a simple fix, but so effective! I was pulling my hair out over this audio renderer issue. Big props to whoever figured this out!
James Knight -
I’ve noticed this happens more with certain applications. Anyone else experienced that? I'm curious if there's a correlation
Anna Lee -
Is it just me, or does the audio renderer error seem to pop up at the worst possible times? I was in the middle of a meeting! Thanks for the restart tip!
Kathy Sweets -
Has anyone tried updating their audio drivers after encountering this? I wonder if that would help prevent future occurrences
Ringo -
Every time I restart, the sound works temporarily, then the error shows up again. Are there any permanent fixes out there
Nick 42 -
I’ve been having issues on and off for weeks! Restarting sometimes resolves it but can be inconsistent. Anyone else have this experience
Tina G. -
Occasionally the audio renderer issue might be tied to specific applications. Has anyone dealt with that? Would love to discuss
Cat Lover 123 -
LOL, I thought I was going to have to buy new speakers! So glad I found this post, restarting worked for me
Amy Nova -
Thanks for providing this clear solution! I pressed so many buttons before I found this method; sometimes the simplest fix is the best
Mike Taylor -
Anyone else experiencing this issue every time they update Windows 10? It's super annoying. Would love to know if there are other fixes
Linda Williams -
Hah! I can’t believe I spent hours trying to fix this when all I needed was a restart. Thank you for posting this solution
John Smith -
Wow, I was really struggling with this Audio Renderer Error! Restarting my computer worked like a charm. Thank you for sharing this solution!
Mark H. -
Great tip! Sometimes the most obvious solutions are the ones we overlook. I appreciate you shedding light on this
Hank T -
I had no idea a restart would help! I had almost resigned to the fact that I needed new audio hardware. Thank you for posting this!
Charlie’s Mom -
Wow, I didn’t realize this was such a common error! Glad to know I'm not alone in this. Thanks for the help
Agent Tom -
I had a similar issue and, like you, restarting helped! I'm just glad it's not my hardware failing. Thank you for sharing!
David 804 -
This post was a lifesaver! Encountered the error while gaming; a quick restart and I was back in action
Phoebe Rose -
Letting my frustration out here - it’s infuriating when the audio randomly cuts. Restarting seems to work for now; fingers crossed!
Grace T. -
Funny how a simple restart can solve such a pain! I wish I found this article earlier. Thanks for sharing
Kira 22 -
Can anyone suggest alternative solutions if the restart doesn't work? It’d help a lot for people dealing with persistent errors
Alexandra C. -
If only every tech issue could be resolved with a restart! This was super helpful. Thanks
Liam Tech -
Great post! I was about to send my laptop for repairs, and this saved me a lot of time and money!
Pet Cat -
Just wanted to say, after the restart my sound is not just back - it’s even better! Maybe my computer needed a little wake-up call
Emily Johnson -
This is such a common problem, and I appreciate you posting the solution! I thought I had to reinstall my audio drivers, but restarting did the trick
Sarah O’Connor -
Just wanted to add that if the problem persists, check your sound settings as well. Sometimes, switching the device helps avoid the Audio Renderer Error
Lily K -
One piece of advice: always ensure your audio drivers are up to date to minimize these kinds of errors! Thanks for the post
David Games -
Restarting worked a couple of times, but the error still returns. What else can I do? I appreciate any further advice