Mail Merge is like one of those old friends you haven't contacted in years. Always underestimated and ignored, until the day you desperately need it.
You just don't realize its potential until you are tasked with managing a few hundred invitations. Maybe, they are wedding invitations or maybe a bunch of address labels and name badges. Don't worry, you can send a large amount of personalized mail with Microsoft Outlook 2016 in just a few minutes and with a few clicks. The following article will guide you to do that.
When should you use Mail Merge?
Mail Merge is used when you want to create multiple documents that are essentially the same but each document contains its own details. The emails have the same format and content as well as graphics if any. For example, invitations have all the same content except for names, addresses ...
Unlike sending mail to a group of people, mail merge makes each recipient the unique recipient.
Mail Merge feature uses 2 parts:
- The main document (here: Microsoft Word) where you write the content of the email.
- The data source changes (here: Microsoft Outlook Contacts) is usually the address and name of the recipient.
These two parts are "merged". With Outlook as part of the Microsoft Office suite, you can use this feature to send mail to multiple people, each mail personalized for a separate contact.
Microsoft Office allows you to use different data sources for address details, for example, you can use Excel spreadsheets or even an Access database. Here, you will use the Outlook contacts to send email.
Prepare contacts for Mail Merge
You perform the following steps after launching Outlook:
1. Open People to display your contact list.
Select the contacts ( Ctrl + Click ) you want to include in your personalized email list. To easily manage a large list, use the Sort option available (click the down arrow next to All ). You can sort by category ( sort by Categories ) in the same drop-down menu.
Note: Mail Merge does not work with distribution lists.
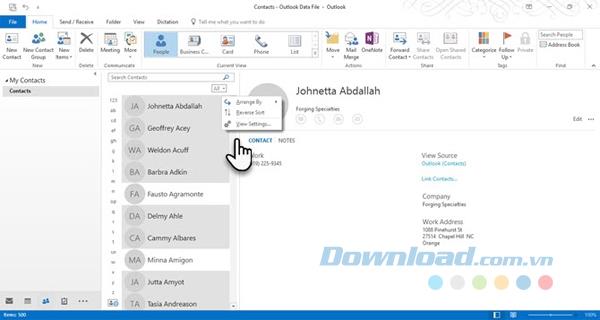
2. From the Ribbon , choose Mail Merge> Hone> Actions Group .

3. In the Mail Merge Contacts screen , select Only selected contacts if a personalized email is sent for the selected contact. Under Merge option , choose the following parameters:
- Document type : Form Letters.
- Merge to : Email
- Message Subject Line : The subject line is unchanged for all emails. Therefore, you select This Will Get Your Attention .
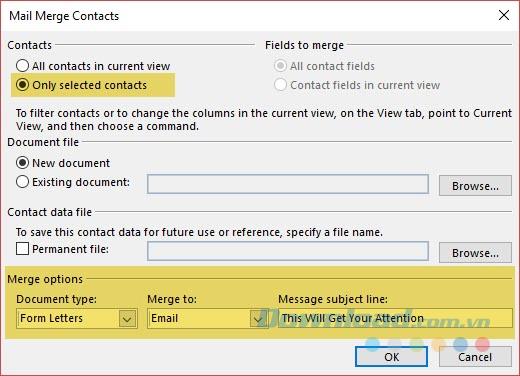
4. Click OK and then Microsoft Word will launch for you to compose your personal message.
Compose personalized messages in Microsoft Word
On the Mailings tab on the Ribbon , select the Greeting Line to start the message with the greeting lines.

As you can see here, the dialog box has already been filled in first. This is just a placeholder for the name from your contact list. Right below, you can check a preview of the names from your list. You can customize the items with the options given here.
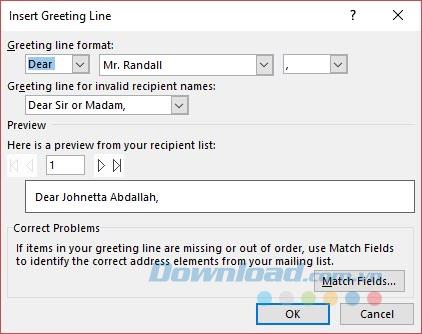
Note that the Merge field comes from the column headers in your mailing list. So, if there is a mismatch, use Match Fields to ensure that the merge remains accurate. If the field you want to indicate Not Matched , click the drop-down list for that field and select the column name that matches that column in your list.
When you click OK , a placeholder field for the greeting line is displayed in the Word document. You may enter additional information for the document with additional fields.
Click on Insert Merge Field . This data should be displayed in your original data source which in this case is contact information in Outlook.
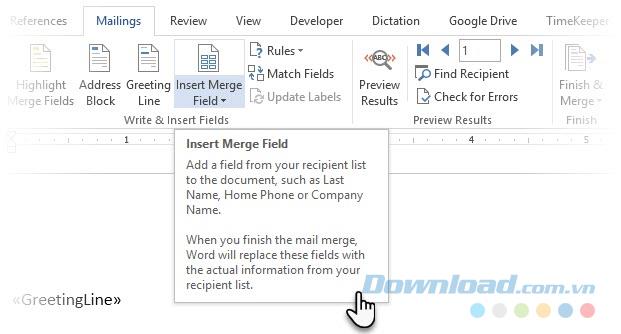
To format the greeting line the way you want it, highlight the entire field, including the trailing signs. Go to the Home tab and use Font settings . Also, set Line Spacing to ensure that the line spacing matches the distance in the rest of the document.
Enter the text of the message
The opening of the message is the GreetingLine placeholder and / or any fields you have inserted with the help of additional case additions. Now you start to compose your message.
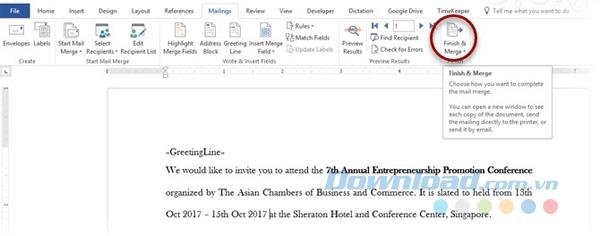
When the body of the message is complete, click Finish & Merge> Send Email Messages. Click OK in the Merge to Email dialog box .
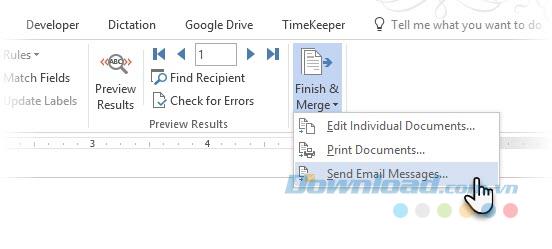
Word then sends individual letters to each corresponding email address. You cannot CC or BCC other recipients and you cannot add attachments to emails.
You can save the document you have used for mail merge, as it also saves the link to the data source, ie contacts. When you open the mail merge document, select Yes when Word prompts you to stay connected.
Once you get used to it, the whole process takes only a few minutes from start to finish. Also, instead of spending time composing emails for each person, you can now do the same for a group, regardless of the number of people in the group.
