Easily Create a Gmail Account in 2021: A Full Picture Guide

What is a Gmail Account?

A Gmail account is a free emailing platform. It allows you to send and receive mail as usual and lets you customize many things through its interface. 

One great difference between Gmail and its competitors like Yahoo is that there are no ads on the platform. Instead of ads, the platform gives you 15GB of data free and you will only have to pay after you exceed this amount.

What Are The Benefits Of a Gmail Account?

When you create a gmail account, you are also signing up for a Google account.

This means you get access to all of Google’s services that come included if you have a Gmail account.

This is why creating a Gmail account is so versatile. Not only can you check your mail, but you can also get documents written on Google Docs, or organise your day with Google Calendar.

How Long Does it Take To Create a Gmail Account?

It’s extremely easy to create a Gmail account, all it takes is some general details such as your name, date of birth, ext. This will allow you to create a Google account through which you can access Gmail.

The whole process will only take around 5-10 minutes.

How to Create A Gmail Account

  1. Go to accounts.google.com/signup to get to the signup page for a Google Account.
  2. Now you have to fill in some basic information shown below. This includes your First and Last Name, Username (pick whatever you would like), & a Password.
  3. Now you will go onto step 2 which is just to enter in some additional information. This includes your Phone Number, Recovery Email Address, your Date of Birth, and your Gender. Please note that your phone number and recovery email address are optional, however, it’s recommended so you have a backup if you were to get locked out of your account.
    If you do choose to add in your phone number, there is an additional step where Google will send you an SMS to confirm it is your number. Just enter the code that they send you into the box and continue on.
  4. Now, the final step is just to accept Google’s terms and conditions to create your Gmail account. So just scroll all the way down to the bottom of the page with the arrow as shown.
  5. Then just click on “I agree” to confirm that you agree to their policies.
  6. Now Google will take a few seconds to process your information, then it will redirect you to your Google account dashboard as shown below.
  7. From here, all you have to do to access your Gmail inbox. Just follow the link here. Here is the page you should be on below.

Leave a Comment

Sync Active Directory Users with ONLYOFFICE DocSpace via LDAP

Sync Active Directory Users with ONLYOFFICE DocSpace via LDAP

Connect ONLYOFFICE DocSpace to Active Directory or OpenLDAP, import users and groups safely, map account fields, and schedule reliable synchronization.

Change ONLYOFFICE Workspace’s Default Storage Location

Change ONLYOFFICE Workspace’s Default Storage Location

Move portal data from Disk Default to a supported cloud storage provider, or relocate Docker data safely by changing its host volume mapping.

Completely Remove ONLYOFFICE Document Server from Linux

Completely Remove ONLYOFFICE Document Server from Linux

Identify whether Document Server uses a Linux package or Docker, remove only its components, and check remaining data without deleting shared services by mistake.

Stop ONLYOFFICE Co-Editing Lag by Finding the Bottleneck

Stop ONLYOFFICE Co-Editing Lag by Finding the Bottleneck

Trace slow collaborative editing to Docker resource pressure, proxy connections, or document load, then choose the fix that matches your measurements.

Add Fonts to ONLYOFFICE Document Server: Docker vs Linux

Add Fonts to ONLYOFFICE Document Server: Docker vs Linux

Install custom fonts in ONLYOFFICE Document Server, compare persistent Docker mounts with direct copies, rebuild the font list, and verify the result.

Configure HTTPS for ONLYOFFICE Docs in Docker

Configure HTTPS for ONLYOFFICE Docs in Docker

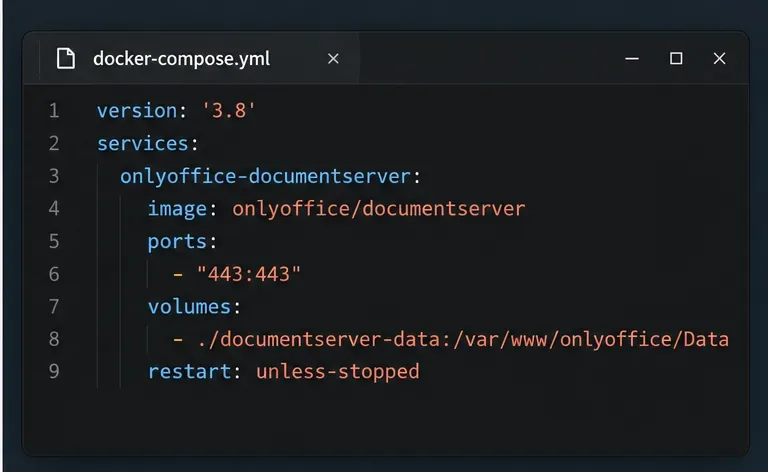
Choose where TLS should terminate, mount a trusted certificate and private key safely, and verify HTTPS access to a Dockerized ONLYOFFICE Docs server.

Connect a PHP App to ONLYOFFICE Docs and Save Edits

Connect a PHP App to ONLYOFFICE Docs and Save Edits

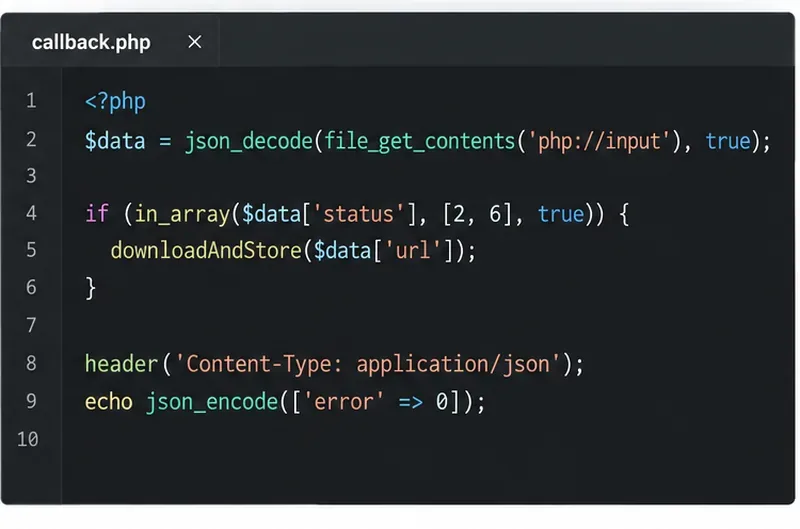
Embed the ONLYOFFICE editor in your PHP app, sign its configuration with JWT, and save edited files through a secure callback.

Keep ONLYOFFICE Spell Check on the Language You Choose

Keep ONLYOFFICE Spell Check on the Language You Choose

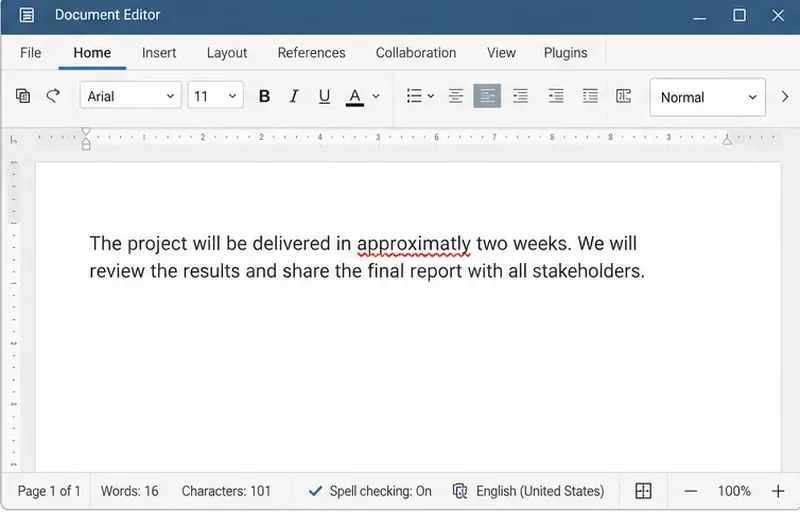
Set the proofing language for the whole document or selected text, confirm spell checking is active, and identify when a server dictionary is missing.

Keep Track Changes On When a Document Reopens

Keep Track Changes On When a Document Reopens

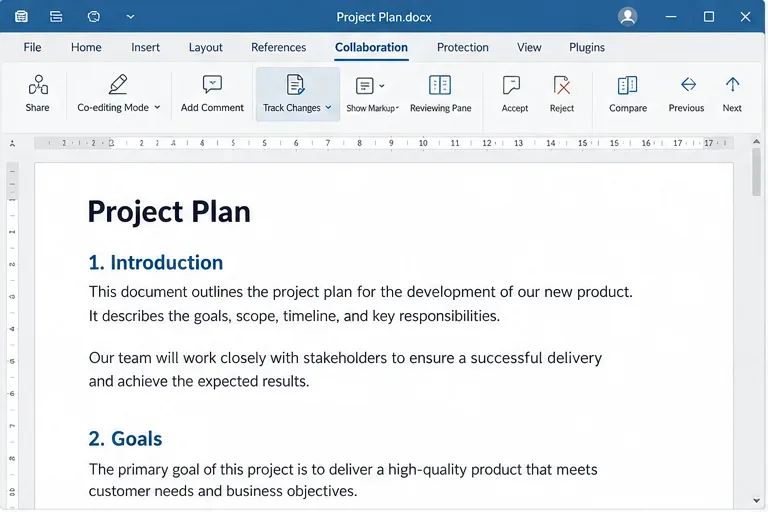
Enable persistent Track Changes for everyone in one ONLYOFFICE document, verify edits are recorded, and understand the limits of this setting.

Trace the Upstream to Clear ONLYOFFICE’s Nginx 502

Trace the Upstream to Clear ONLYOFFICE’s Nginx 502

Find whether Nginx, Docker networking, or an internal ONLYOFFICE service is returning 502, then verify the corrected upstream and health check.