How to Share Audio with TeamViewer - Latest Version Updates 2024, 2025

Learn how to share audio using TeamViewer, including the latest updates for 2024 and 2025, making remote communication more effective.
Being evaluated as a tool to connect and control computers remotely, extremely effective, but the errors that TeamViewer are making are not less. In particular, there are some quite annoying errors such as: Accessto the Teamviewer Server Has Been Denied, Rollback framework could not be initialized or time-limited TeamViewer connection.
Time-limited connection errors mean, users can only use TeamViewer for a maximum period of 5 minutes. This is extremely annoying especially when users have urgent work.
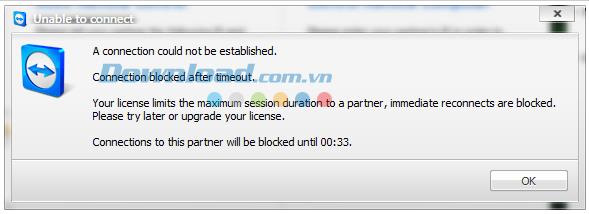
Firstly, you should learn about this error as follows:
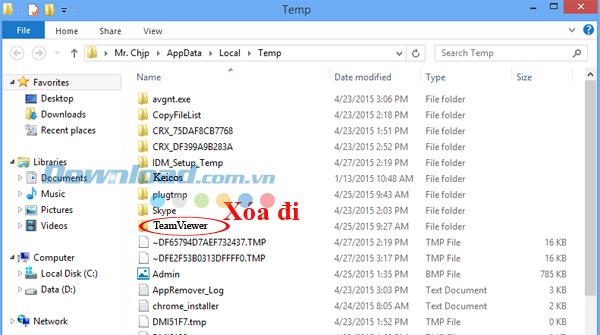
Step 1: If you are running TeamViewer , you must close it by using Ctrl + Alt + Delete to open the Task Manager dialog box . Select the Processes tab and navigate to, click on TeamViewer , scroll down and select End Process. Or you can also open Task Manager on Windows 8 with Ctrl + Shift + Esc and turn it off.
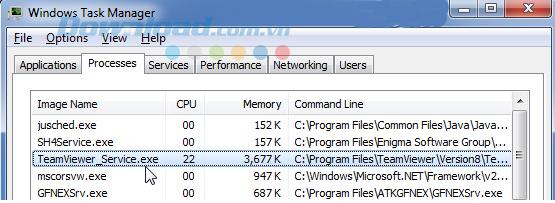
Then turn to follow the steps below:
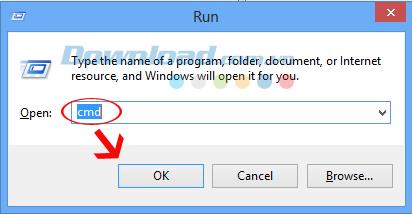
Step 2: Open the Start / Run dialog box , enter "cmd" in the Open box , then select OK .
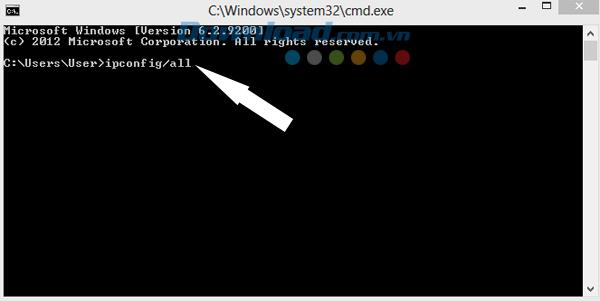
After the command prompt appears, type "ipconfig / all" and press Enter .
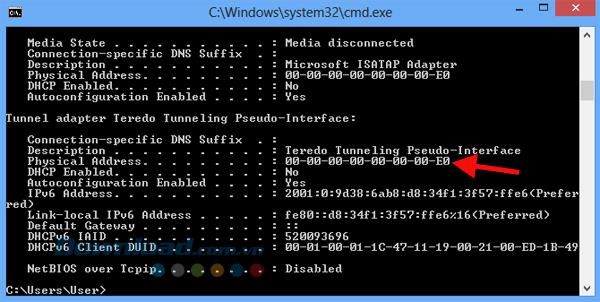
Depending on the model, model and manufacturer, the results will vary, but most importantly, the Physical Address (red arrow) information. As shown in the picture, is "00-00-00-00-00-00-00-E0" . Please save these numbers to use in the following step.
Step 3: Right-click the network icon in the Task Bar, and select Open Network and Sharing Center / Local Area Connection / Properties.
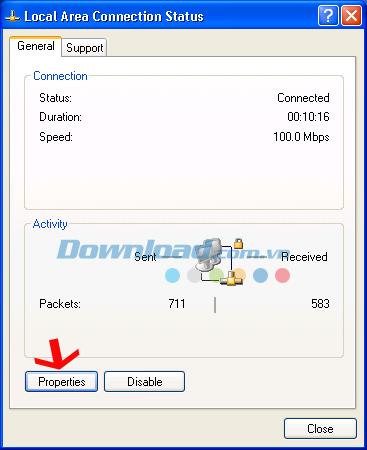
Or, depending on the operating system that your computer is using, select Open Network and Sharing Center / Change adapter settings.
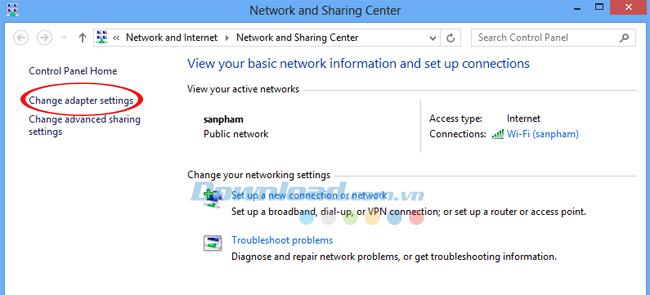
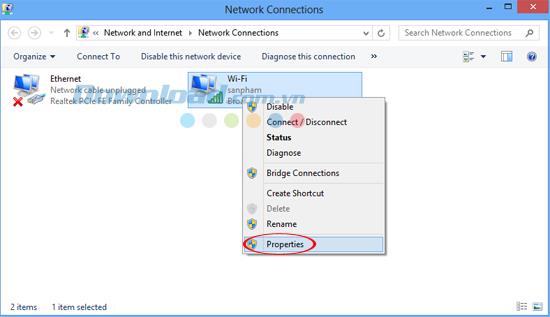
Select the wifi network you are using, right click and click Properties .
Continue to select Configure .
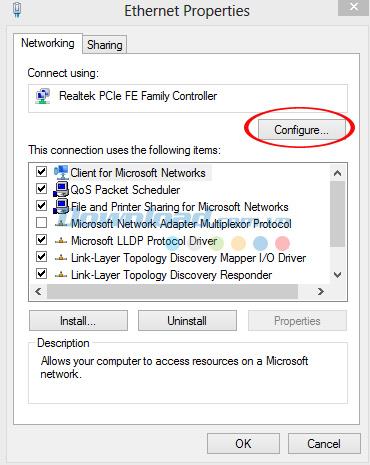
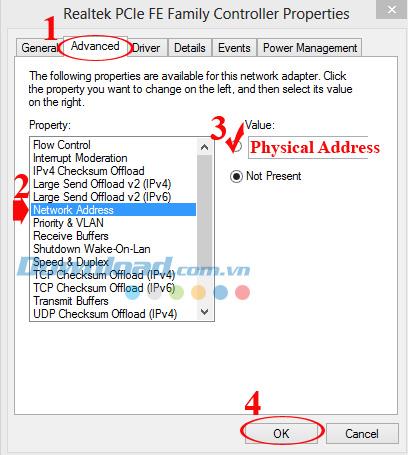
Step 4: A new window appears, select Advanced tab and do the following:
ATTENTION:
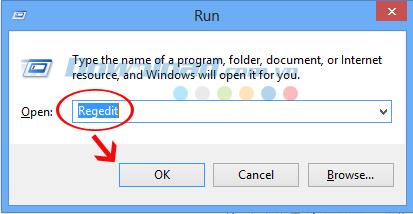
Step 5: Continue to open the Start / Run dialog box , enter Regedit in the Open box and OK .
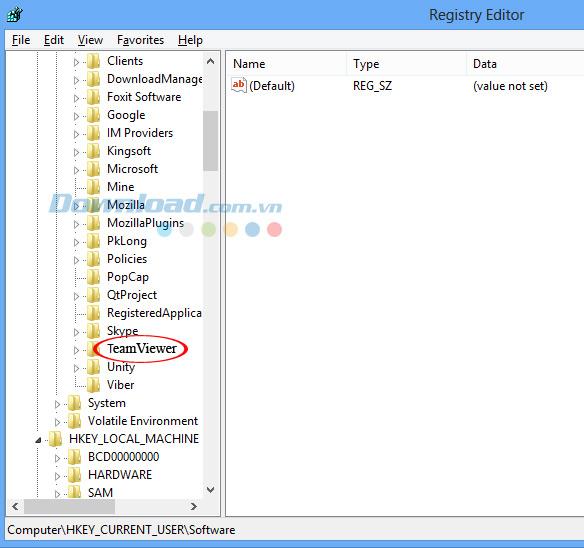
After the Registry Editor dialog box appears, find and delete TeamViewer by following the path:
HKEY_CURRENT_USER / Software / TeamViewer.
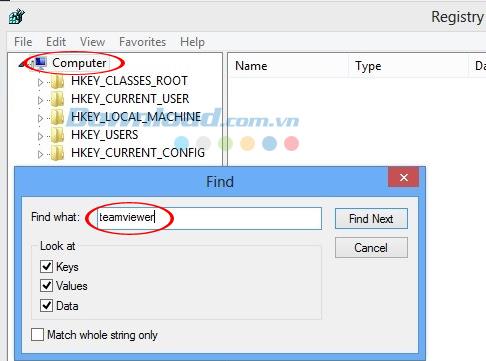
Also, to make sure you can click on Computer , then click on Edit (above) and select "Find" . After the new window appears, enter the keyword "TeamViewer" into the Find what box and find all the values with the corresponding name, you delete and repeat the search process - delete continuously, until not there's more.
If you download and install the new TeamViewer version , please pay attention to the installation, should do as shown below.
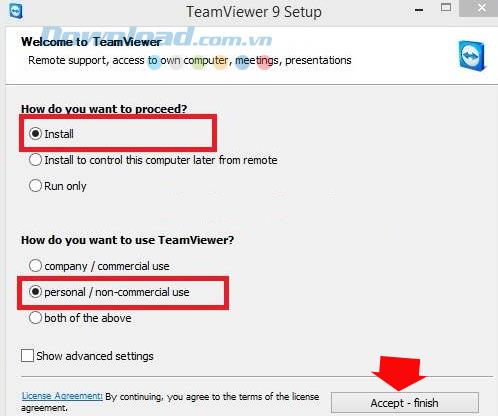
After all the above steps have been completed, you can restart TeamViewer and check the results. Hopefully the article will be helpful for you in the process of using this tool.
Learn how to share audio using TeamViewer, including the latest updates for 2024 and 2025, making remote communication more effective.
Learn how to effectively overcome TeamViewer login time limit error in 2024. TeamViewer remains a popular choice for remote control software.
How to activate and customize Black Screen on TeamViewer, Black Screen feature - Black screen on TeamViewer helps you hide the remote screen during connections to the computer
How do I uninstall TeamViewer on my Mac. This article applies to all TeamViewer users working on Mac OS X or macOS. To uninstall TeamViewer from your Mac, drag the TeamViewer application file to your Ttrash, it will leave its configuration files behind on the computer.
The following article will share with you how to uninstall TeamViewer software by conventional methods and by specialized software Perfect Uninstaller.
Like other TeamViewer errors, Access to the TeamViewer Server Has Been Denied is an error that prevents users from connecting to other computers, despite everything.
WebTech360 please share how to turn off online mode on TeamViewer quite easily through the article below. Invite you to refer.
Sometimes we need to learn or exchange something through TeamViewer that wants to share the sound in our computer? So how can you help others hear the sound in your computer?
Setting a fixed password for TeamViewer is the way we set up this remote control and connection software a permanent user code, regardless of the default code that TeamViewer provides each boot.
Growth doesn’t always look like adding more. Sometimes it looks like cutting away what’s no longer helping. Across industries, a quiet shift is happening among business owners who’ve stopped chasing every new trend, subscription, and “solution” that lands in their inbox. Instead, they’re pruning.
Transporting bulky goods presents a unique set of challenges. Whether you’re moving furniture, heavy machinery, construction materials, or large appliances, ensuring that these items reach their destination safely, on time, and without unnecessary expense requires a carefully thought-out approach.
If you no longer need to use Galaxy AI on your Samsung phone, you can turn it off with a very simple operation. Below are instructions for turning off Galaxy AI on your Samsung phone.
If you don't need to use any AI characters on Instagram, you can also quickly delete them. Here's how to delete AI characters on Instagram.
The delta symbol in Excel, also known as the triangle symbol in Excel, is used a lot in statistical data tables, expressing increasing or decreasing numbers, or any data according to the user's wishes.
In addition to sharing a Google Sheets file with all sheets displayed, users can choose to share a Google Sheets data area or share a sheet on Google Sheets.
Users can also customize to disable ChatGPT memory whenever they want, on both mobile and computer versions. Below are instructions for disabling ChatGPT memory.
By default, Windows Update will automatically check for updates and you can also see when the last update was. Here is a guide to see when Windows last updated.
Basically, the operation to delete eSIM on iPhone is also simple for us to follow. Below are instructions to delete eSIM on iPhone.
In addition to saving Live Photos as videos on iPhone, users can convert Live Photos to Boomerang on iPhone very simply.
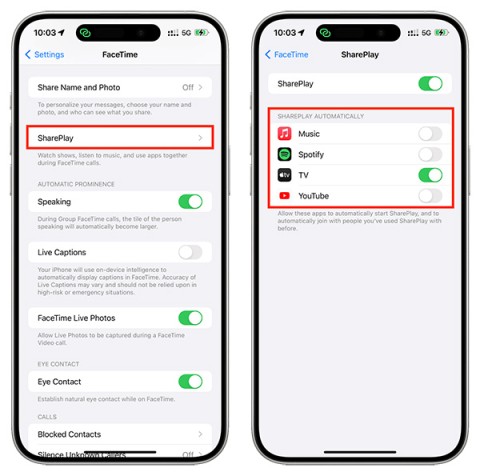
Many apps automatically enable SharePlay when you FaceTime, which can cause you to accidentally press the wrong button and ruin the video call you're making.
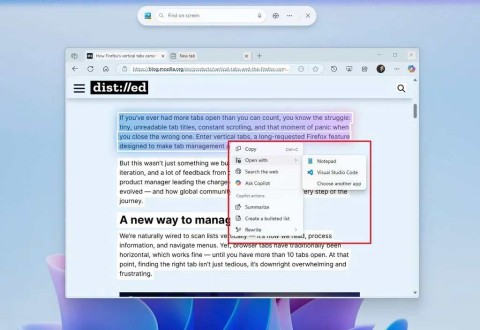
When you enable Click to Do, the feature works and understands the text or image you click on and then makes judgments to provide relevant contextual actions.
Turning on the keyboard backlight will make the keyboard glow, useful when operating in low light conditions, or making your gaming corner look cooler. There are 4 ways to turn on the laptop keyboard light for you to choose from below.
There are many ways to enter Safe Mode on Windows 10, in case you cannot enter Windows and cannot enter. To enter Safe Mode Windows 10 when starting the computer, please refer to the article below of WebTech360.
Grok AI has now expanded its AI photo generator to transform personal photos into new styles, such as creating Studio Ghibli style photos with famous animated films.


