Set Up ONLYOFFICE JWT Secrets Across Server and Connector
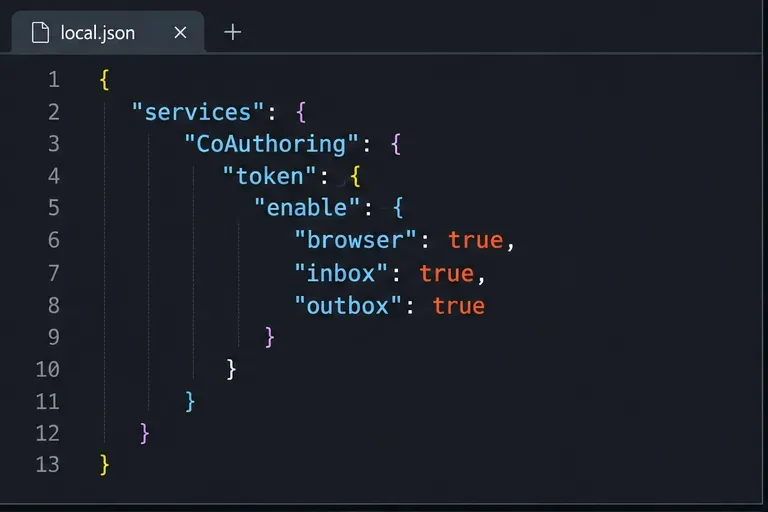
Configure matching JWT secrets for ONLYOFFICE Docs and its connector, with safe steps for Linux packages, Docker deployments, and verification.
After installing Teamviewer on the computer, the software will set itself a fixed ID and a 4-character password range that changes after each session. But if you want to use a fixed password for convenience, you can do it very simply by following the article below.
However, only use fixed passwords with trusted partners, due to data security. In addition, you can also change the default password length to increase the security of your TeamViewer account. Invite you to follow the article below to know how to set a password for TeamViewer:
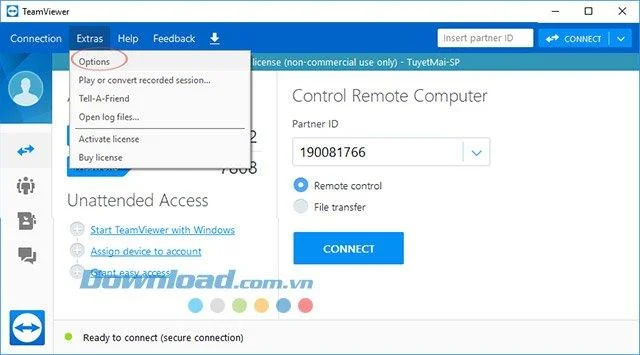
Step 1: At the main interface of TeamViewer, click on Extras tab> Options.
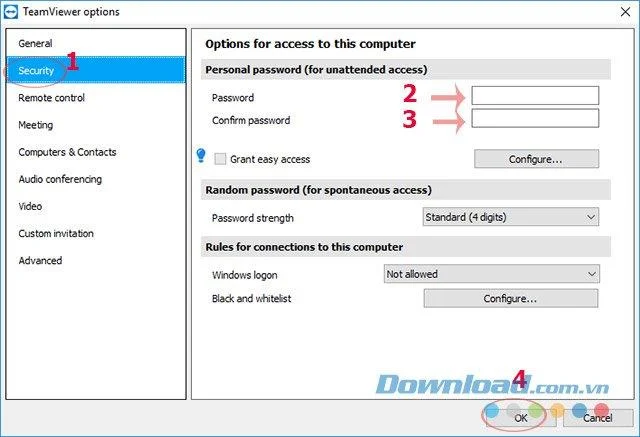
Step 2: The TeamViewer Options interface appears, switch to the Security tab. Look to the right of the Personal password (For unattended access) section , enter the password in the Password box , retype the password in the Confirm Password box , and then click OK to save it.
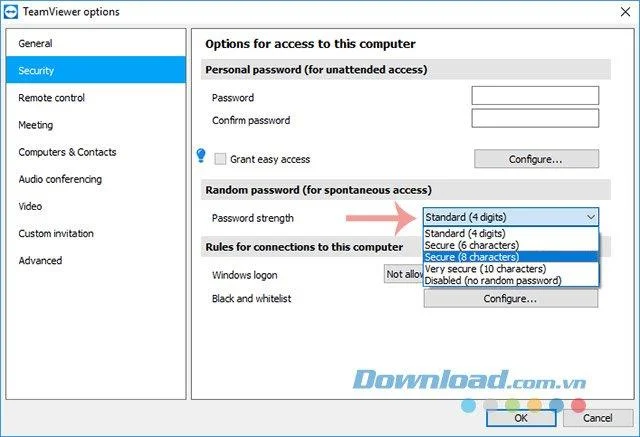
In addition, in the Random password (for spontaneous access) section, users can also adjust the password length from 4 characters to 6, 8, 10 characters. Disabled to disable the password when connecting 2 computers.
You will now use the password you just created to create the connection for others. This is convenient if you frequently ask a person, they will remember the ID and password for the next help without having to ask for the login password again. However, if the crooks detect and take advantage of this, this will be a great danger for the user's account. So, consider carefully before proceeding to use, because each password has its advantages and disadvantages.
I wish you successful implementation!
Configure matching JWT secrets for ONLYOFFICE Docs and its connector, with safe steps for Linux packages, Docker deployments, and verification.
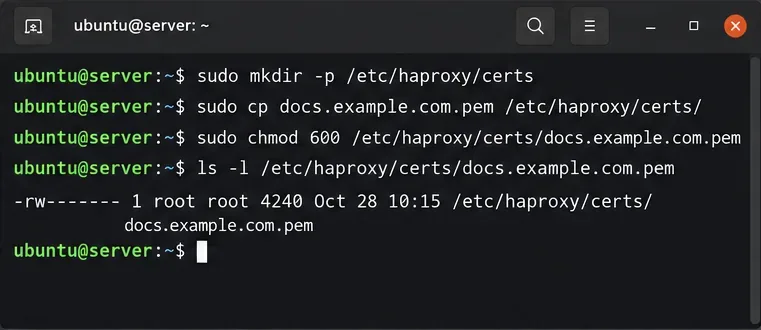
Configure HAProxy HTTPS, forwarding headers, WebSocket timeouts, and health checks for ONLYOFFICE Docs, then verify editing and saves.
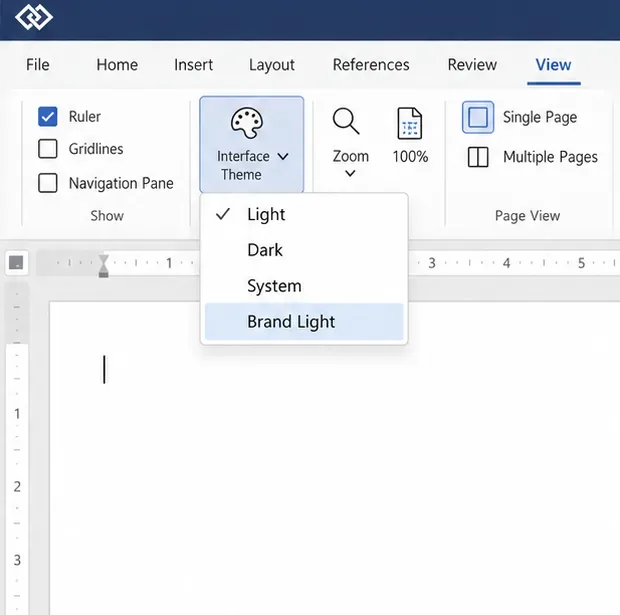
Give an embedded ONLYOFFICE Docs editor your company logo and interface colors with a custom theme file and editor configuration. See edition limits and deployment checks.
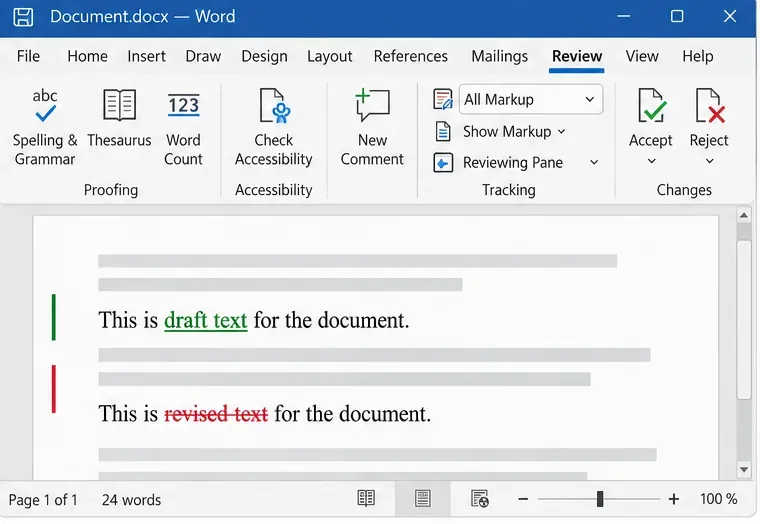
Track edits in Writer, preserve an editable ODT source, and check the exported DOCX in Word before sharing it.
Follow SUSE’s SP7 procedure to enable FIPS mode, reboot safely, verify the active policy, and check whether your compliance requirement calls for validated modules.
Compare YaST and cryptsetup for a new encrypted SLES data volume, choose LUKS1 or LUKS2, and verify unlock and mount behavior safely.
Create, refine, and verify a least-privilege AppArmor profile on SLES 15 SP7, with a clear note on SLES 16’s SELinux default.
Set up RMT on SLES 15, mirror entitled repositories, and verify HTTPS registration and package access from a test client.
Connect SLES 15 to AD with YaST’s SSSD-based logon management, then verify directory lookup, domain login, and Kerberos tickets.
Set up the right Live Patching path for SLES 16.0 or 15 SP7, apply eligible kernel fixes, and confirm what is active without confusing it with a reboot-required kernel update.