If you're using a Chromebook and want to remove traces of your online activity, knowing how to delete history on Chromebook helps keep your browsing private. The process clears websites visited, download records, cached images, and form data directly through the Chrome browser that powers every Chromebook. This guide walks through the exact steps to complete the task in under a minute.
Why Clear Browsing Data on a Chromebook
Chromebooks store browsing history locally in the Chrome browser profile. Over time this includes site URLs, search terms, and temporary files that can reveal your activity to anyone with physical access to the device. Deleting this data regularly also frees up a small amount of storage space and can resolve occasional loading issues caused by corrupted cache files.
Before starting, make sure your Chromebook is connected to Wi-Fi and updated to the latest Chrome OS version through Settings > About Chrome OS. No additional apps or extensions are required.
How to Delete History on Chromebook Step by Step
-
Open the Chrome browser and access Settings
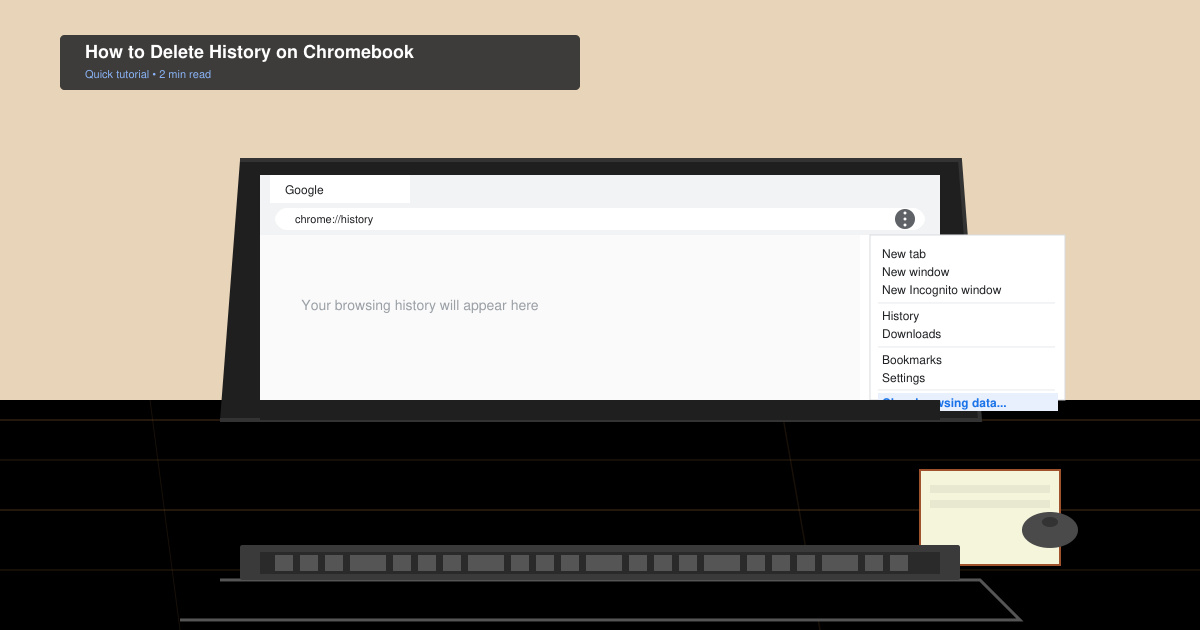
Click the circular account icon in the bottom-right corner of the shelf or open the Launcher and select the Chrome icon. Once Chrome launches, click the three vertical dots in the top-right corner, then select Settings from the dropdown menu.
-
Navigate to the Privacy and security section
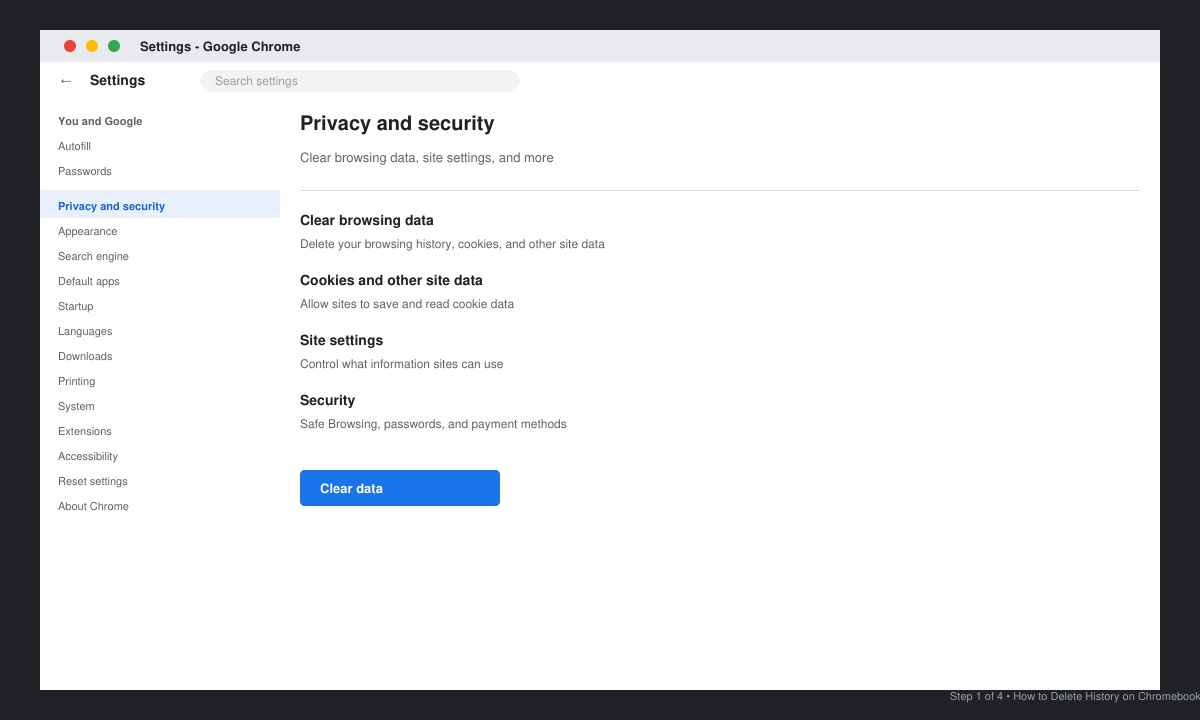
In the left sidebar of Settings, click Privacy and security. Under this heading, select Clear browsing data. A new dialog box appears with multiple tabs and checkboxes.
-
Choose the time range and data types to remove
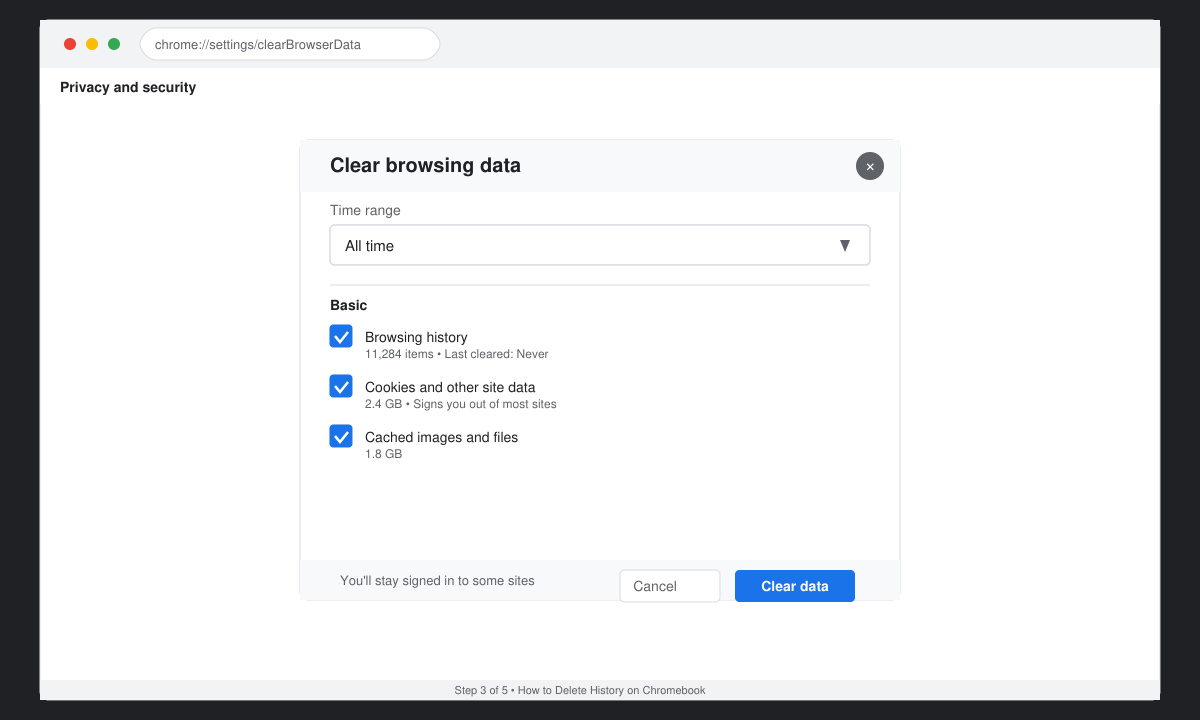
At the top of the dialog, open the Time range dropdown and select All time to delete everything. Check the boxes for Browsing history, Cookies and other site data, and Cached images and files. Leave other options unchecked unless you specifically want to remove saved passwords or autofill data.
-
Confirm and complete the deletion
Click the blue Clear data button at the bottom of the dialog. Chrome immediately removes the selected information. You can verify success by returning to the History page (Ctrl+H) where no entries should remain.
Tips and Troubleshooting When Deleting History on Chromebook
- If the Clear data button is grayed out, restart the Chromebook and try again after signing back in.
- Syncing is enabled by default on many Chromebooks. To stop history from reappearing across devices, go to Settings > Sync and Google services and turn off Sync everything or deselect History.
- Guest mode browsing never saves history, so use it when you want temporary sessions without any records.
- Some managed school or work Chromebooks may restrict this feature. In that case, contact your administrator.
Frequently Asked Questions
Does deleting history on Chromebook also remove it from my Google account?
No. The steps above only clear local data on the Chromebook. To delete synced history from your Google account, visit myactivity.google.com and remove items individually or in bulk.
Can I delete history for a specific website only?
Yes. Open Chrome, press Ctrl+H to view history, search for the site, hover over the entry, and click the three dots next to it to remove just that item.
Will clearing history log me out of websites?
Yes, if you also select Cookies and other site data. To stay signed in while removing history, uncheck that box before clicking Clear data.
Conclusion
Following these instructions makes it simple to delete history on Chromebook whenever you need to protect your privacy or free up space.