Recently, some Windows 10 users have encountered the problem of annoying audio loss. That is the error No Audio Output Device is Installed. The cause of this situation can come from many different factors, such as the bug of Windows 10 October 2018 update bug, unrecognized devices or missing audio drivers.
According to Microsoft, Intel audio driver is not connected correctly to devices via Windows Update. Incompatible audio driver may be one of the causes of this problem. Here are some solutions to help restore sound for computer.
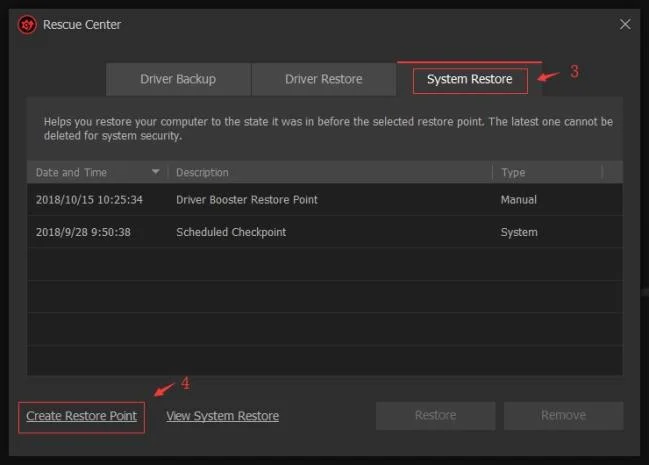
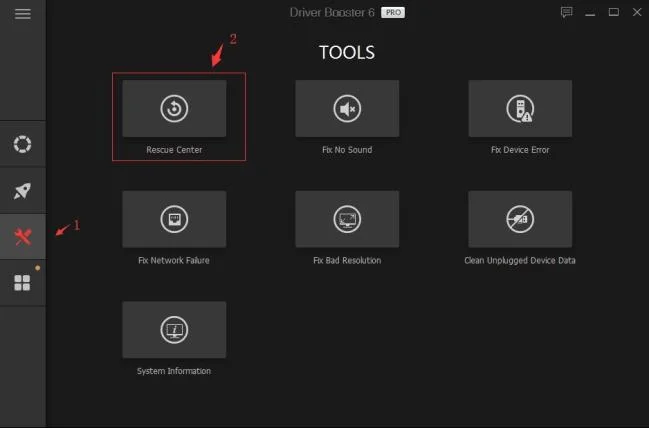
Note : First of all, the most important thing to remember is to create a system restore time in Driver Booster's Rescue Center before following this guide. If any accident occurs, thanks to it, you can still restore the system to its original state (at the selected time).
Detailed pictures of the steps taken:

Check environment & external equipment
If the No Audio Output Device is Installed error appears on the computer, you should check hardware or external errors first.
1. Check the power source and volume level, try turning on the entire volume control. (Some speakers & apps have separate volume controls. You should check them all.)
2. Check audio equipment (eg audio, microphone, headset ...)
- Check the connection between the computer and the audio device.
- Check the operation of the audio player.
3. If using a desktop computer, don't forget to try the headphone jacks on the back of the computer tree.
If there are no problems with the hardware or external connection errors, try the next method.
Fix Windows 10 sound loss with Diver Booster Fix No Sound tool
However, the No Audio Output Device is Installed error is most likely coming from within. If Driver Booster is installed , you can automatically fix this error as follows:
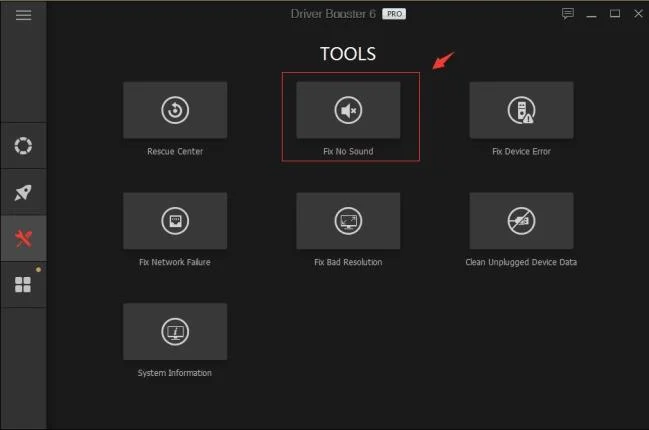
- Step 1 : Open Driver Booster .
- Step 2 : Click the Tools icon on the left of the main window.
- Step 3 : Select the Fix No Sound tool .
- Step 4 : Check if everything is working well.

Fix the error of disconnecting audio device manually
Check for errors with Realtek HD Audio Manager.
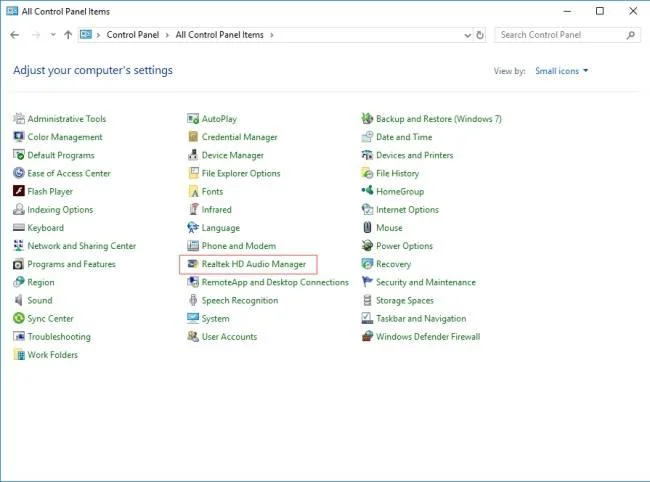
Open Control Panel to see if the PC has Realtek HD Audio Manager .
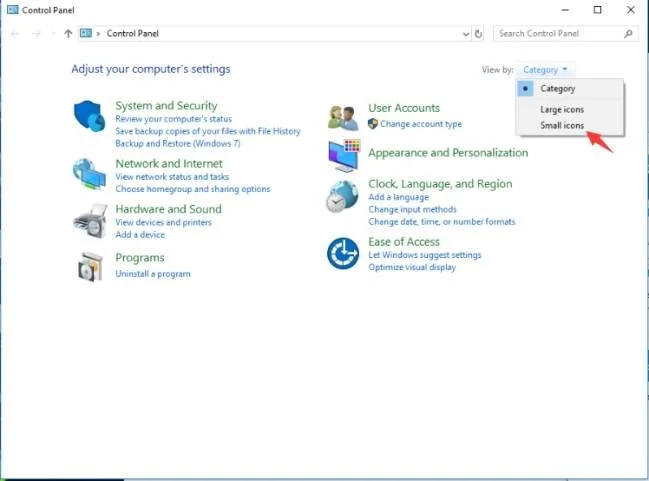
Step 1 : Open the Control Panel (Press "Windows + R"> Type Control> Click "OK"> Select View by as Small icons on the right of the Control window ).

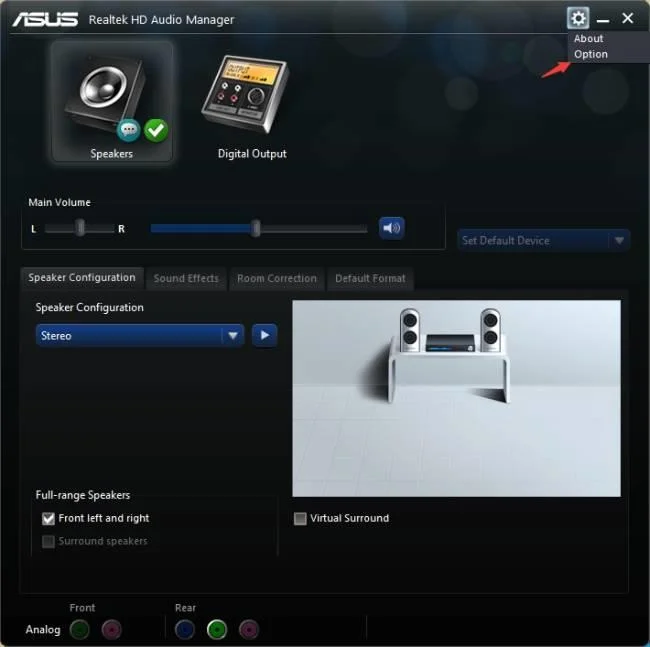
Step 2 : Click Realtek HD Audio Manager in Control Panel .

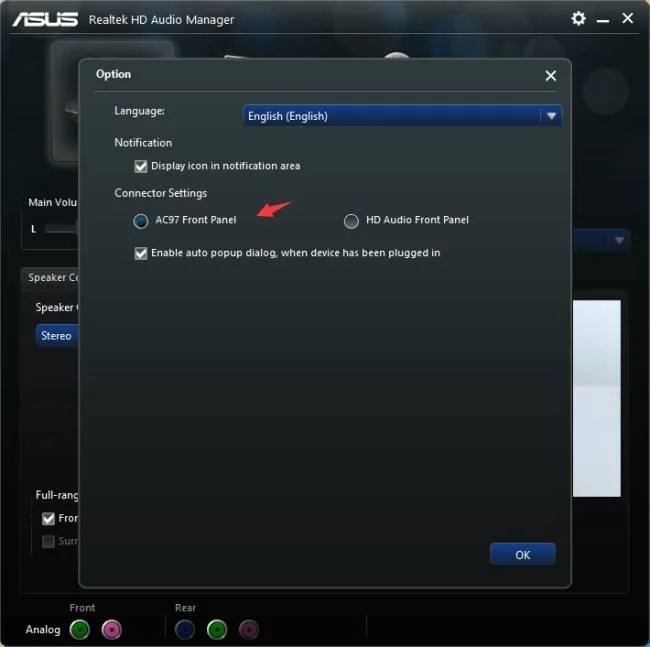
Step 3 : Click the gear icon at the top right of the window and select Option .

Step 4 : Click AC97 Front Panel , then check if it fixes the problem of audio loss.

Uninstall audio devices
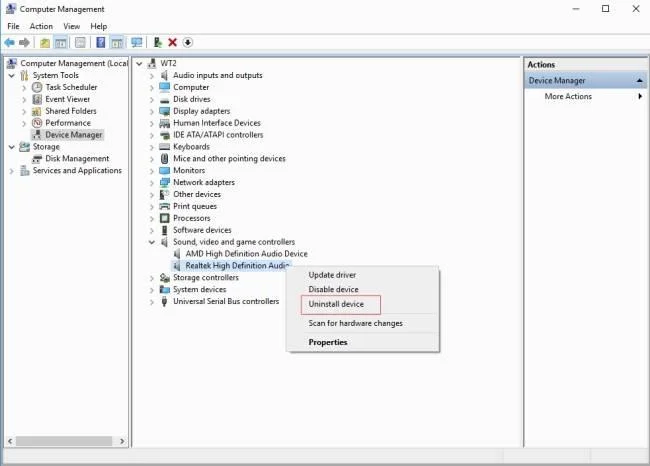
Step 1 : Open Device Manager (Press "Windows + R"> Enter "devmgmt.msc"> Click "OK" ).
Step 2 : Open Sound, video and game controllers to view audio devices.
Step 3 : Right-click the relevant audio device and select Uninstall devices * .
Which device should I uninstall?
- If the system uses HDMI or DI (Display Port) to play audio, you should have one of the 3 audio devices (NVIDIA High Definition Audio, AMD High Definition Audio, Intel (R) Display Audio), remove the audio device. bar you have.
- If the system does not use HDMI or DI to play audio, uninstall other audio devices (except NVIDIA High Definition Audio, AMD High Definition Audio, Intel (R) Display Audio) in Sound, video and drivers. game controller.
Tips:
While uninstalling, please remember to check “ Delete the Driver software for this device ”.

Reboot the system after uninstalling to see if anything goes wrong.
Update audio driver
1. If the audio problem persists after restarting the PC, try updating the audio driver as follows:
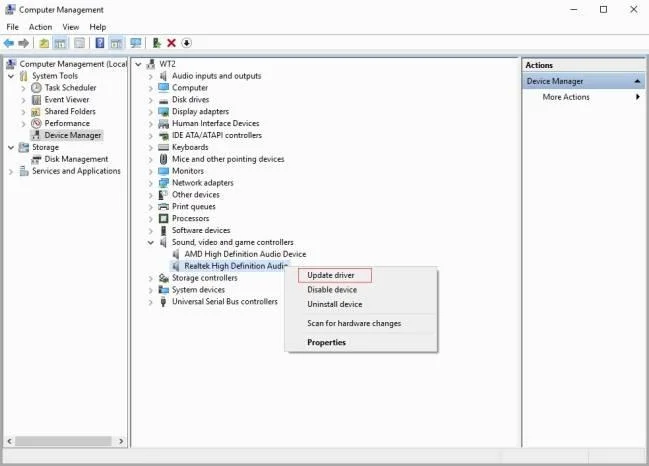
Step 1 : Open Device Manager> Sound, video and game controllers.
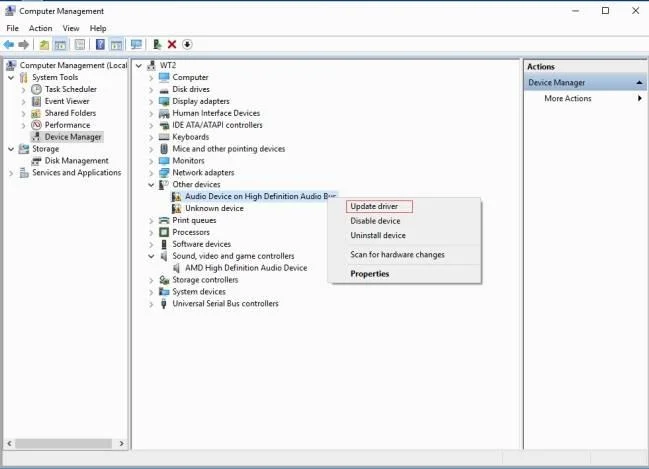
Step 2 : Right-click the relevant audio device and select Update driver to see if the system is back to normal.

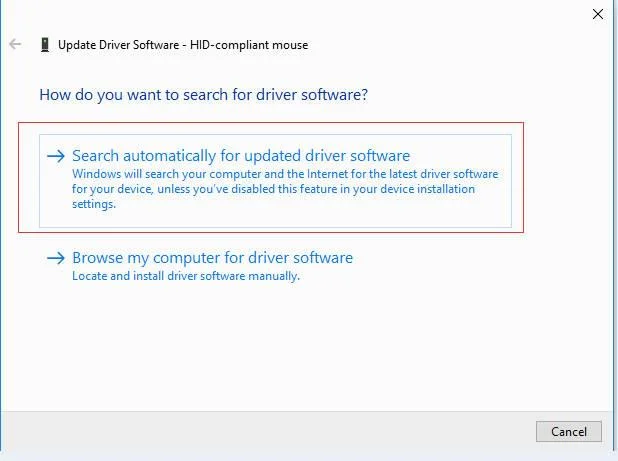
Step 3 : Click Search automatically for updated driver software to check for driver updates.

2. If there are no audio devices in Sound, video and game controllers :
Step 1: Find and open Other devices .
Step 2: Right-click on Unknown device and select Update driver to see if the system is back to normal.

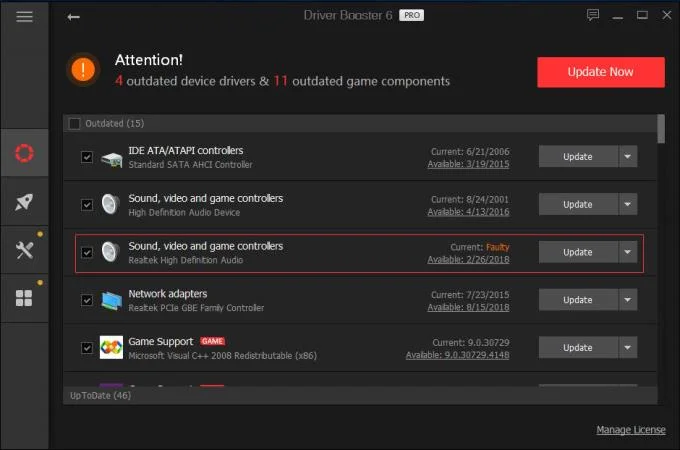
3. If you have not used Driver Booster as a driver update, you can try it with 1 click to update the driver automatically.
Activate Driver Booster PRO version , you will get the following great deals:


After trial, if satisfied, you can buy Driver Booster at the company's website through this link .
If all else fails, you can turn to iObit for help:
- Step 1: Click to download DBInfoHelper
- Step 2: Double click to run this tool.
- Step 3: Click " Save report to Desktop ".
- Step 4: Find //db_info_xxxx.zip on the desktop.
- Step 5: Send the zip file to dbfeedback@iobit.com
Hope the article is helpful to you!