Notion is widely utilized for various purposes, including work task management, habit tracking, and simple to-dos. Thanks to its checkbox feature, users can handle these tasks effortlessly. However, once the week ends and a large number of boxes need to be unchecked, managing those can become tedious. This article will guide you through efficient ways to manage your tasks in Notion, as well as other functionalities that can aid you.
1. How to Add a Checkbox in Notion
Before learning how to uncheck boxes, it's essential to know how to create them:
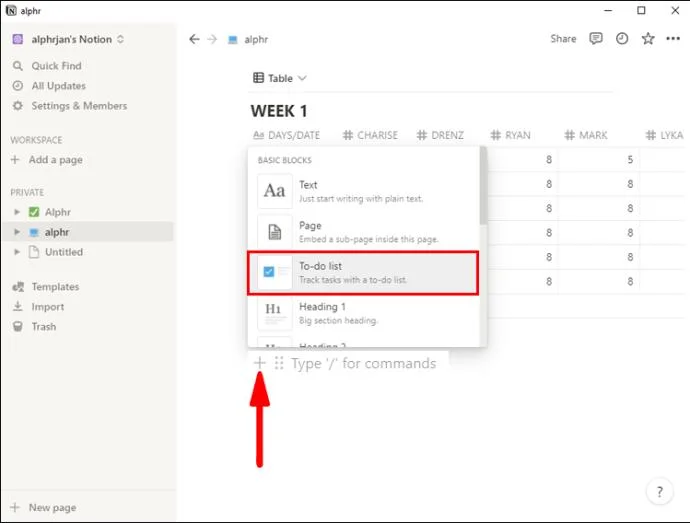
- Click the plus sign next to your textbox and select “To-do list.”

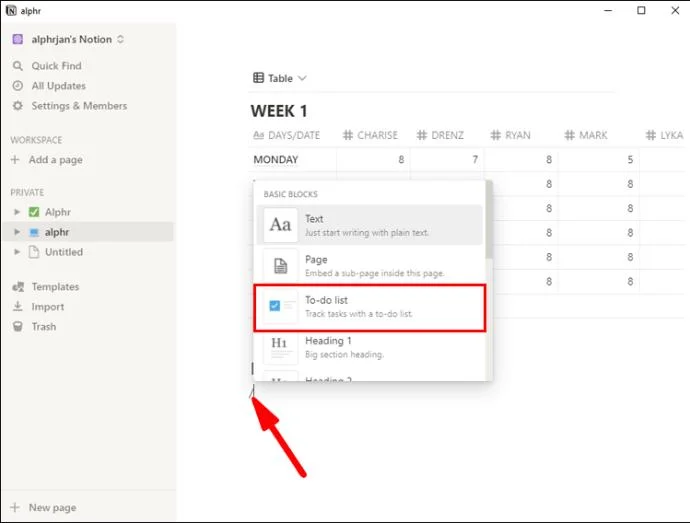
- Type “/” in your textbox and navigate to “To-do list.”

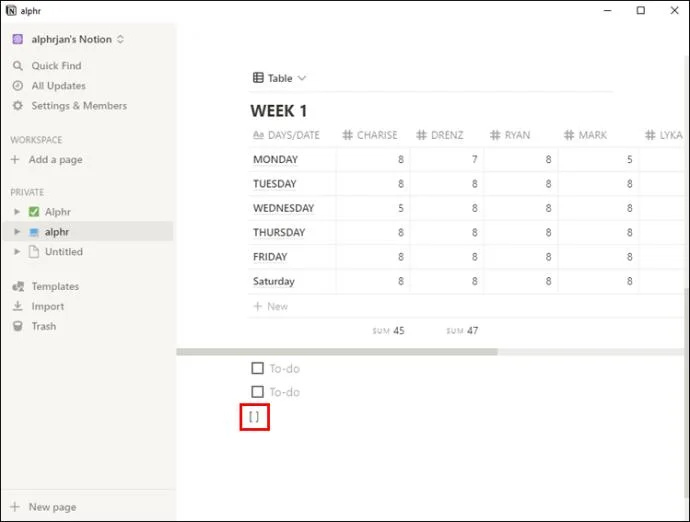
- Type “[]” in the textbox, converting it to a checkbox automatically.

For checking and unchecking, you can either click the box or use the keyboard shortcuts:
Ctrl + Enter for PC or Command + Enter for Mac.
2. How to Uncheck All Boxes in Notion
You can uncheck multiple to-dos at once, which is a significant time-saver:
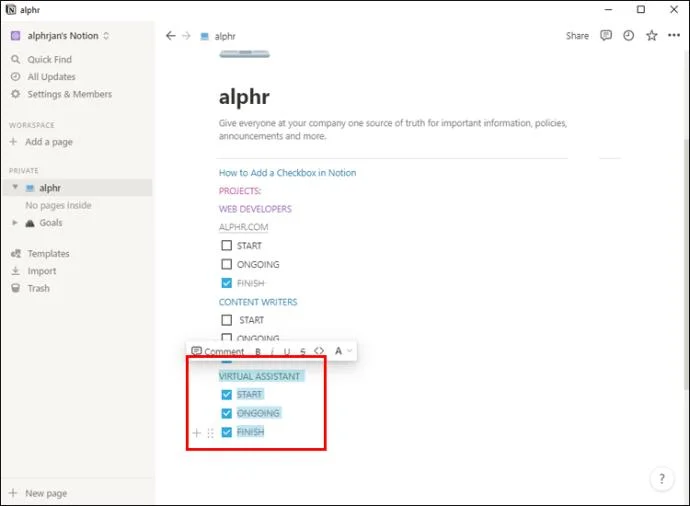
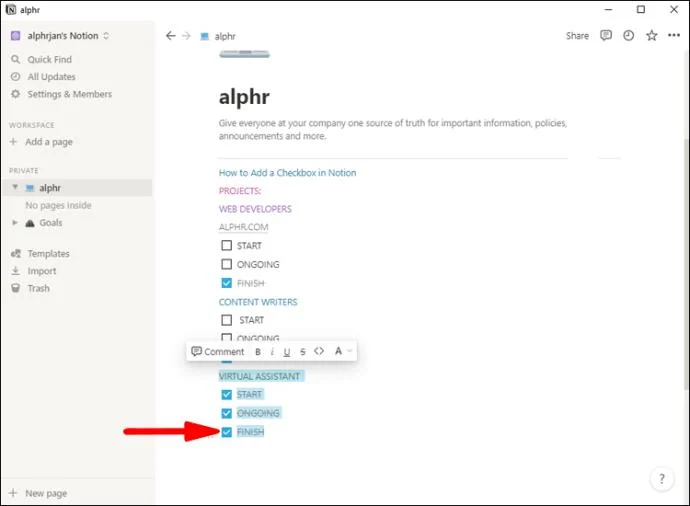
- Click and drag your cursor over the checkboxes you want to uncheck while holding the left mouse button.

- Click any of the selected boxes to uncheck all of them simultaneously.

You can also use keyboard commands:
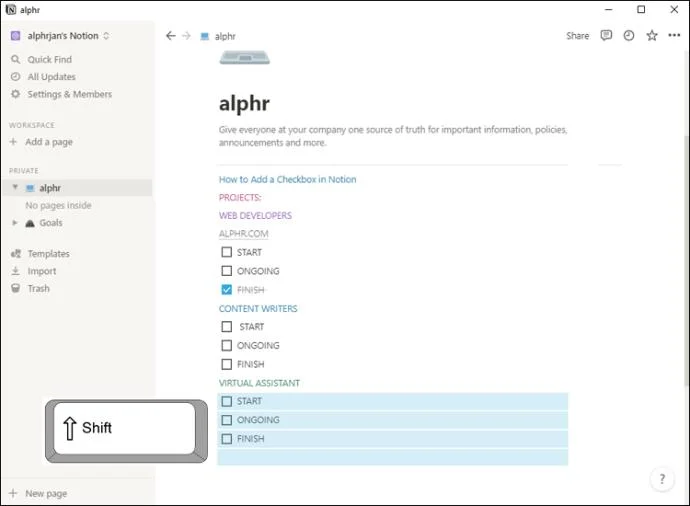
- Select boxes using Shift and arrow keys.

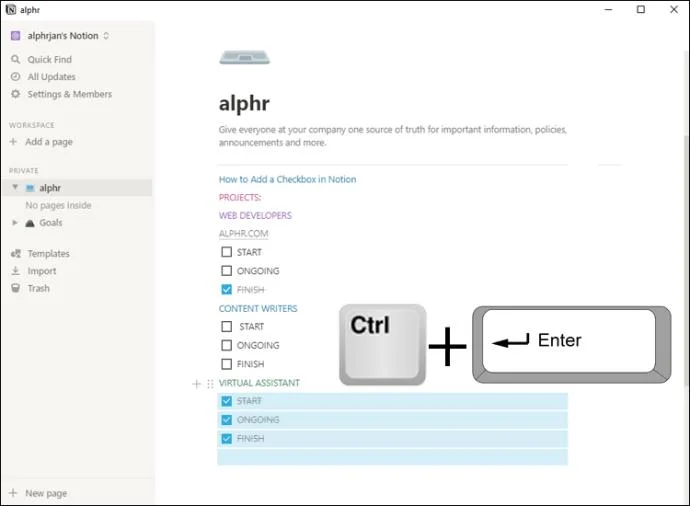
- Press Ctrl + Enter on PC or Command + Enter on Mac to uncheck the selected boxes.

These methods are valid across multiple columns, eliminating the need to apply actions separately.
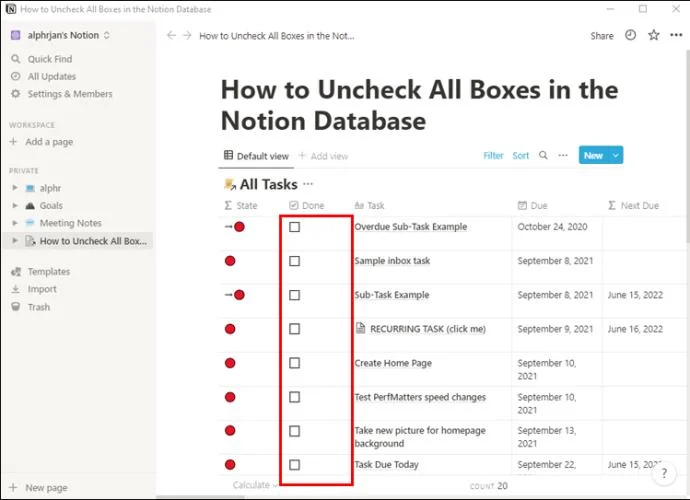
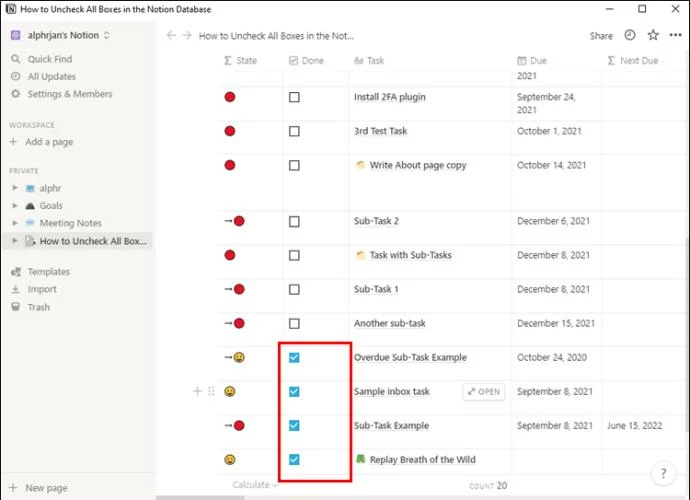
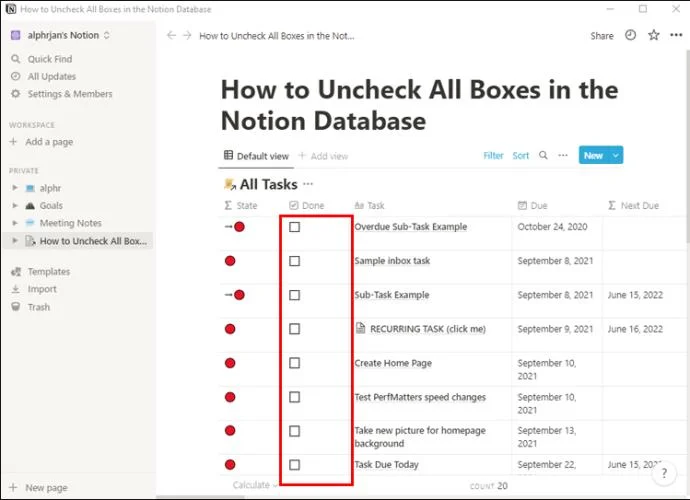
3. Uncheck All Boxes in a Notion Database
Unchecking boxes in a Notion database can require some additional steps. Here are effective strategies:
3.1 Use Backspace
- Click into any non-checkbox cell, then click outside the table to highlight the cell.

- Use the arrow keys to navigate to the desired columns.

- Hold Shift and select the area of the table you plan to uncheck using arrow keys.

- Press Backspace, and all selected checkboxes will be cleared.

Note: Ensure you include only checkboxes in your selection, as this action will delete the content of other cell types.
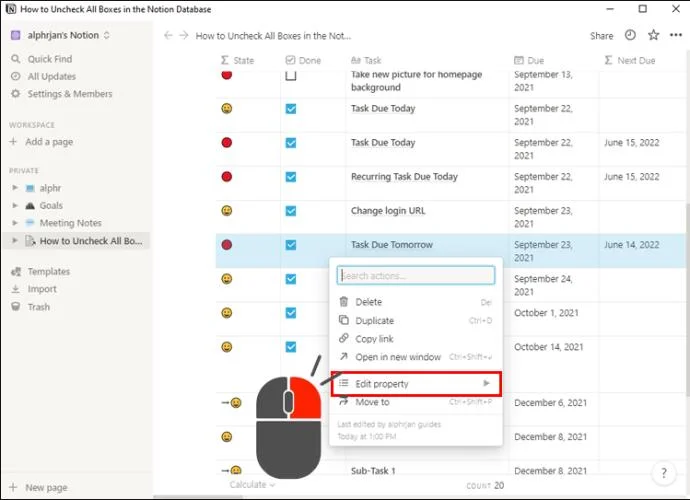
3.2 Edit Property
- Select a cell in your database.

- Use the Shift key and arrow keys to mark the section you want to uncheck, as described before.

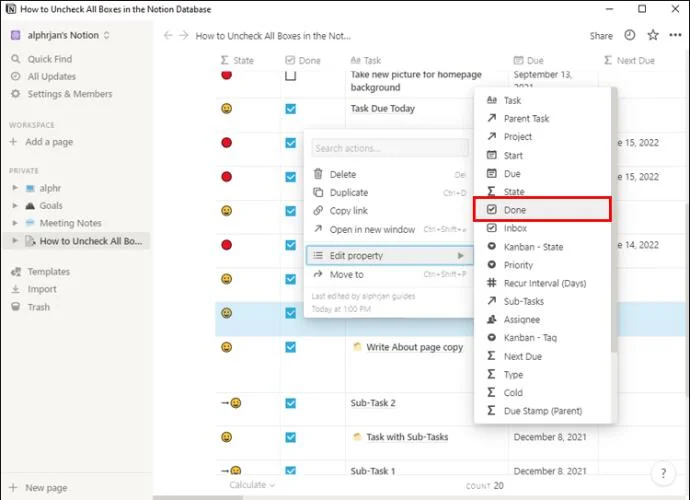
- Right-click and navigate to “Edit property.”

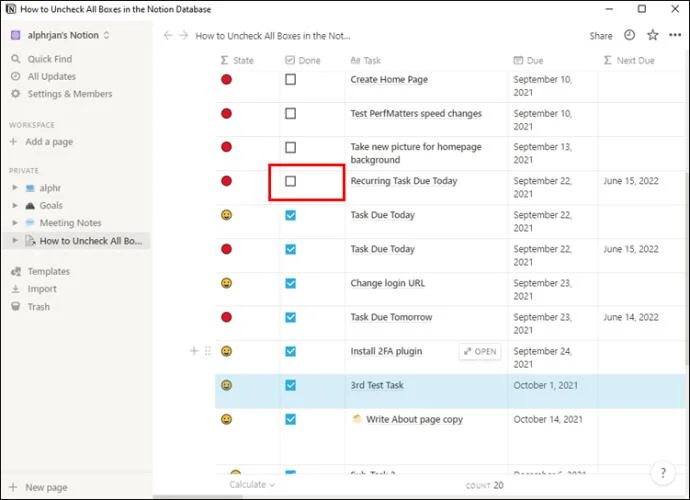
- Click the column name to uncheck the entire column of checkboxes.

3.3 Copy and Paste Unchecked Boxes
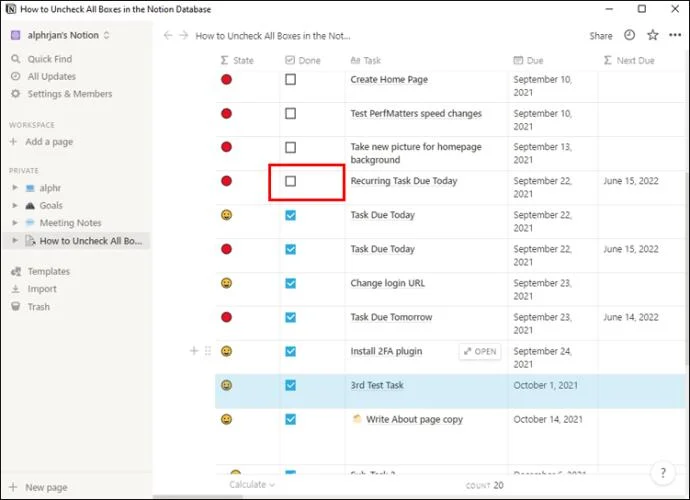
- Uncheck one checkbox to create a reference.

- Select a cell by clicking into it and then outside the table.

- Navigate to the unchecked box, click on it, and use Ctrl + C or Command + C to copy it.

- Select the entire area you want to uncheck with Shift and arrow keys.
- Press Ctrl + V or Command + V to paste the unchecked box into all selected fields.

Note: Ensure you have selected only to-do type columns before pasting, as other property types may be affected differently.
4. Should You Uncheck Your To-Dos in Notion?
While unchecking existing to-dos can seem quick, it may hamper your ability to track progress over time. Consider archiving completed tasks instead of deleting them. Create a new page for archives, linking it on your task page. Put your to-dos under a toggle to maintain organization. You can move completed items into your Archive page to make space for new tasks easily.
5. Optimize Your Efficiency in Notion
Notion is designed to enhance organization and save time. Follow this guide to uncheck as many boxes as possible quickly, whether in a list or database. Embrace all the functionalities that Notion offers to elevate your productivity.
Your Thoughts
How do you handle your to-do lists in Notion? Do you prefer unchecking recurring tasks, or is there another method you prefer? Share your thoughts in the comments section below.










Steve Jobs -
Who knew such a simple action could make a big difference? Love this tip, it's totally practical!
Hương Đà Nẵng -
I love Notion, and this just made it even better. I could never figure out how to manage my checklists effectively. Thanks a ton
Hưng Bùi -
Thanks for this! I love Notion but sometimes it can feel a bit complicated. This just simplified my life.
Hải Sắc -
Can anyone recommend other Notion hacks? I find it hard to keep up with all the features they offer
Minh Hằng -
Anyone know if there's a keyboard shortcut for this as well? I love shortcuts!
Mèo con -
I just tried it, and it worked like a charm! No more pain with checking items manually. Really appreciate this
Peter Pan -
I find Notion's interface a bit cluttered sometimes. Any tips on organization besides this? Appreciate the help
Sunny Kim -
What an amazing tip! I was getting so tired of manually unchecking things. This is a game changer!
Lan Phan -
After struggling with my task list for days, finding this tip was a pleasant surprise! Thank you so much
Anna Nguyen -
What a relief! I was just about to abandon my checklist entirely. This makes managing my tasks so much easier
Jenna Marbles -
I love how user-friendly your explanation is. Thank you
Hương KT -
Thanks for the share! I had to check each box for my project list yesterday, such a pain. This tip is a lifesaver for my workflow
Anna Brown -
Wow, I was just about to give up on Notion. This little trick has rekindled my interest! I can’t wait to try it.
Duy Sinh 6789 -
Very helpful post! I’ve been using Notion for months, and it always bugged me that there wasn’t a simple way to uncheck everything. Now I can focus more on my tasks
Huyền Lizzie -
Wow, I never knew I could easily uncheck all items in Notion! This will save me so much time. Thanks for sharing
Chí Nam -
Thanks for breaking this down! I’m always looking for ways to improve my productivity in Notion.
Vân Anh -
I absolutely agree that this is a huge time-saver! Notion just got a little less stressful for me. Thanks!
Nam Nguyen -
Does this work for databases too? I often feel lost trying to manage my tasks! Thanks for the guide
Emily Clark -
Great post! I never knew you could do this—definitely going to implement this in my planning. Appreciate it
Lisa Smith -
Such a useful tip! I often forget tasks in my Notion boards, and this will definitely help me clear things out faster
Hải Tùng -
I was frustrated with checking tasks individually. Now I feel like I gained a superpower. Thank you for this revelation
Quang vn -
This tutorial is exactly what I needed! I often find myself checking items one by one, and it's so tedious. Your guide made it super clear!
Bích Ngọc -
Can anyone share how they customize their Notion boards for better productivity? Would love to learn more
Thùy Linh -
Great tips! However, can you explain if there's a way to check all items again quickly? That would be super helpful
Thanh Mai -
Just tried it, and it works! Holy moly, why didn't I find this sooner? Thanks for sharing!
Phúc IT -
I've shared this with my team! We all struggle with this same issue. Can't believe it was so simple. Cheers!
Tommy Lee -
I didn’t even know this was an option. Seriously, you're a lifesaver! I will definitely share this with my friends
Khanh Nguyen -
Great explanation! I find Notion a bit overwhelming at first, but these simple tricks help me feel more confident using it
Tom H. -
Any chance you could include more visuals in your next post? I’m a visual learner, and images help so much
Huy Kien -
I am impressed! This is exactly the kind of practical advice I look for when learning about software
Linh mèo -
How did I not know about this before? This will speed up my organization process, thank you