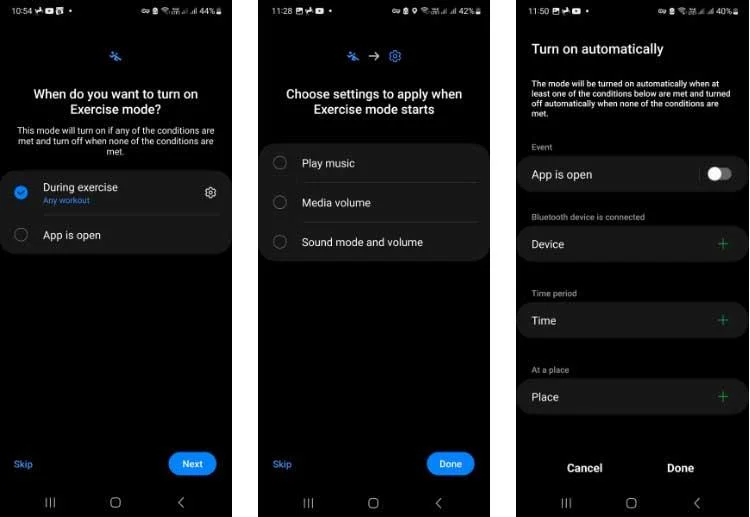
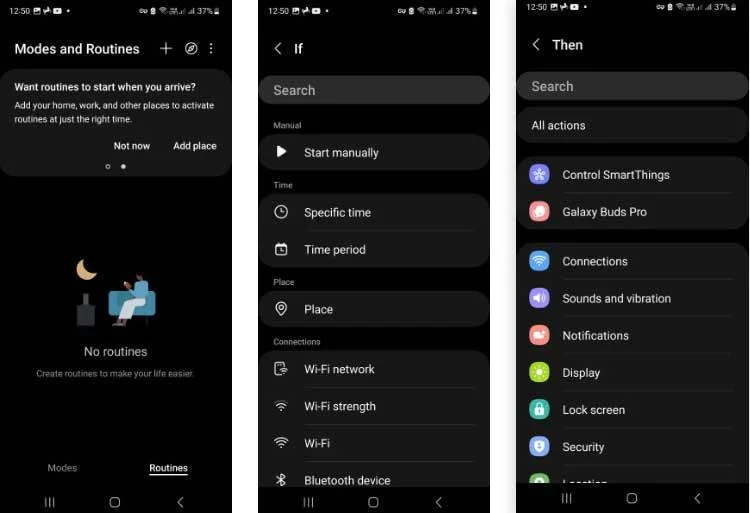
Modes and Routines is a new feature in Samsung's One UI 5 that allows you to open apps and change settings automatically to suit what you're doing.
The One UI 5 update for Samsung Galaxy introduced some new exciting features, including Modes and Routines. These two tools give you new ways to combine phone settings, styles, and layouts for everyday life activities.
Below is the best way to set up and use Modes and Routines on Samsung Galaxy devices.
How to use Modes and Routines on Samsung phones
Difference between Modes and Routines
Modes and Routines are two different ways of achieving the same basic things. Each tool allows you to quickly adjust your Samsung device setup to suit your current needs.
For example, you can select Workout Mode before working out or create a Sleep Routine to open when you're ready to work out. Your device settings will instantly switch to accommodate these situations, be it silent notifications or playing workout music.
The main difference between these two tools is Modes. You can enable it manually or with another task. Routines are like IFTTT applets. It is triggered when specific criteria are met such as location, time, or when a task is performed.
You need to be using One UI 5 or higher on your Samsung Galaxy device to access and edit Modes and Routines using the method below.
How to use Preset Modes on Samsung Galaxy
The device has a number of Modes available for you to use the first time you access this feature, including Sleep, Workout, Driving and Relax. You still need to configure these Modes before you can use them, but they give you a good starting point.
- To start configuring Modes , go to Settings > Modes and Routines > Modes .
- Tap any of the preset Modes, then tap the Start button .
- Choose when and how to activate Mode. If you just want to turn on Mode manually, tap Skip .
- Select the desired settings on each setup screen to configure the Mode to your liking. Some settings will require deeper selection, such as which applications to use.
- When configuring Mode , click the Done button to see an overview of the settings you have selected.

How to create Custom Modes from scratch
You can also create Custom Modes for situations that are not suitable for the modes in Preset Modes as follows:
- At the bottom of the Modes tab in Settings , tap Add Mode > Custom .
- Name the new Mode and choose an icon design & color.
- Tap Done and the Custom Mode overview screen will open.
- Touch the Turn on automatically position and select the conditions that need to be met to activate this Mode .
- Process what you want on this screen, select each section and change the settings to meet the conditions you want.
You can delete both Custom Modes and Preset Modes (when configured) by selecting them, tapping the More button (3 dots) and selecting Delete .
How to create a Routine in One UI 5
Routines are similar to Modes but may be more suitable when you want to change settings to automation. They operate on an If/Then - Condition/Result process.
Previous Routines were created via Bixby, but this feature has been separated from the voice assistant in One UI 5. The process for creating them is similar. Basically, you need to follow these steps:
- Open Settings > Modes and Routines , and select the Routines tab . Any Routines created with Bixby will be listed here.
- To add a new Routine, tap the + button at the top of the screen.
- Tap the If button to add a trigger to the Routine, such as time or location. You can also add conditions to the trigger, but the battery level is required.
- Tap Then to select actions that are triggered when the If condition is met. You can select more than one action to be enabled.
- With the trigger and task set up, tap Done . You can then add a name, icon, and color accent to the Routine.
- The final setting is what happens when the Routine finishes. For example, if Bluetooth is turned on, you can know whether it is turned off or not.

A new feature of Routines in One UI 5 is the ability to activate a pair of apps instead of just one. When using this option, the app will open in a split screen with one app at the top and one at the bottom.
Turn on Recommended Routines
First, you need to enable Customization Service. You can see a popup confirming turning it on on the Routines screen. If not, you can find it by tapping the More button, then Settings > Customization Service .
Above is how to use Modes and Routines in One UI 5 . Hope the article is useful to you.