Stop CODE Editing Sessions from Ending at 10 Minutes

Trace a 10-minute CODE disconnect to its proxy, load balancer, or WebSocket path, then correct the timeout and verify the session stays connected.
WebTech360 – Microsoft PowerPoint in the Office 365 suite is one of the best presentation support tools available today. With updates from July 2018 to this, PowerPoint has added the ability to insert 3D models into slides. With the models available in the model store of Microsoft Powerpoint, you can freely create your presentations to become more vivid. Especially it is extremely useful for preschool teachers, elementary school teachers and biology and science teachers… In this article, WebTech360 will guide you how to insert 3D models into your slides.
1. Insert 3D images from Microsoft's online library
Step 1: Select the slide to insert the 3D model, then on the toolbar, go to Insert > 3D Models > From Online Sources .
Step 2. Select the model category that you think is suitable for the content to be inserted. Or you can type in the search box to find the right model.
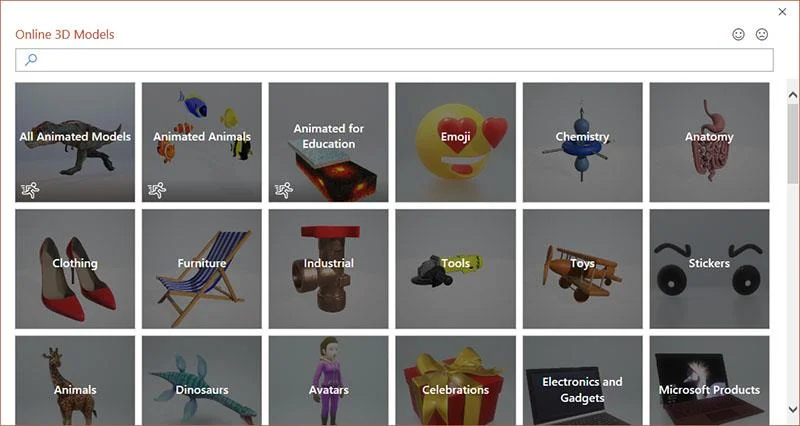
Step 3. Then click on the model you want to insert and click Insert to insert it into your Slide.
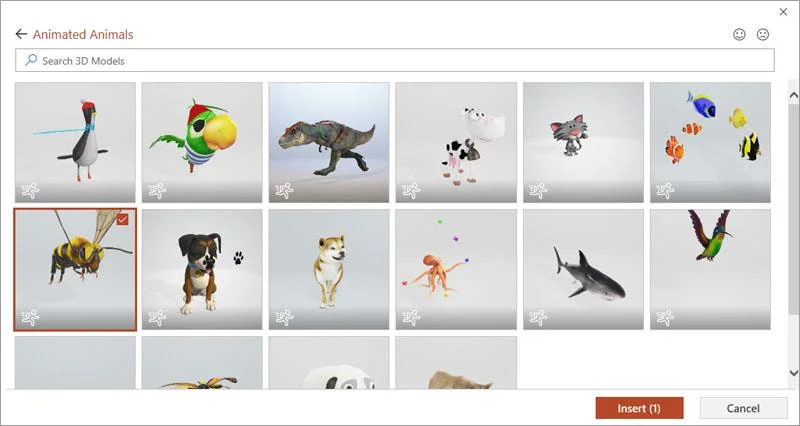
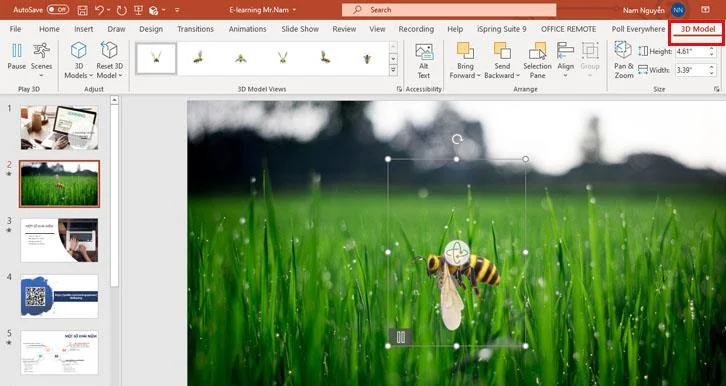
Step 4. So we have inserted a lovely 3D model into our Slide already. Now you can adjust the viewing angles to suit your Slide.
Click Select 3D Model on the Ribbon and choose the appropriate formats for your Slide.
Some other options to help you fine-tune your 3D models include:
800800
Or you can also use the icons that surround the model to adjust accordingly.
8
2. Insert the 3D model available in the computer
In addition to using 3D images available online, this feature also supports users to use images available in the computer. You do the following:
Step 1: Go to Insert > 3D Models > From a File .
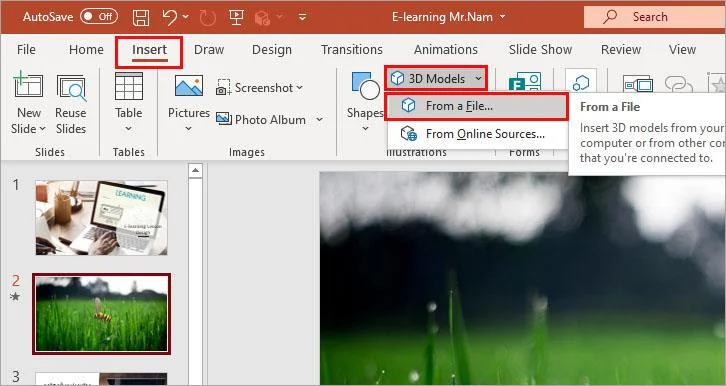
Step 2: Select an image from your computer and then Insert to insert it into the document.
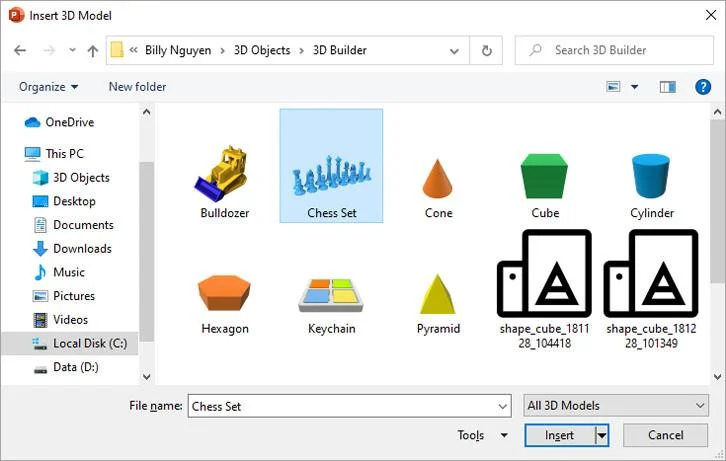
The models in this machine can be downloaded from the internet or created by yourself using 3D design programs such as 3D Builder available in Windows 10.
PowerPoint new version fully supports reading 3D formats such as obj, fbx, 3md, ply, stl, glb...
Step 3: You can fine-tune the image like inserting 3D images in the online store.

Some notes when using the 3D image insertion feature on PowerPoint 365:
So we have finished inserting the 3D model into our slide. Wish you have more interesting experiences also with Powerpoint.
Trace a 10-minute CODE disconnect to its proxy, load balancer, or WebSocket path, then correct the timeout and verify the session stays connected.
Install the official Collabora Helm chart, configure WOPI access and ingress affinity, and verify the deployment without common setup mistakes.
Use browser requests, WOPI logs, and targeted proxy checks to find why Collabora opens a blank document—and choose a fix that fits the evidence.
Configure CODE Docker dictionaries and tag document passages correctly so English, French, and other supported languages receive the right spell-checking.
Adjust the per-view inactivity threshold in coolwsd and distinguish it from background-tab dimming, document unloading, autosave, and login expiration.
Stop scheduled CODE update checks, review optional remote services, and use outbound network controls without breaking document editing.
Enable secure document editing in Seafile by configuring Collabora’s discovery URL, HTTPS, and WOPI access for your deployment.
Test the system clipboard, adjust browser permissions, and identify when an embedded Collabora integration needs an iframe policy change.
Mount font files into Docker and Collabora’s systemplate so custom typefaces appear in the editor and render correctly in documents.
Back up coolwsd.xml and its deployment sources, restore them safely, and verify CODE before users return to editing.