Home
» How to
»
Instructions for uninstalling Cheat Engine
Instructions for uninstalling Cheat Engine
Video Instructions for uninstalling Cheat Engine
Cheat Engine is an open source tool designed to help you change game parameters to make them harder or easier depending on your preferences. However, the downside of this program is that it comes with many additional software such as MyPCBackUp, ByteFence Anti-Malware, WorldofTanks ... Many users want to remove it because of other unwanted applications installed. slowing down the computer speed as well as taking up memory space, moreover, many annoying pop-up ads appear on the screen when starting Cheat Engine.
If you have tried the usual way to remove Cheat Engine but it is not successful then it is best to use professional removal tools. The following is an article that shows you some ways to uninstall Cheat Engine.
Finish running the Cheat Engine in Task Manager . This step is applicable to Windows 7 / Vista / XP / 8/10.
Right-click on the Taskbar and select Task Manager.
In the Task Manager window , find the Cheat Engine and click End task / End process to finish running the program.
For Windows 7
Click Start and select Control Panel.
Select Uninstall a program under Programs.
In the list of installed programs, find Cheat Engine and click Uninstall to remove it.
A dialog box will appear as shown below, click the Yes button to confirm the uninstall.
You will then receive a message box telling you that Cheat Engine has been successfully removed from your computer. Click the OK button to finish the process.
ATTENTION:
If you install additional software, follow the instructions below to remove it (You can skip this step if you do not install the included programs).
Uninstall the included programs
Search for an unnecessary program from the list of installed programs and click Uninstall to remove it.
Select Uninstall in the pop-up dialog box.
Click Close to complete the removal process.
For Windows 8
Right-click Start and select Programs and features.
Find Cheat Engine and click on Uninstall.
In the message box that appears, click Yes to confirm the uninstall. Then click the OK button .
For Windows XP
Click Start and select Control Panel.
Then, click on Add or Remove Programs.
In the Add or Remove Programs window , find Cheat Engine in the list of currently installed programs and click Remove to remove.
Click Yes to confirm the removal and Ok to finish.
NOTE: The steps to uninstall the bundled software on Windows 8 and XP are the same as Windows 7.
Uninstall Cheat Engine with the default uninstaller
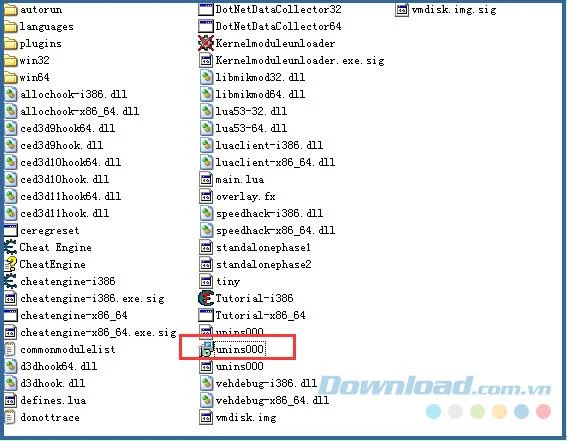
Go to the directory where you used to install Cheat Engine (if installed by default, go to C: \ Program Files \ Cheat Engine ), search and double-click on the default uninstaller unins000.exe and execute. Follow the instructions to uninstall Cheat Engine.
After you have removed the Cheat Engine, you need to delete the related files and folders.
If you install Cheat Engine by default, delete the following files:
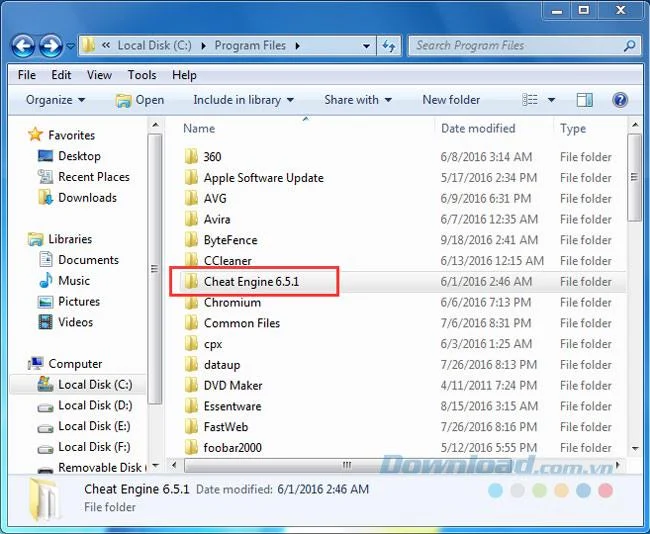
C: \ Program Files \ Cheat Engine 6.5.1
C: \ Users \ User Name \ AppData \ Roaming \ Cheat Engine 6.5.1
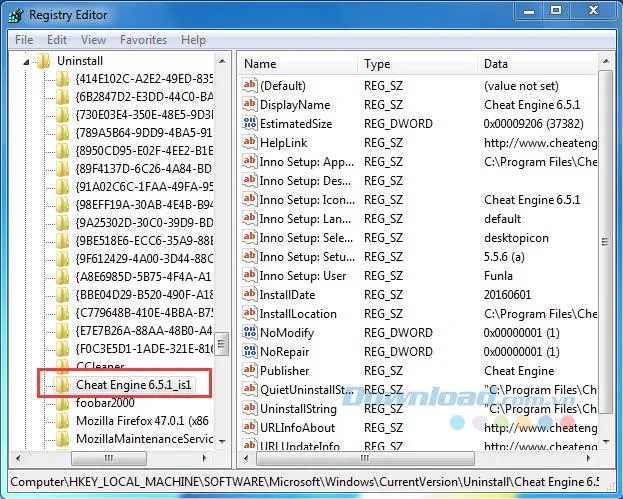
Delete the Cheat Engine in the Registry
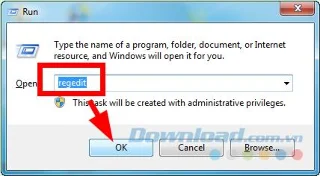
First, press Windows + R key combination . In the Run dialog box , type Regedit and press OK.
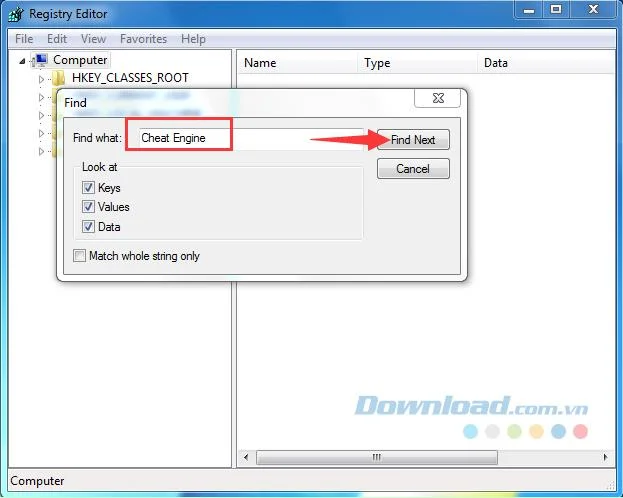
In the Registry Editor window , simultaneously press Ctrl + F on the keyboard or click on Edit and type Cheat Engine into Find what , click the Find Next button .
Then you will see related items, delete all of them.
ATTENTION:
You need to repeat the above steps continuously until you have cleaned all the Cheat Engine related items.
Perfect Uninstaller is a professional uninstaller program that makes removing unwanted programs easier, faster, and more safely than Windows Add or Remove Programs. With Perfect Uninstaller, you can completely remove all related registry entries that Cheat Engine left over.
Main features of Perfect Uninstaller
Remove any unwanted programs without leaving a trace.
Uninstall any stubborn / hidden / corrupted programs that cannot be removed via Windows Add or Remove Programs.
Displays details of a program installed in your computer.
Completely clean all registry entries and junk files that the program has left.
Disable unnecessary startup programs to speed up PC startup.
Back up system files whenever you start your computer to avoid data loss.
After downloading and installing Perfect Uninstaller, follow these steps:
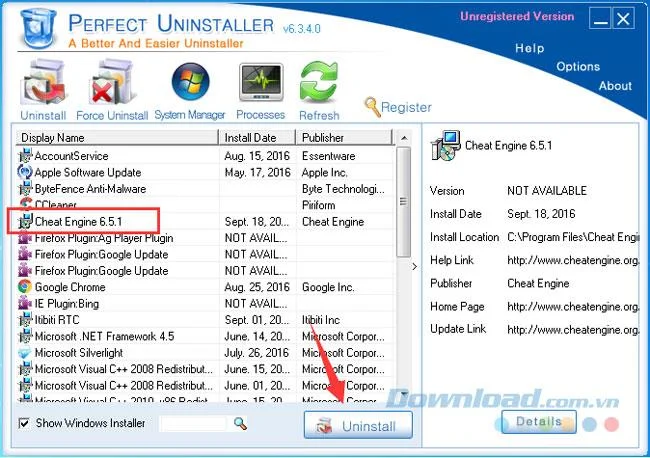
Step 1: Start Perfect Uninstaller and choose Cheat Engine from the list of programs, then click Uninstall.
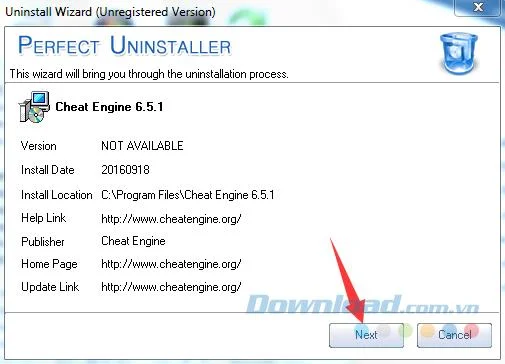
Step 2 : A message box pops up showing you the details of the program including its version, installation location, manufacturer and homepage. Click the Next button to continue the process.
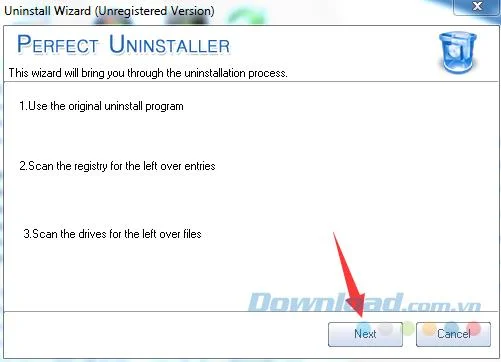
Step 3: In the pop-up dialog box, click on Next , then select Yes to confirm uninstall.
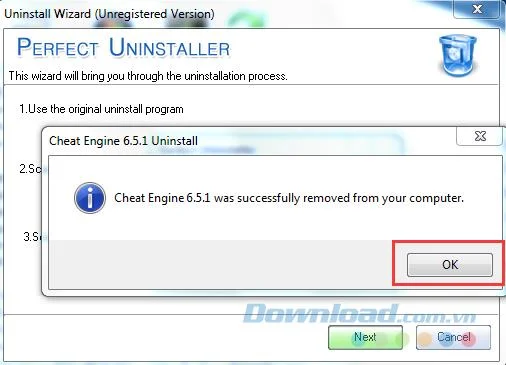
Step 4: Finally click Ok to complete the removal process.
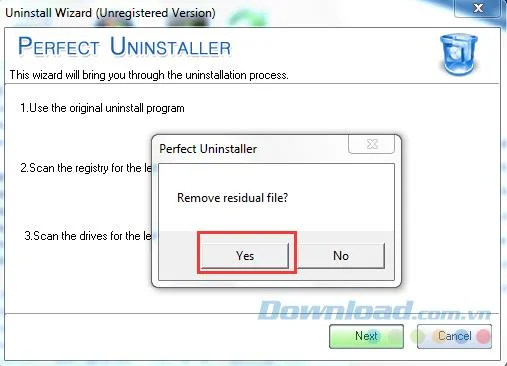
Step 5: Click the Yes button and follow the on-screen instructions to remove the remaining files.
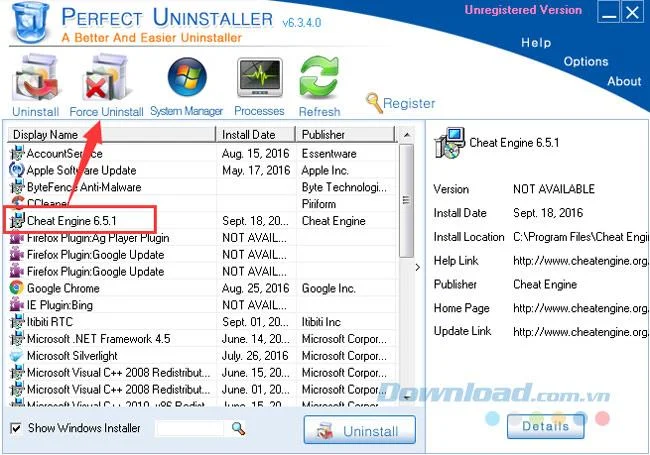
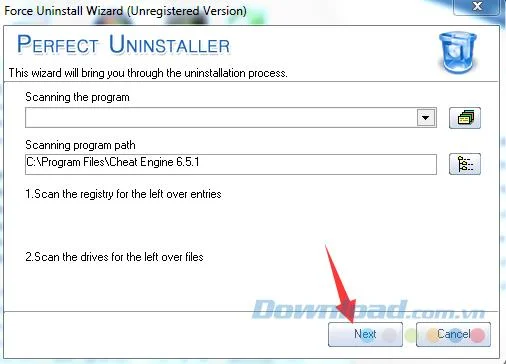
If you can't uninstall the Cheat Engine using Perfect Uninstaller's Uninstall function, don't worry, use another powerful function called Force Uninstall to disable and quickly uninstall in just one Few simple steps:
Step 1: Select Cheat Engine and click on Force Uninstall.
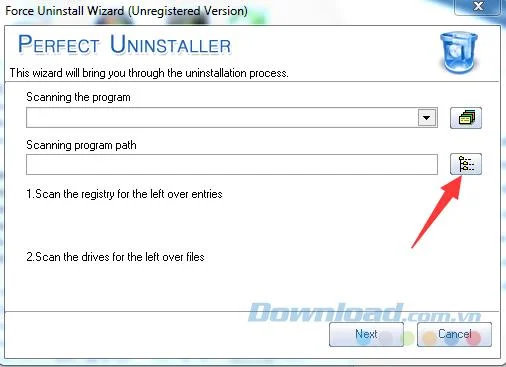
Step 2: Click the branch diagram icon next to the Scanning program path frame and select the Cheat Engine folder , then click OK .
Step 3: Click Next, Perfect Uninstaller will scan your registry and drive to search for leftover files. After the scan is complete, click Next to delete all registry entries and files created by Cheat Engine.
Want to remove Cheat Engine from your computer easily and quickly? If so, don't hesitate to use a professional removal tool like Perfect Uninstaller. This reliable software can remove any unwanted or stubborn programs in a matter of seconds, it cleans up all the remaining junk files and protects your computer from being registry error.