The application migration, software installed on the computer from one location to another location is absolutely normal in the course of using the computer. However, with the applications installed, you cannot move them without removing them and after going to a new location, you will need to reinstall again, very laborious and time consuming. This is when you need Steam Mover .
Steam Mover is an extremely useful tool, helping to move installed applications and software from one location to another, even from one drive partition to another without removing and installing. set again. This is a method that can save us a lot of time and unnecessary operations.
In particular, if anyone has been, using Windows 10, it will see the need of Steam Mover. Because Windows 10 forces users to choose the installation location of applications, software right from the first step. This is really disadvantageous if you want to change the location of these applications during use.
How to use Steam Mover
Because Steam Mover will be more useful for users of Windows 10 operating system, the images in this article will be guided on this operating system. Moreover, this software only supports the NTFS standard, so before you start, check the location of the application you want to move and the location to move to see if it is in the correct format?
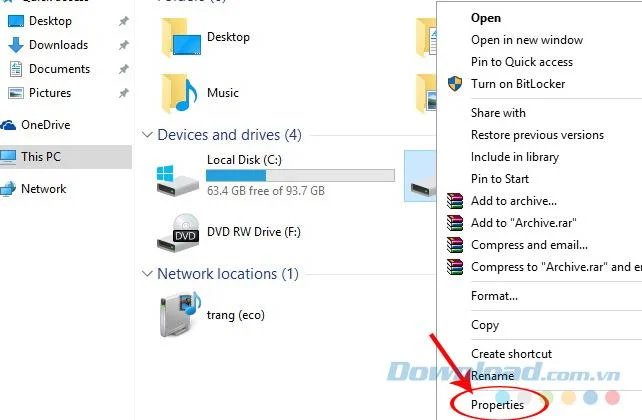
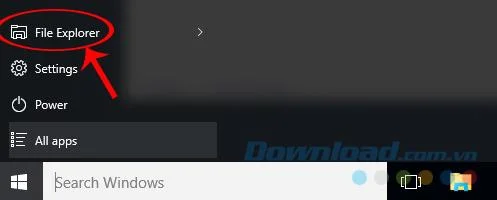
Step 1: Check the format of the two partitions on Windows 10. From the main interface, click the Windows icon in the lower left corner of the screen, select File Explorer.
Step 2: Right-clicking on the drive will move the application and the drive will bring data to, select Properties .

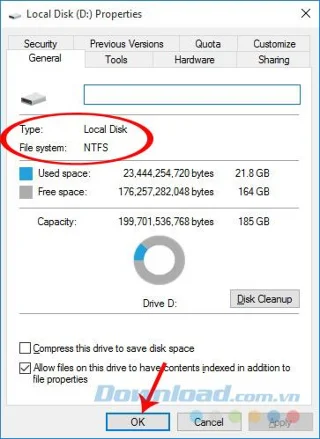
Window as below appears, you check in the File system section to see if it is standard NTFS or not?

Identify as NTFS standard, then OK to close.
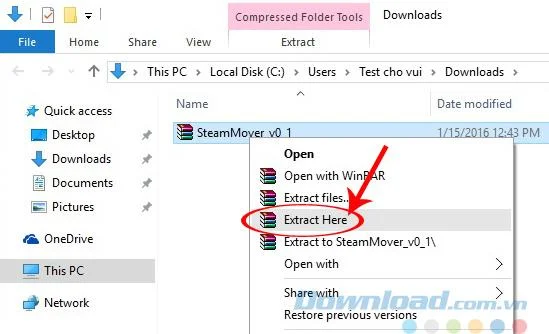
Step 3: After the test is complete, you proceed to download the installer of Steam Mover and extract it.

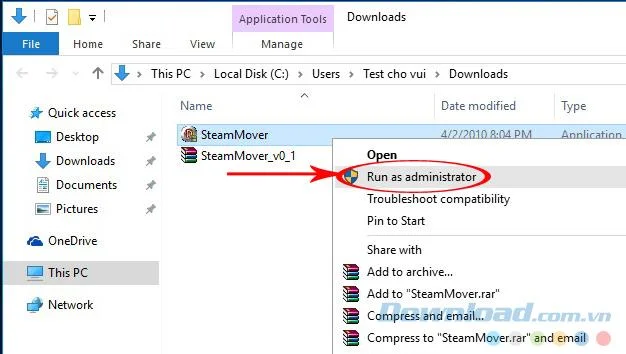
Step 4: Continue to run under admin rights SteamMover file by clicking the right mouse click it and select Run as administrator.

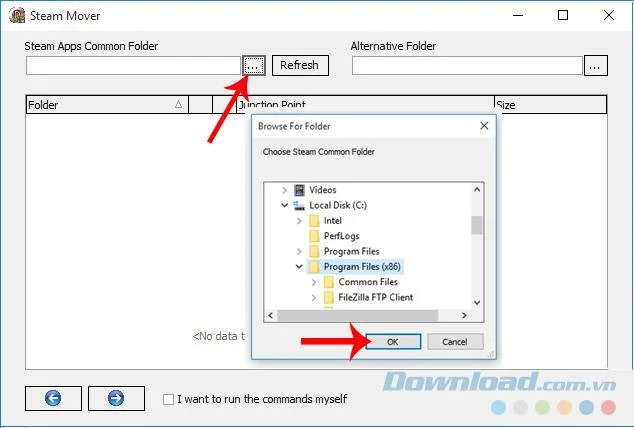
Step 5: The main interface of Steam Mover appears. The beginning will be a blank white frame. You observe:
- Steam Apps Common Folder: Location of applications and software to move.
- Alternative Folder: Alternate folder , this is where you want to move the application to.
Click the dot icon next to Refresh to select a location.

Select the location of the applications, the software needs to be moved, and then OK
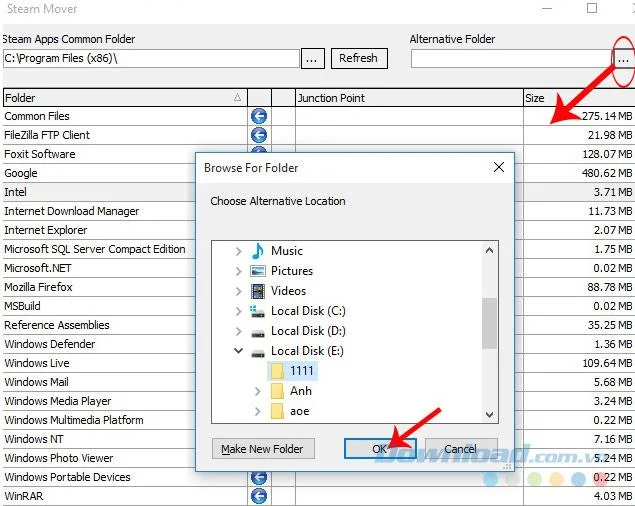
Step 6: Continue to select the three dots on the opposite side to determine the new location for the application.

Choose a location to move the application to and then OK
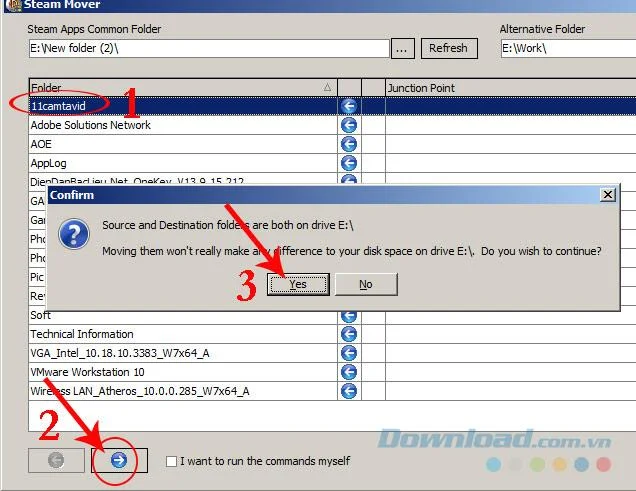
Step 7: The interface will now display all the applications and software that have been installed in the folder of your choice. To move an item, just do the following:
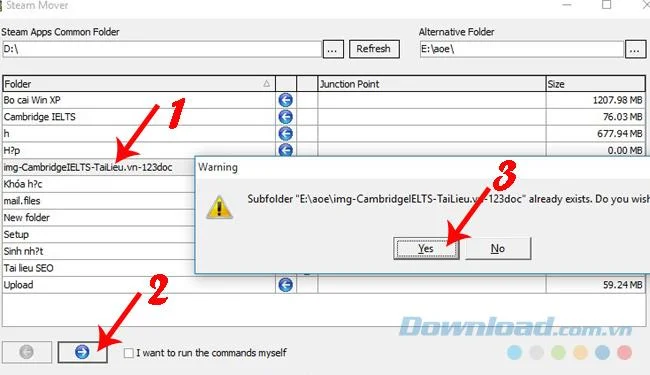
- Click the left mouse button on the line that contains the necessary move.
- Click the green arrow below (arrow to the right).
- Select Yes in the next message appears.

For example:
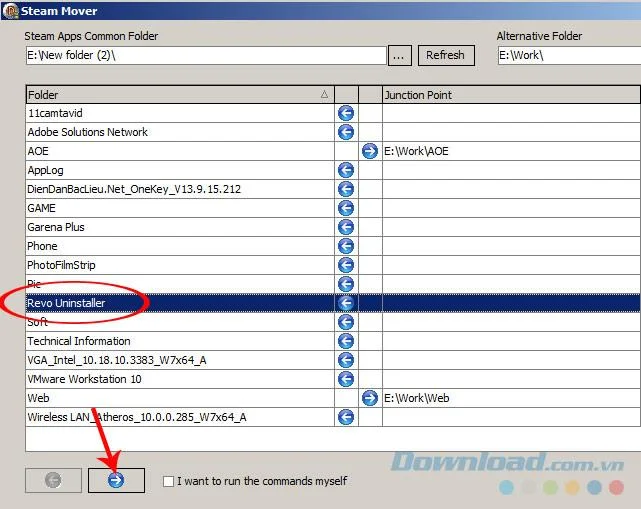
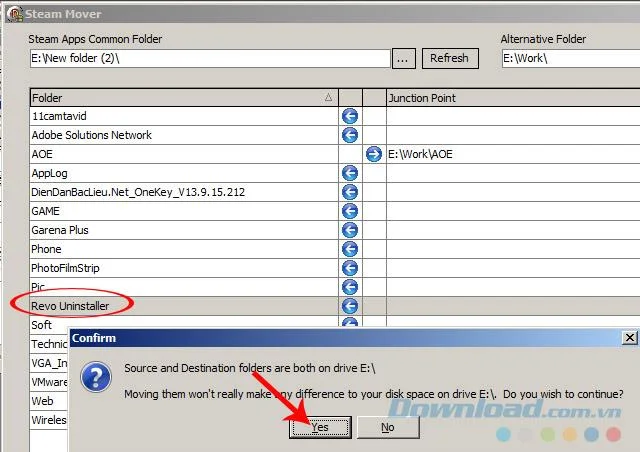
Download.com.vn will move Revo Uninstaller to the new partition. Click on Revo / green arrow.

Click Yes at the message appears.

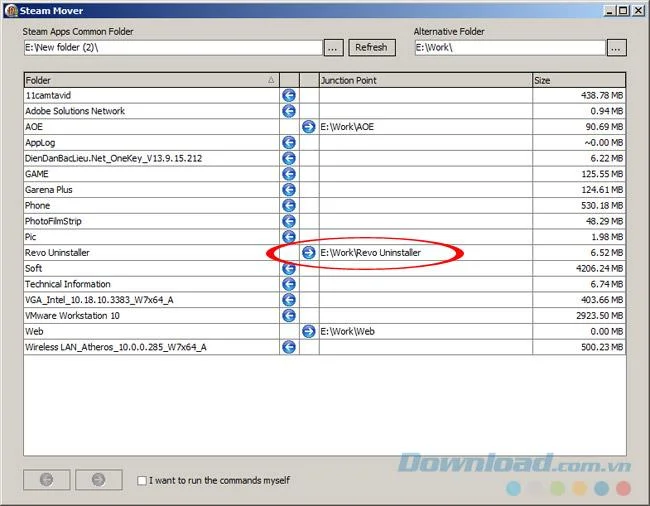
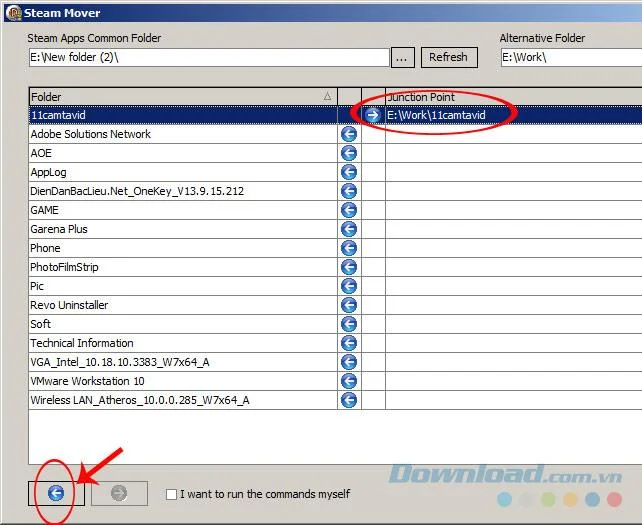
We will then get the result as shown below. Revo Uninstall has been moved to a new location.

Step 8: To move these applications back to their original locations, just click on them, then click the green arrow (pointing to the left) and wait for the migration to be done automatically.

Can move any application or software without capacity limit.

And here is the image Download.com.vn done on Windows 7 operating system. The operation of checking the partition, selecting the moving and arriving partitions and the application migration are completely the same.
Use Steam Mover to move apps and software on Windows 7
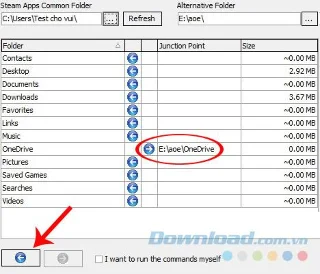
We also click the three dots on the sides to determine the location of departure and arrival. Then select the application to move, select the green arrow icon below, Yes to agree and wait a bit.

And ... success!

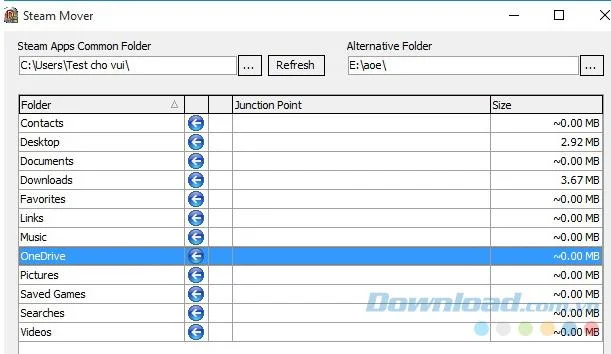
To bring the application, the software has just moved back to the old position, we are similar:
- Select the application from the right.
- Click the arrow (pointing to the left).
Attention:
- Steam Mover can work well on most operating systems from Windows XP, Windows 7 to Windows 10.
- In the process of moving the application, there may be more than one notification, you just need to click Yes.
- Applications and software, when moved to a new location or moved back, can still be used normally.
The above article has just guided you how to move houses for installed applications and software to a new location without reinstalling. This way, we will save a lot of time and ensure that the computer capacity is not full after each new download and installation.
Wishing you and your family a happy new year!