If you’re starting or growing a business, you need an effective way to manage different teams and departments, share information, manage workflow, and delegate tasks efficiently. Implementing HubSpot to your business can be of tremendous help in bringing marketing, sales, and service together. From tracking their sales and prospects to launching inbound marketing campaigns.
To take advantage of all the possibilities this platform has to offer, you need to know how to utilize its main functions, starting with adding a new user.
Adding a New User
While HubSpot is vital in improving your CRM pipelines, users are the backbone of the system, so take the process one step (or person) at a time. Luckily, adding a new user to HubSpot is as simple as following these easy steps:
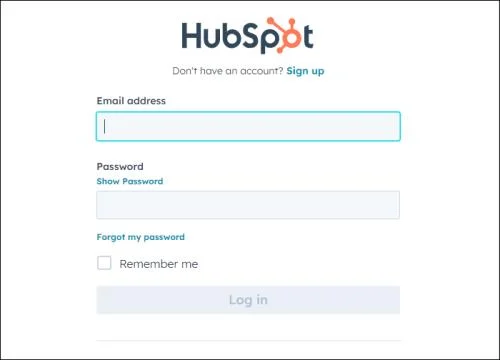
- Log into HubSpot with your admin credentials.

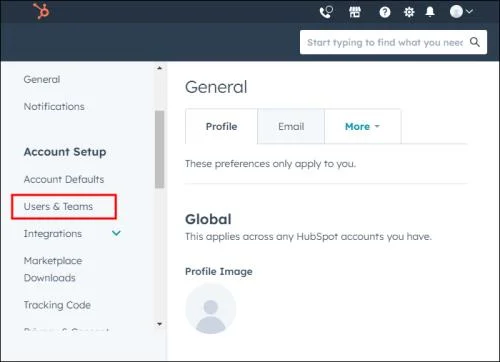
- Click on the gear icon in the upper right menu.
- Navigate to User & Terms in the left sidebar menu.

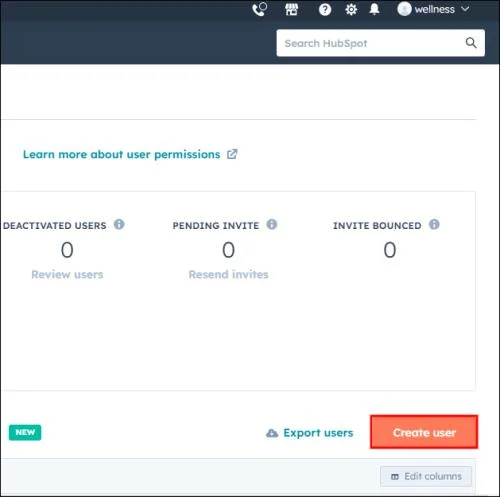
- Go to the Users tab and click on Create User in the right corner.

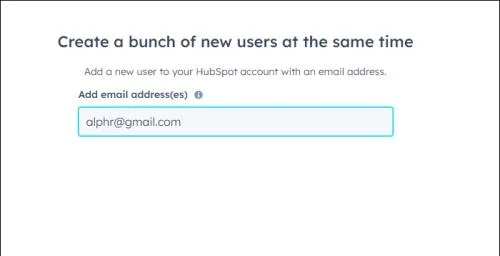
- Enter the email address of your new user, multiple space-separated addresses, or upload multiple emails via a single-column CSV or TXT file or another option listed on the screen and click Next.

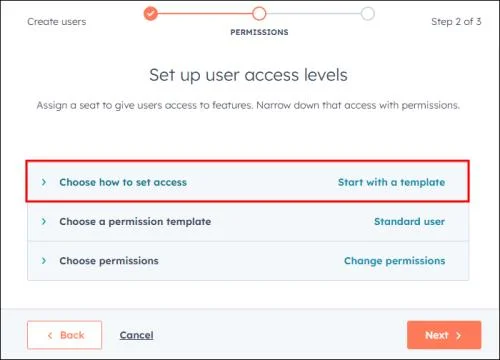
- Click on Choose how to set access and pick the option that’s most suitable for you.

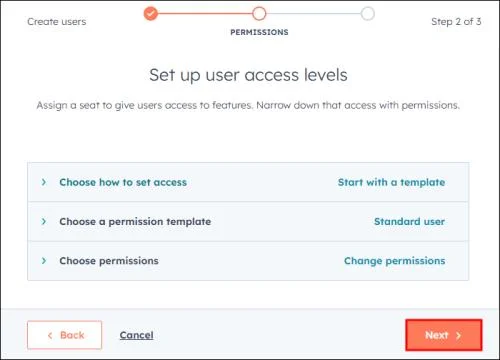
- Select Next, at which point HubSpot will send invites to the designated emails unless you disable that on the screen.

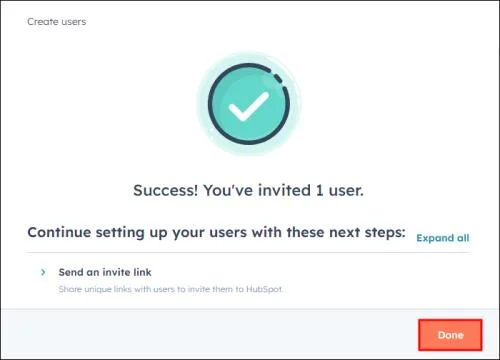
- Hit Done to wrap up or save the settings you used as a preset for future additions.

Since HubSpot creates an invite based on the email, you won’t need any additional information to add a person to the system. Once the new team member accepts the invite, they can finish setting up their profile with personal information.
Before clicking on Done, you can select these options if they’re convenient or available to you within your subscription plan:
- Copy invite link – You can click on this button to copy the invitation link, which you can save, and send to the new user on another platform, like in a Slack or Teams message.
- Add your users to a team – This option might be useful if you already have teams set up. You can select the teams from the dropdown menu and add your user.
- Set up users with presets – If you have Enterprise or Professional tier, you can add presets to your user, by choosing them from the dropdown menu.
- Save these permissions – If you modified an existing template or setup preferences from scratch, you might use them in the future for similar roles. This option allows you to save the permissions within a new set template. It’s only available for the Enterprise tier.
Setting Up User Permissions
By default, user permissions are divided into six hubs:
- CRM
- Marketing
- Sales
- Service
- Reports
- Account
When setting these options, for some hubs you can define what your user can view, access, modify, or delete. For other hubs, you’re offered toggle options and can just switch certain features or tools on or off.
Start With a Template
This one is the most convenient option. HubSpot already configures the permissions based on the user’s job function within the company. You can choose the desired template by scrolling through the dropdown menu under Select template or by typing in the job title. After you’ve selected the template, you can customize it further if needed.
Use a Custom Permission Set (Enterprise Only)
HubSpot has an option for you to create permission sets before you begin adding a new user. During this process, you can define preset permissions for various positions within your company. As a Super Admin, you can create up to 100 different sets. Simply search for the roles you imputed by typing in the name of the permission set you have already created, and it will be assigned to the new user.
Start from Scratch
This option is as straightforward as it sounds. You get to manually input all the permissions for the new user by setting the permissions for all hubs individually.
Managing Paid User Seats
When creating new users, there might be some limitations for the permissions that are reserved for “users with a paid seat.”
A paid seat allows the user to access additional features and functionalities that aren’t available in the free plan. Depending on the type of paid subscriptions, the sets of features offered might vary. Tiers that offer limited numbers of paid seats are for Sales Hub and Service Hub tiers. The number of paid seats you can include in HubSpot depends on your plan and subscription settings.
During the new user setup process, you’ll be able to assign users access to some of these features. By doing that, you’ll be filling one of the “paid seats” that come with your subscription plan. If you’ve used up all the seats offered in your package, you can purchase additional seats. If you didn’t buy a seat before your new user setup process, you’ll be directed to checkout to purchase additional seats once the invites go out.
Creating Users with Paid User Seats
During the new user setup, you can assign a new user their paid user seat in a few simple steps. These will be available for Starter, Professional, or Enterprise Sales and Service tiers.
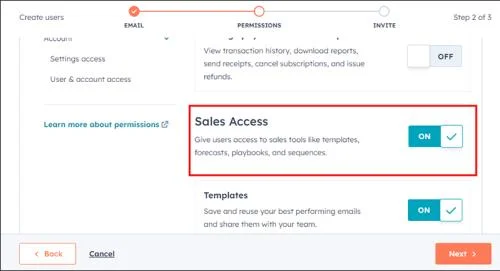
For Sales Paid User Seat:
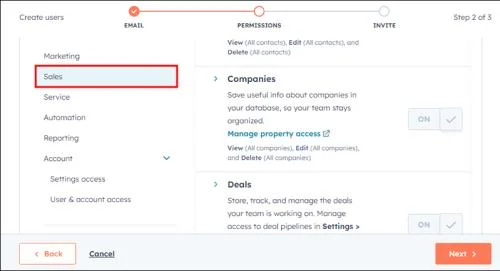
- Click the Sales tab.

- Switch the Sales Access on.

- Based on your tier you’ll have the Sales Starter, Sales Professional, or Sales Enterprise boxes displayed.
- Toggle the switch that shows the number of total and remaining available seats.
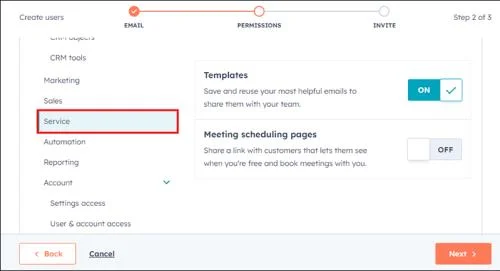
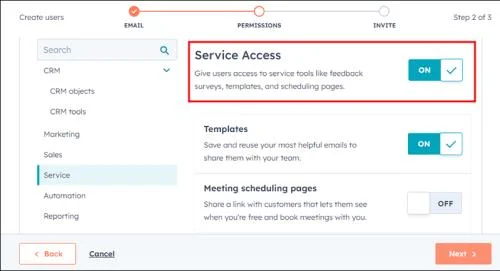
For Service Paid User Seat:
- Click the Service tab.

- Switch the Service Hub Access on.

- Based on your tier you’ll have Service Starter, Service Professional, or Service Enterprise displayed.
- Toggle the switch that shows the number of total and remaining available seats.
FAQs
Who can add users on HubSpot?
Super Admins and other users who have permission to add and edit users can do so, and a Super Admin can enable the Add and edit users permission within the Access tab when creating a new user. Another user with the ability to add and edit users can only add permissions that they have.
How do I change the number of seats in my Sales or Service Hub subscription?
You can add new seats to your Service or Sales account anytime. If you pay a monthly subscription, before the next billing period you’ll have to pay a prorated amount for the new seats you purchased. You can remove the extra seats you paid for or the ones that you don’t use within your subscription at any time from your “Account & Billing” page.
Take Your CRM to Another Level
For your business to thrive, merely purchasing one of the most popular CRM platforms, like HubSpot, isn’t enough. To grow with HubSpot and harness the potential it has, you need to know how to use and take advantage of all of the features it offers. Adding users and setting permissions are some of the first steps to take to bring your CRM to the next level.
Have you encountered any issues while adding new users? Let us know in the comments section.