Home
» How to
»
Ubuntu Server Booting into Emergency Mode: A Step-by-Step Rescue Guide
Ubuntu Server Booting into Emergency Mode: A Step-by-Step Rescue Guide
Illustrative scenario: Casey maintains a hypothetical Ubuntu Server VM that drops into emergency mode after a reboot, shortly after an optional data-volume mount was added to /etc/fstab. Casey has console access but no SSH session. The mount change is a lead, not a proven cause: emergency mode can follow several boot failures, so Casey checks the current machine’s logs before changing anything. The terminal panels below show representative layouts and placeholder output, not a real repair or test.
What emergency mode means
On an Ubuntu Server installation using systemd, emergency.target starts a minimal shell on the main console. It is more limited than rescue.target, which brings up the base system and system mounts with only essential services. Depending on the path into emergency mode, the root filesystem may already be mounted read-only or read-write. Check it instead of assuming either state. See the upstream systemd special-target documentation.
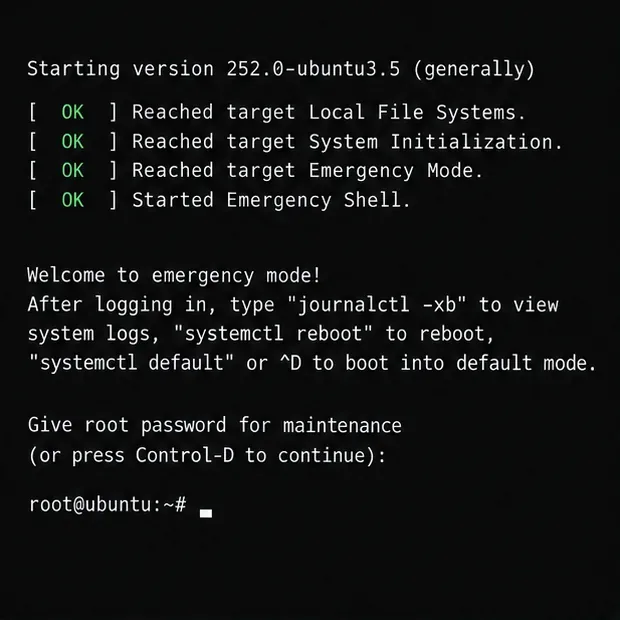
First distinguish the prompt. A systemd emergency shell typically says “Welcome to emergency mode!” and may ask for the root password for maintenance. A BusyBox prompt such as (initramfs) means boot has not yet switched to the installed root filesystem; a grub> or grub rescue> prompt is a bootloader problem. These require different recovery paths. If the root account is locked or the server is remote, use the hosting provider’s serial/VNC console or rescue environment; SSH usually is not available at this stage. Do not press Ctrl+D to continue until you understand and fix the reported failure.
Step-by-step rescue
1. Keep console access and record the exact failure
Stay in the emergency console. Note the last failed mount or service name and any device path or UUID printed above the prompt. Casey’s recent fstab edit is worth checking, but do not comment out every failing line or run a repair command based only on the word “emergency.” If the system is a virtual machine, keep the provider console open through the repair and next reboot.
The console identifies systemd emergency mode and provides a maintenance shell; authentication and wording can vary by setup.
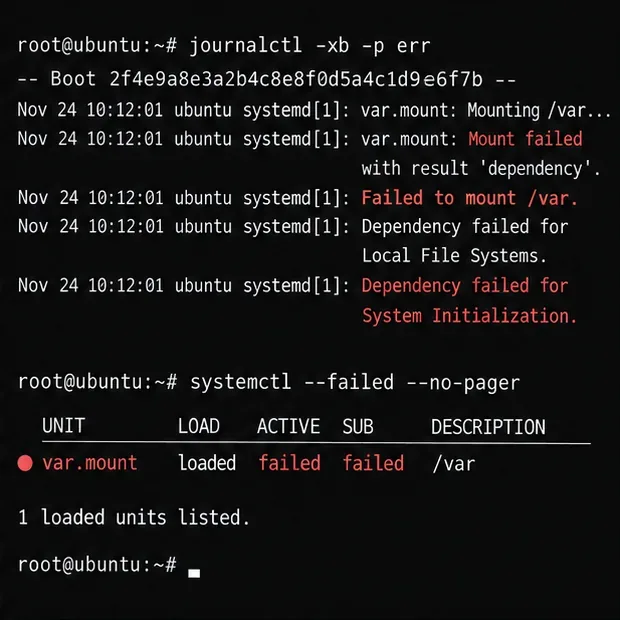
-b limits the journal query to this boot, and -p err filters for error priority and higher. Look for the first relevant error, not simply the last cascade of “dependency failed” messages. If a mount unit failed, note its escaped unit name and target path; if a service failed, identify whether it is a cause or only a consequence of a missing mount. Ubuntu’s journalctl(1) manual documents boot and unit filtering.
Representative boot-log output points to a failed mount dependency; the actual unit name and message must come from the server.
3. Check the root mount and available space
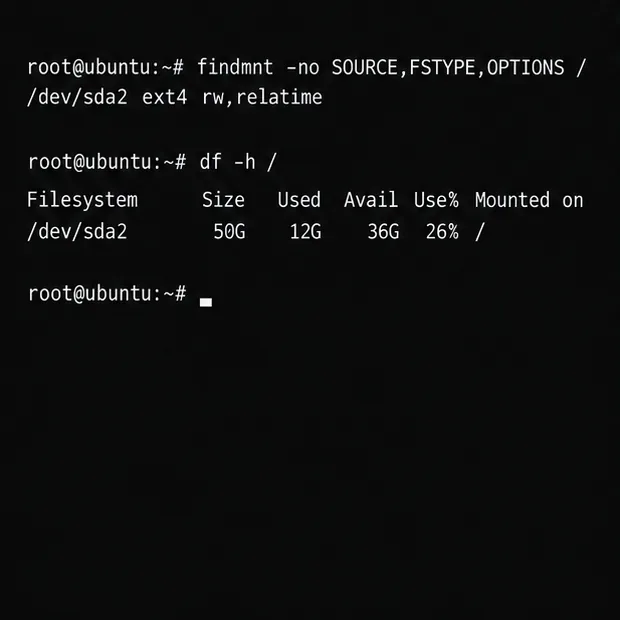
Before editing files or attempting repairs, inspect how the root filesystem is mounted and whether the system has run out of blocks or inodes:
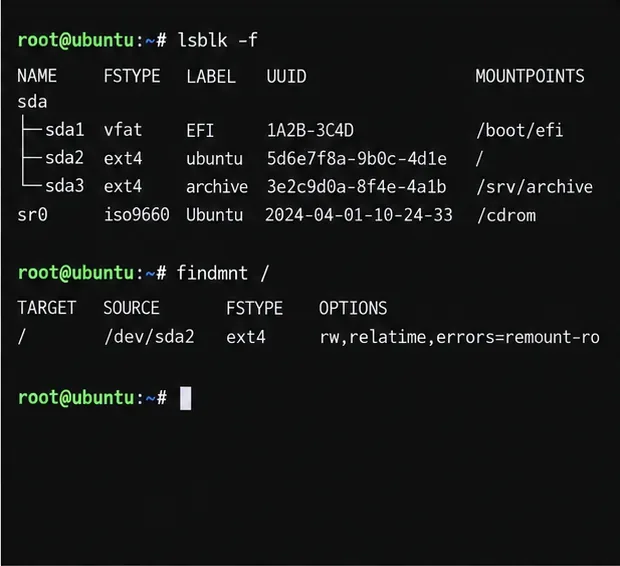
In the findmnt output, ro means read-only and rw means read-write. A read-only root can be intentional during part of a recovery path, or it can reflect filesystem trouble. Do not immediately force a remount as read-write if kernel logs report I/O or filesystem errors. A full filesystem or exhausted inode table can also cause unrelated services and mounts to fail. The Ubuntu findmnt(8) manual describes how to inspect mounted filesystems.
The commands reveal whether root is mounted read-only or read-write and whether disk blocks are available.
4. Validate /etc/fstab and verify device identifiers
Because Casey recently changed /etc/fstab, check both its syntax and whether the referenced devices exist:
findmnt --verify --verbose
lsblk -f
blkid
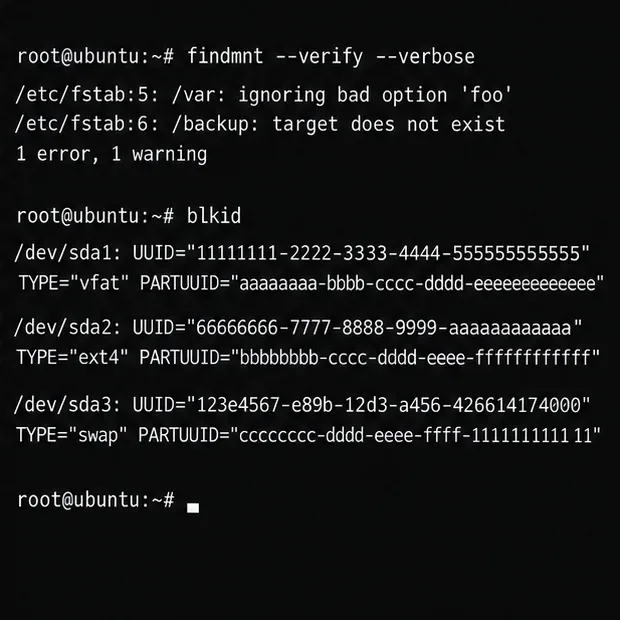
findmnt --verify --verbose checks the fstab entries for parse and usability problems. Compare every UUID= in the suspect row with the UUID shown by lsblk -f or blkid. Also check the mount point, filesystem type, and options. A copied UUID from another disk, a device that is not attached, or an invalid option can prevent a required mount from completing. Do not guess a partition such as /dev/sda1; device names can change between boots.
The validator reports fstab issues while blkid lists device UUIDs to compare with the suspect entry.
5. Correct only the confirmed mount problem
If the root filesystem is writable and the fstab check identifies a bad row, make a backup before editing:
cp -a /etc/fstab /etc/fstab.before-rescue
nano /etc/fstab
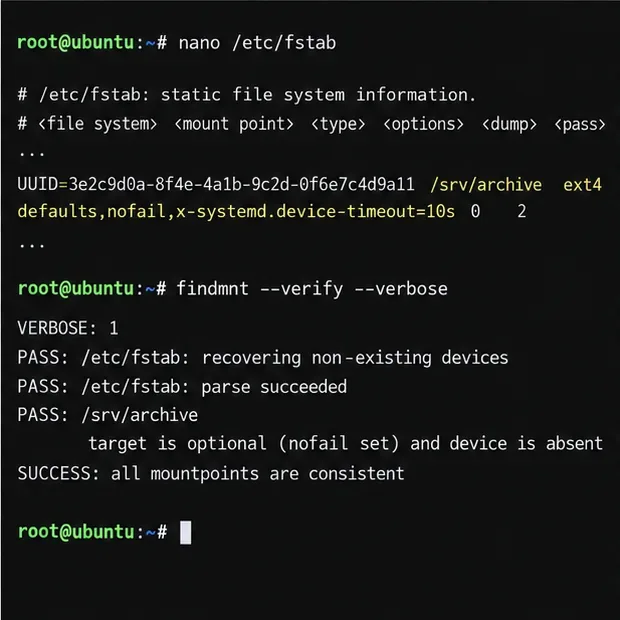
Correct the UUID or other field only after confirming the intended device. If the mount is genuinely optional and the server should still boot when that volume is absent, a systemd-aware fstab line can use nofail and a finite device wait, for example:
Replace the placeholder with the real UUID and use the actual filesystem type. Do not add nofail to root, boot, or other filesystems required for the machine or its applications to operate correctly. With nofail, boot proceeds even if the mount fails, so dependent services may still need attention. The Ubuntu systemd mount-unit manual documents these fstab options.
After editing, validate again before attempting the mount:
findmnt --verify --verbose
systemctl daemon-reload
mount /srv/archive
Use the actual mount point in the last command. If it still fails, read the new error and check whether the disk is attached and healthy. If the root filesystem is read-only, do not force changes blindly; use a provider recovery environment or bootable Ubuntu media to inspect and edit the installed system safely.
The example marks only a nonessential archive mount as optional and checks the fstab afterward.
6. Investigate a failed service only when the journal points to one
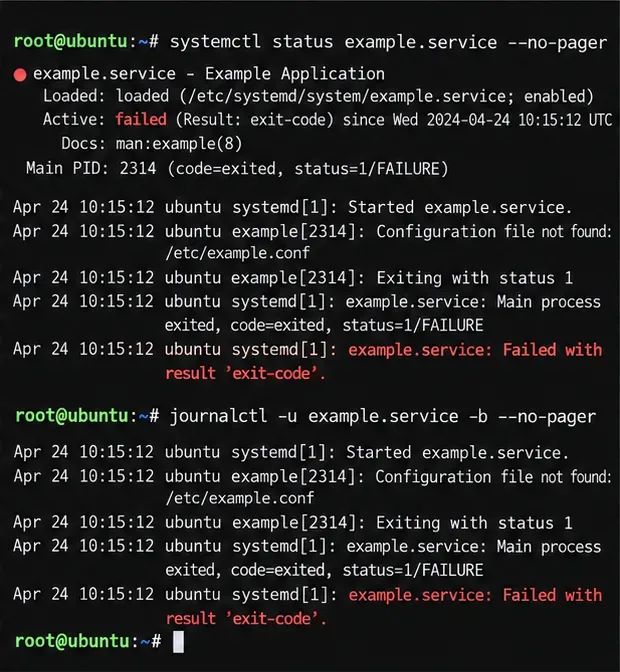
Emergency mode does not mean that every failed service caused the boot stop. If the relevant error names a service, inspect that unit and its logs instead of masking or disabling it:
systemctl status example.service --no-pager
journalctl -u example.service -b --no-pager
Replace example.service with the exact unit name. Check whether its configuration file, executable, credentials, or required mount is missing. If the failure is downstream of Casey’s missing data volume, fix that mount first and then re-evaluate the service. Disabling an essential service may hide the symptom while leaving the server unusable.
The service status and journal help separate a root cause from failures caused by another missing dependency.
7. Treat filesystem errors as an offline repair task
If the kernel journal reports filesystem corruption or storage I/O errors, stop making writes where practical and preserve a backup or provider snapshot before repair. Confirm the exact device and filesystem with lsblk -f. For a root filesystem, boot into the provider’s rescue system or Ubuntu recovery/live media, ensure the target partition is unmounted, and use the checker appropriate to that filesystem. For ext2/3/4, that tool is e2fsck; XFS, Btrfs, and other formats have different procedures.
Never run fsck or e2fsck on a filesystem that is mounted, including a mounted read-only root. The Ubuntu e2fsck(8) manual warns that checking a mounted filesystem is generally unsafe and that results are not valid. If the disk reports repeated I/O errors, prioritize recovering data or involving the storage provider over repeatedly attempting repairs.
The disk listing helps identify the right partition; the root filesystem remains mounted, so it is not ready for fsck.
8. Return to normal boot and verify the result
Once the confirmed cause is corrected, reboot from the console:
systemctl reboot
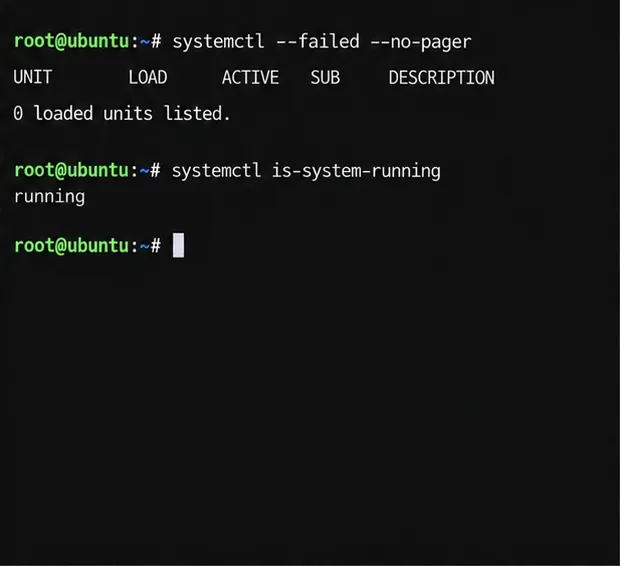
After Ubuntu starts, check the configured default target, the current system state, failed units, and the new boot:
If you are intentionally continuing in the current boot instead, systemctl default asks systemd to start the configured default target. Use it only after the blocking error is fixed; it does not repair an invalid mount or damaged filesystem. systemctl get-default shows the configured default target; systemctl is-system-running reports whether systemd considers the current state running, degraded, or otherwise. A clean recovery means the expected filesystems are mounted, required services are active, and the same emergency condition does not recur after reboot.
The terminal shows systemctl checks for failed units and whether the system is running after restart.
If the prompt is (initramfs) instead
Do not apply the systemd emergency-shell steps blindly in BusyBox initramfs. The initramfs stage is trying to locate and mount the real root filesystem before handing control to the installed system. Record the exact error, inspect whether the expected device appears in /dev and /dev/disk/by-uuid, and compare the boot command line’s root= value with the actual root UUID. If the disk or encrypted/LVM volume is missing, use the provider’s storage and rescue tools to investigate it. Rebuilding initramfs or changing GRUB parameters without identifying the missing device can make boot recovery harder.
For Casey’s hypothetical VM, the useful outcome is a verified cause and a narrowly scoped correction: restore the expected optional volume, correct its confirmed identifier, or configure it as optional only if the workload truly permits that. Then verify the next boot from the console before closing the recovery session.