Drawing photoshop arrows is one of the necessary tool operations to help you navigate to the content you need to introduce, so how to edit photoshop arrows to suit different shapes and sizes . This article of WebTech360 will show you how to draw arrows in Photoshop effectively and quickly.
Photoshop Tools Overview
To master Photoshop , you must first learn about its built-in tools. With so many tools available, potoshop is really confusing and difficult for beginners. In this article, we will learn about the most commonly used basic tools and are grouped by Photoshop in the left toolbar (Toolbox or Tools panel) to draw arrows in Photoshop.h
In the main Photoshop working page, the toolbar is left on the left side of the screen with a 1-line or 2-line bar depending on the user's settings.
The toolbar is divided into the following main tool groups:
- Move and Selection: Group with the ability to select objects and move.
- Crop and Slice: Group specializing in cropping to create objects.
- Measurement tools: Group of application tools to measure color, size, position ...
- Retouching and Painting: This is the group of drawing and editing.
- Drawing and Type: Group of tools related to text and drawings (square, circle, star ..vv).
- Navigation tools: You can navigate or move the view with this group of tools.
Due to the limited area of the toolbars, their functions in Photoshop are almost the same. For that reason, the selection bar shows only a few representative tools and hides many of their similar tools. To view and select hidden tools, press and hold the mouse on the tool with an arrow symbol in the lower right corner, the selection bar will display a sub panel with hidden tools. Click to select the tool.
Here is a list of default tools and keyboard shortcuts when used in the left menu in Photoshop.
- Move Tool (V)
- Rectangular Marquee Tool (M)
- Lasso Tool (L)
- Quick Selection Tool (W)
- Crop Tool (C)
- Eyedropper Tool ( I )
- Spot Healing Brush Tool ( J )
- Brush Tool ( B )
- Clone Stamp Tool (S)
- History Brush Tool ( Y )
- Eraser Tool (E)
- Gradient Tool (G)
- Blur Tool
- Dodge Tool (O)
- Pen Tool ( P )
- Horizontal Type Tool ( T )
- Path Selection Tool ( A )
- Rectangle Tool ( U )
- Hand Tool ( H )
- Zoom Tool (Z)
How To Draw Arrows In Photoshop With 3 Simple And Effective Tools
After having a preliminary understanding of the tools in Photoshop. Apply the knowledge you have just learned to draw a simple arrow. Here we will guide you to draw arrows in photoshop with the 3 most commonly used tools.
Draw arrows with the Line tool
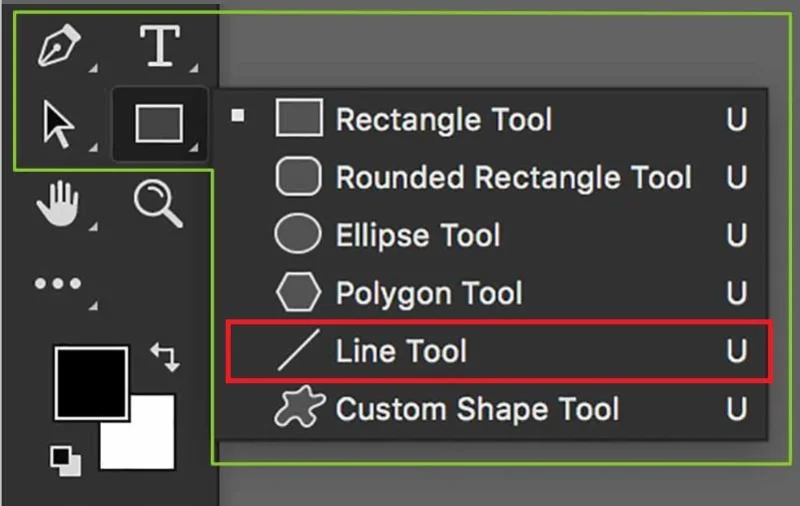
Step 1: Select the Line Tool in the selection bar on the left of the main working screen.
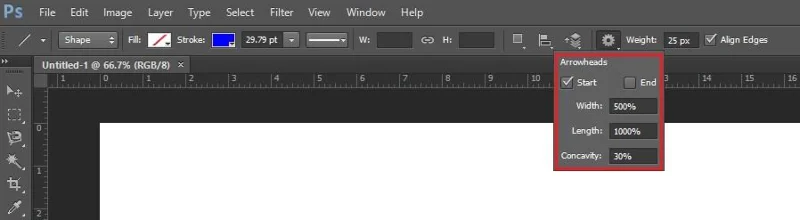
Step 2: Open the Line Tool panel by clicking the gear icon in the horizontal selection bar.
The parameters in the control panel include:
CheckBox Star and End: select the direction of the arrow at the beginning or the end of the line.
Width: The width of the arrowhead shape.
Length: The length of the arrowhead shape.
Concavity: The curvature of the arrowhead.

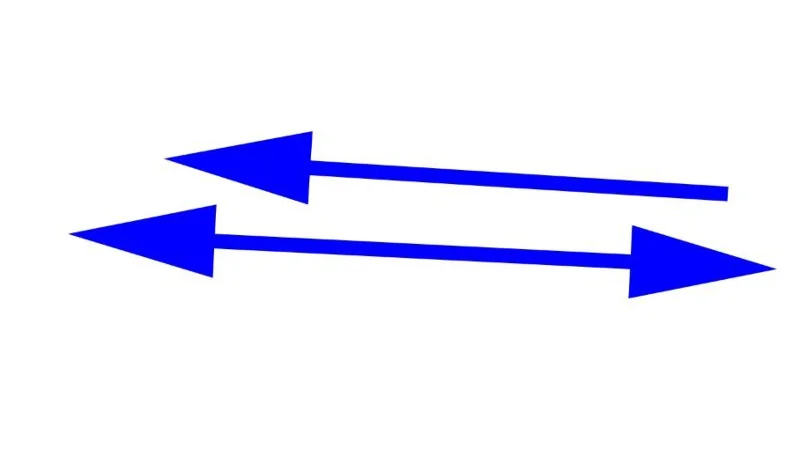
Step 3: Use the mouse to draw a line to create an arrow. Depending on whether you choose CheckBox Start or End , the direction of the arrow will be different.

If you select both Star and End , a double-headed arrow will be drawn.

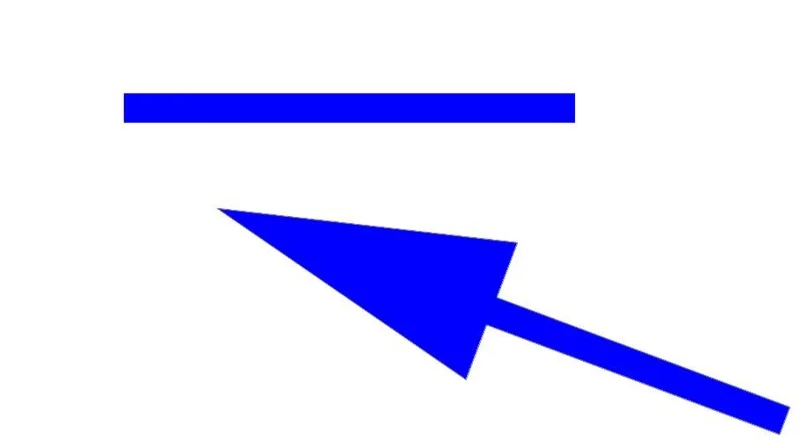
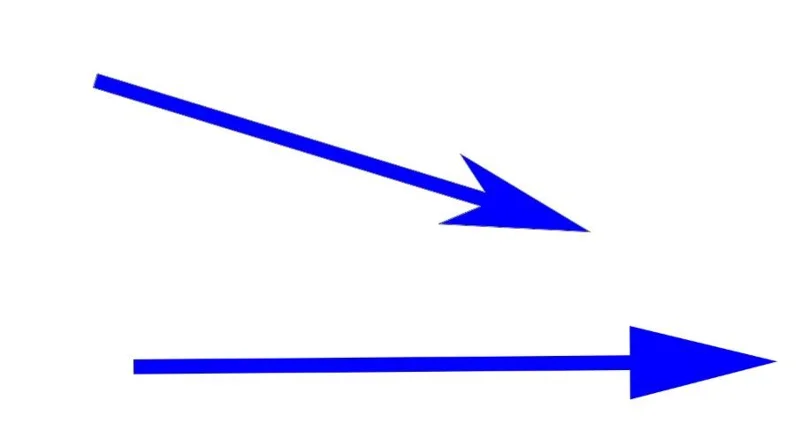
To change the curvature of the arrow, you adjust the Concavity parameter. A clear difference between arrows (1) and (2) can be seen in the image below. Arrow number (1) has been adjusted Concavity to 30% instead of 0% as default (2)

Draw arrows with Shape settings
This is an additional set of tools that will give you more choice of templates for drawing arrows in Photoshop. You just need to download and start using it.
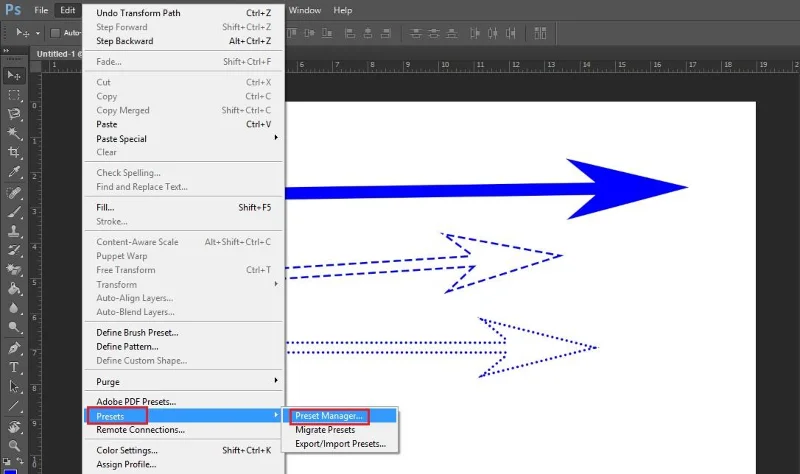
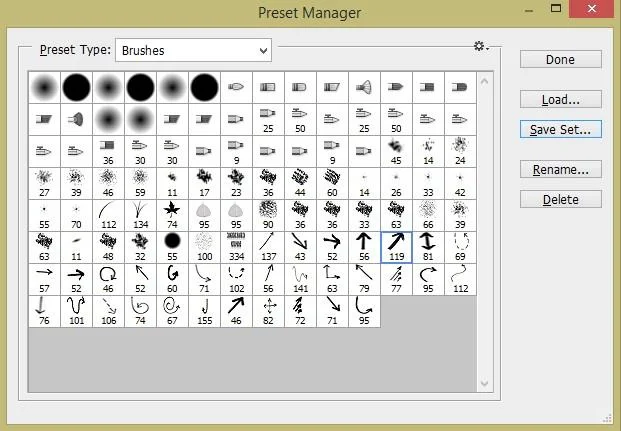
Step 1: From the main working page interface, select Edit > Preset > Preset Manager to display the Preset Manager window .

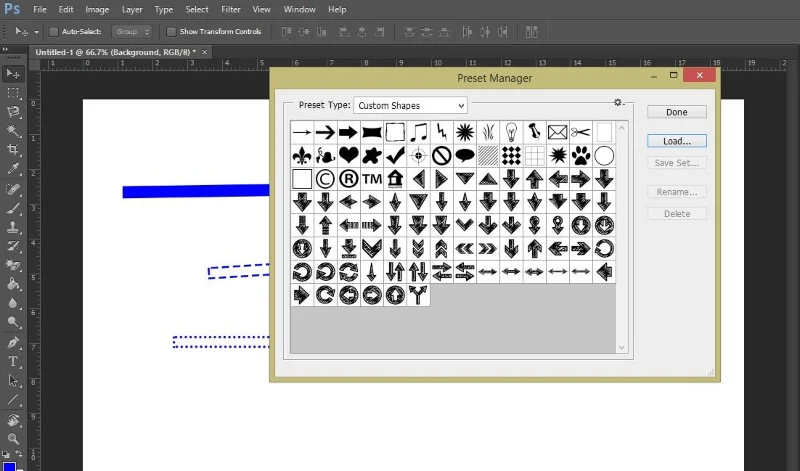
Step 2: From the new window displayed, In the ComboBox Preset Type position , select Custom Shape .
Step 3: Click the Load button and select the .CSH file you need to load.
Step 4: Click Done to complete the installation process.

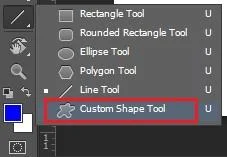
Step 5 : Now you can use the Custom Shape Tool that you just installed by opening the hidden tool in the Line Tool group and choosing Custom Shape Tool .

Draw arrows with the Brush tool
With the Brush tool, you have two ways to draw arrows in Photoshop.
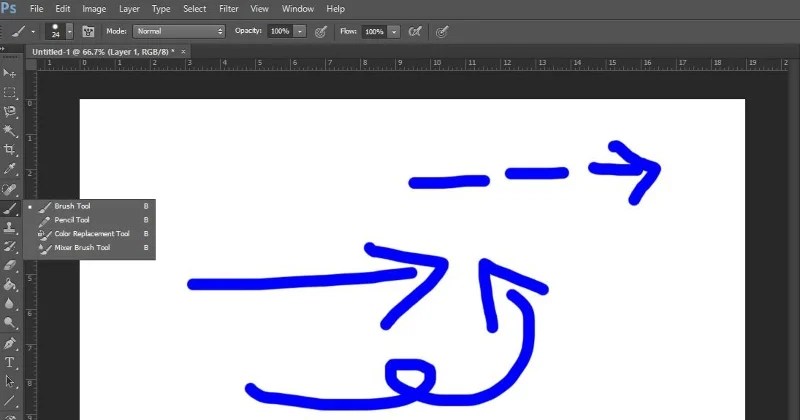
Method 1: You use the regular Brush tool to draw an arrow yourself with the parameters of the bold stroke, the size and the color can be changed. However, mastering the manual brush is very difficult, it requires experience and skill quite high. For starters, painting arrows with a manual brush often won't give the expected results.

Method 2: If method one is not the right choice for you, you can download and use the arrow brushes available with many styles and colors for you to choose from.
Downloading is also extremely simple and easy. Similar to Preset for Shape, you just need to change the Preset Type to Brushes then select Done to have a list of Brush arrows to use.

In addition, if you are in need of a configuration to work smoothly in Photoshop, you can refer to the following minimum configuration for Photoshop design:
Configuration for Designer: HHPC GAMING - INTEL CORE i3 10100 | 16G RAM | GTX 1050Ti
- MAINBOARD: GIGABYTE H410M-H
- CPU: INTEL CORE i3 10100 up to 4.3G | 4 CORE | 8 THREAD
- DISPLAY: JONSBO CR-1000 RGB
- RAM: COLORFUL BATTLE AX 16GB BUS 3000 DDR4 (1x16GB)
- VGA: NVIDIA GTX 1050Ti 4GB GDDR5
- SSD: GIGABYTE SSD 240G SATA III
- HDD: CUSTOMER OPTIONS
- SOURCE: COOLERMASTER PC700 700W
- CASE: JETEK KAMADO ( NO FANS )
So you already know 3 arrow drawing tools in Photoshop . Now, with the tools you just learned, you can freely do everything you want. Keep following WebTech360 for more great Photoshop lessons!