Online learning via phone or computer will become easy with the feature of adding closed captions. Today's article The Teaching Manual will show you how to add subtitles to the Zoom Cloud Meetings application when online.
Benefits of using the feature to add subtitles to lectures on Zoom
- Help members follow the lecture better.
- Can read and understand subtitles when the network is slow, lag can't hear what's being said.
- The meeting organizer (host) can display subtitles instead of speech.
Step 1: Turn on Closed Caption
Access and log in to the Zoom software homepage HERE . Select My Account .
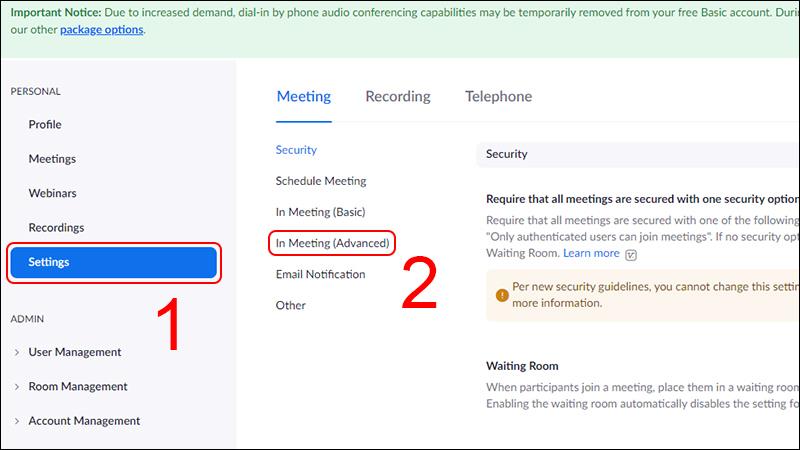
Select the Settings tab > Select In meeting (Advance) .
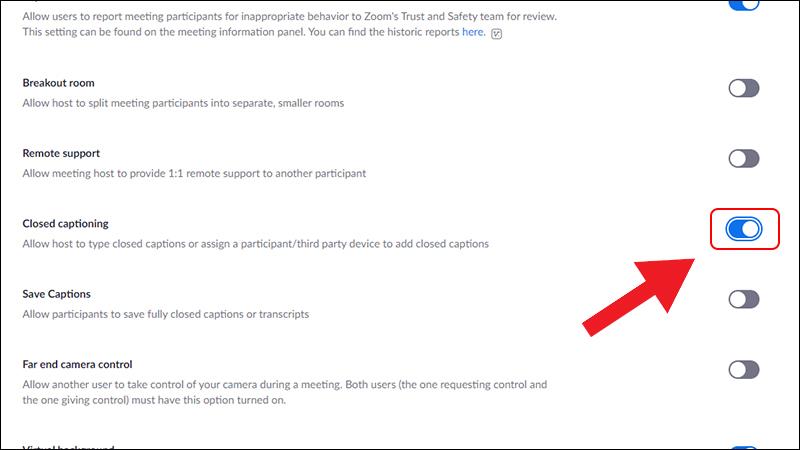
See if Closed Captioning is enabled (the button is green), if not > Move the Close Captioning button to the right to turn it on.
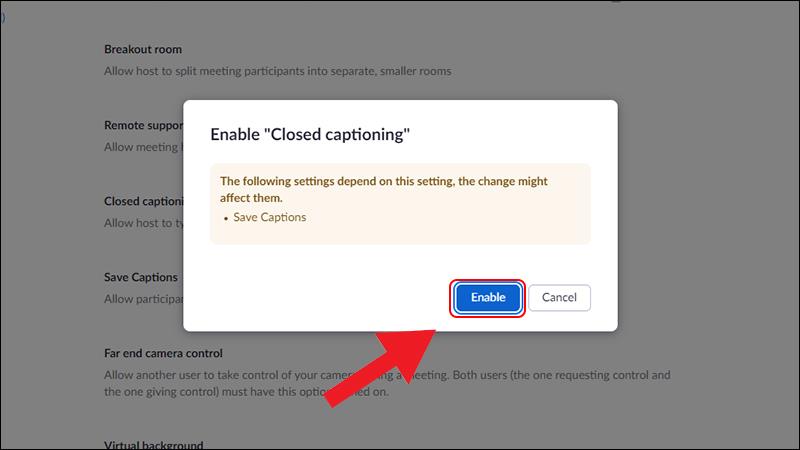
The confirmation message panel appears > Select Enable .
Step 2: Use Closed Caption when online
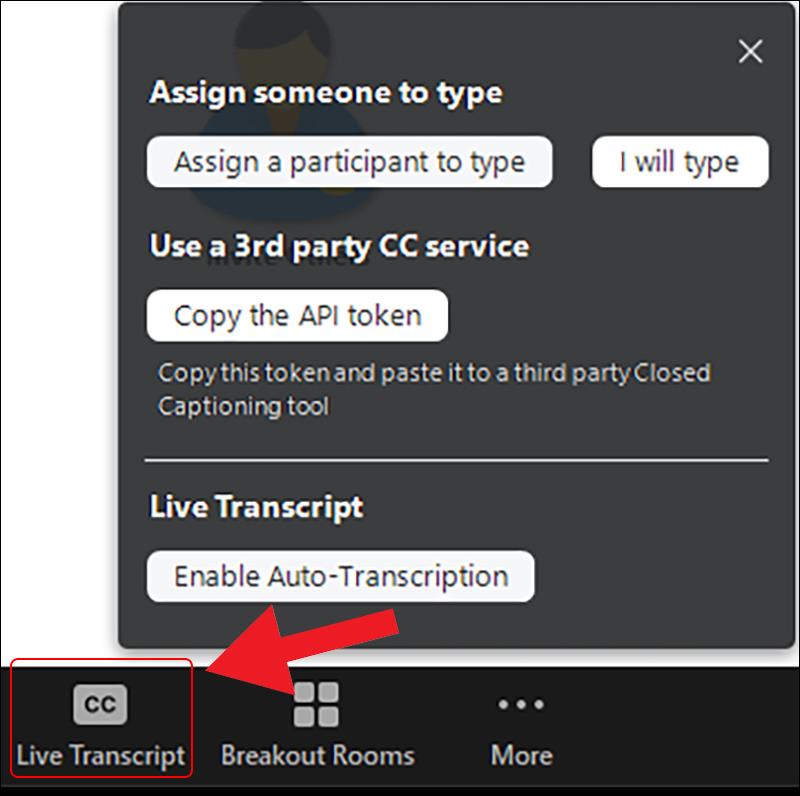
In an online meeting you host > click the CC icon in the dashboard.
Here you have the following options:
– Assign a participant to type : Select the person to enter the subtitles.
Hover over the person you want to select > More > Assign to type Closed Caption .

– I will type : Enter subtitles yourself.
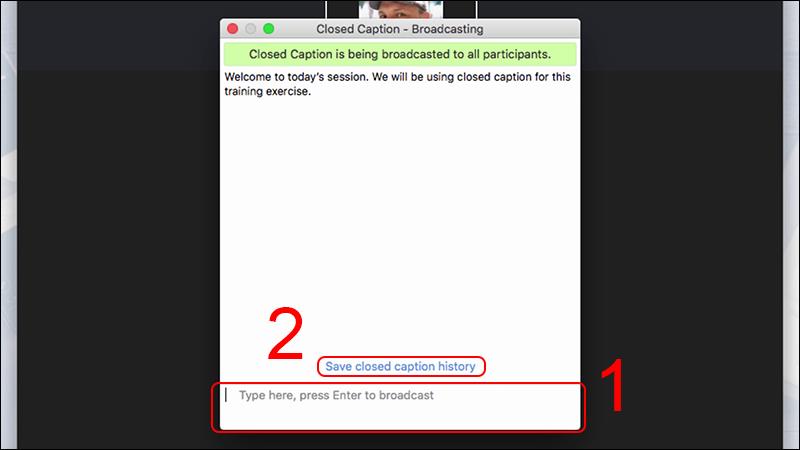
Enter subtitles > After importing, select Save Closed Caption History to save the newly created subtitles.
– Copy the API token : for people who use third-party services to add subtitles.
– Live transcript : The application will automatically recognize the voice and create automatic subtitles.
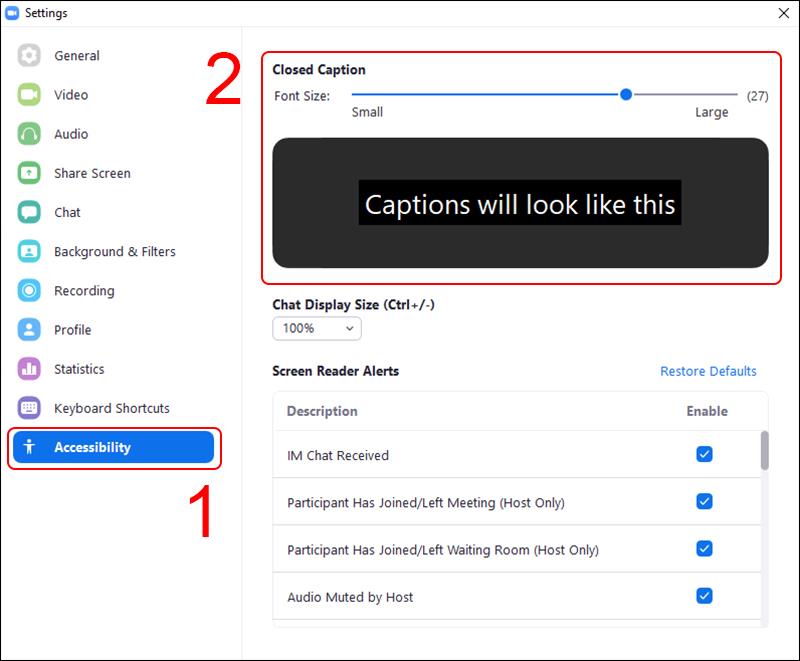
To change the size of the subtitles, go to Settings > Accessibility > Drag the Font Size bar to adjust.
Above are some brief instructions on using the Live transcaption feature in Zoom, hope you will have an enjoyable experience with this feature.
