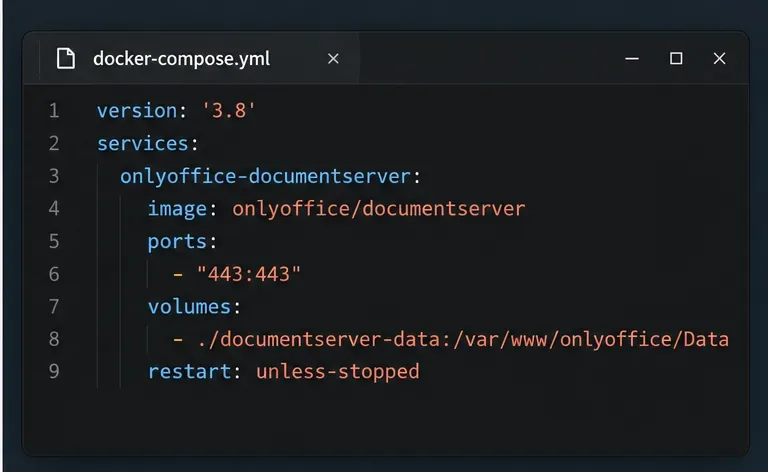
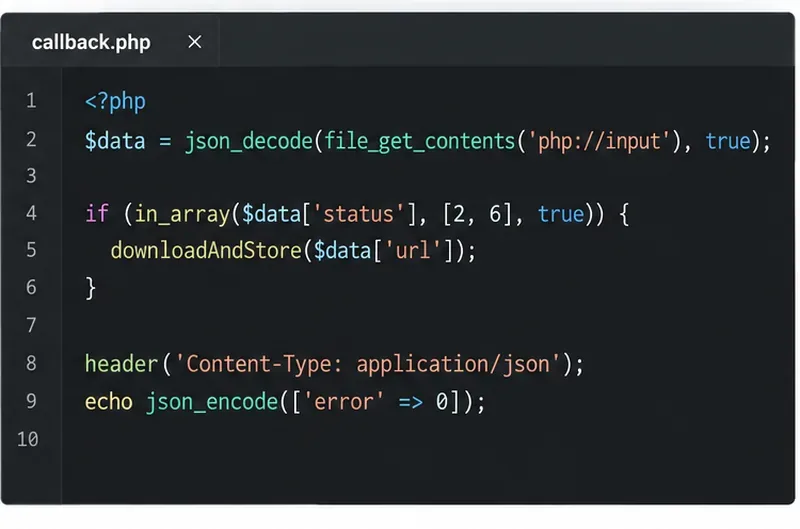
Deploy ONLYOFFICE Docs Enterprise with Its Official Compose File

Start the Enterprise Docker Compose stack, persist its license and data, configure JWT safely, and confirm the editors are ready to integrate.
You can easily customize the lock screen (Lockscreen) on Windows 10 to suit your needs. For example, if you do not like the lock screen you can turn it off, want to see the wallpaper of the standby screen longer can change the timeout or can disable ads in the lock screen to save battery. ..
With 5 tips below, you can customize the lock screen to your liking very quickly. Invite you to follow the article:
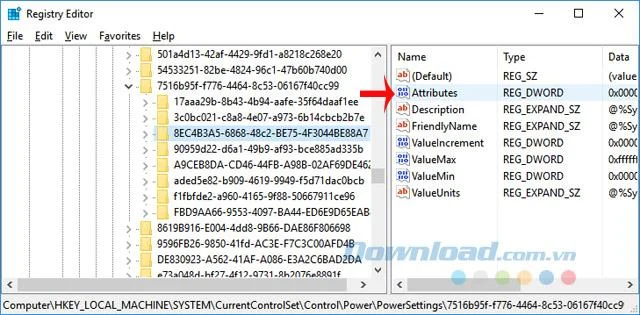
The lock screen wallpapers are presented as a slideshow, there are many beautiful images so sometimes you want to relax by looking at them, but the default after 1 minute will automatically turn off the screen. You can completely change the lock screen timeout by: Type the keyword Regedit into Cortana, then click on the search results as shown in the picture.
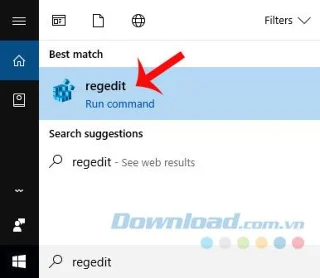
When the Registry Editor dialog box appears, visit the following link:
HKEYLOCAL_MACHINE \ SYSTEM \ CurrentControlSet \ Control \ Power \ PowerSettings \ 7516b95f-f776-4464-8c53-06167f40cc99 \ 8EC4B3A5-6868-48c2-BE75-4F3044BE88A7.
On the right screen, double click Attributes.
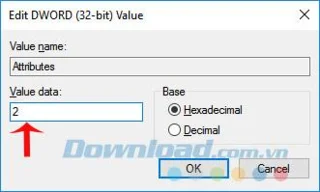
Then, the Edit DWORD (32-bit) Value dialog box appears . Change Value data from 1 to 2 , then click OK to save.
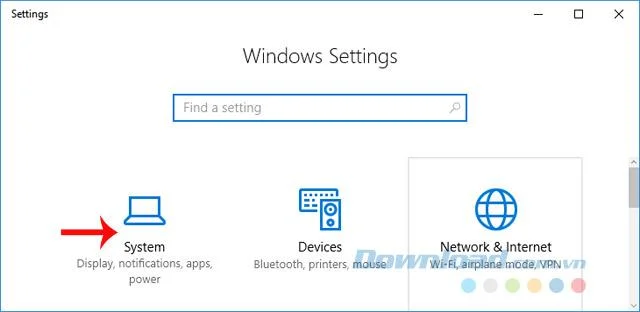
Next, go to Windows Settings , select System.
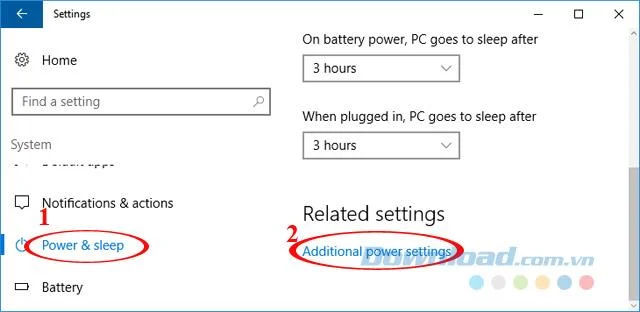
Switch to the Power & sleep tab , then navigate to the Related settings setting group , click the Additional power settings option .
The Power Settings dialog box appears, click Change plan settings in the Balanced (recommended) option.
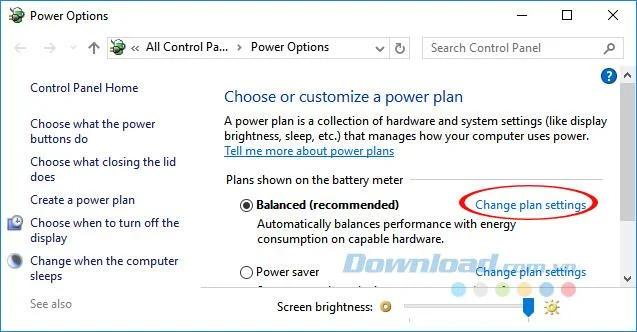
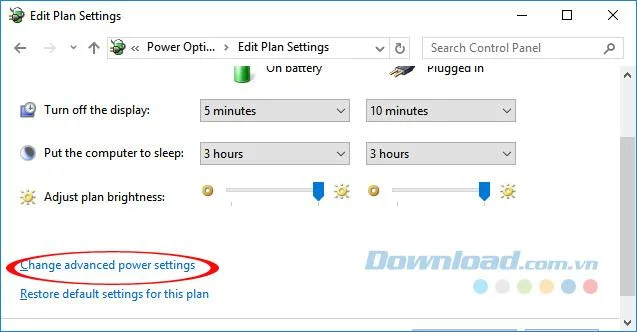
Then, continue to click on the Change advanced power settings option.
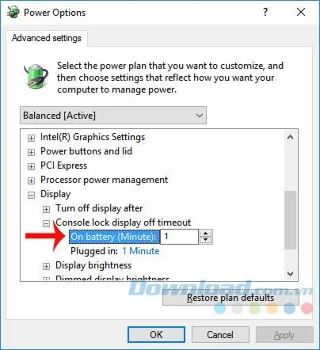
When the Power Options dialog box appears, navigate to the Display custom group , click Console lock display off timeout . Here, enter the number of minutes you want to enter, then click Apply> OK to save is finished.
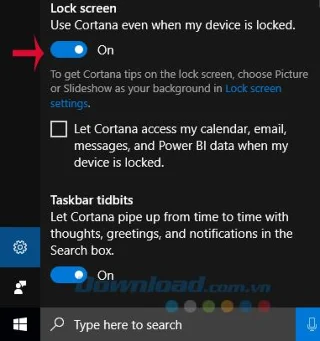
Cotarna is deeply integrated into the system, making it easier for you to do things, even users can use the virtual assistant right from the lock screen. If you are using Windows 10 Creators, you can activate it by: Accessing Cortana , clicking Settings . At the Lock screen , slide the Use Cortana even when my device is locked slider to On to activate.
And when you tick the box Let Cortana access my calendar, email, messages, and other content data when my device is locked, it will allow Cortana to access and display information about the calendar, email, messages ... right on the screen. lock every time you use voice commands.
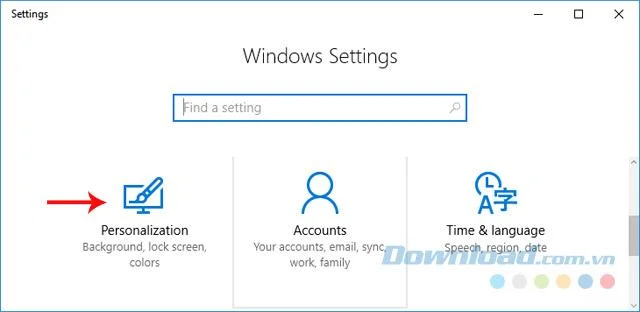
You can also easily disable ads on the lock screen by: Access to Windows Settings , select Personalization.
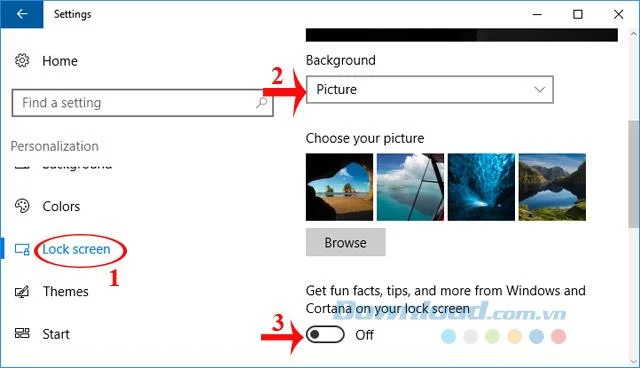
Switch to the Lock screen tab . In Section Background , converted Picture or Slideshow instead of Windows Spotlight. Next, slide the slider in Get fun facts, tips, and more from Windows and Cortana on your lock screen to Off to disable ads on the lock screen.
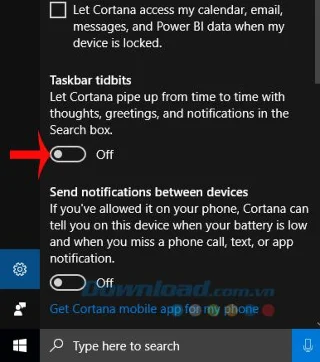
Finally, go to Cortana , click on Settings . At Taskbar tidbits , drag the slider in Let Cortana pipe up from time to time with thoughts, greetings, and notifications to Off to disable.
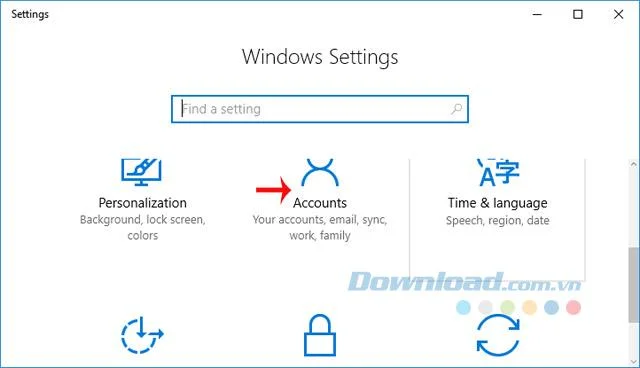
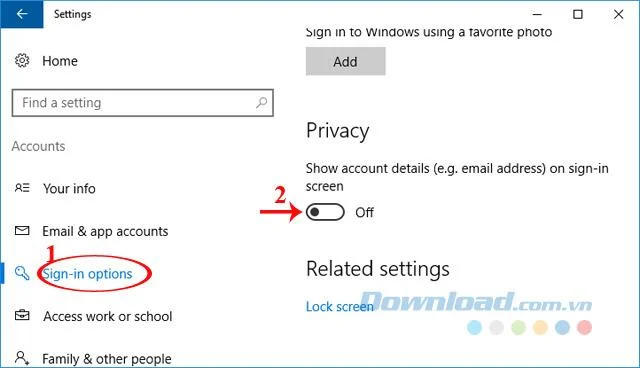
Starting with the Windows 10 Anniversary edition , Microsoft has allowed users to hide their email addresses at the login screen for more account security. You can hide your email address by: Accessing Windows Settings , selecting Accounts.
At the Sign-in options tab, find the Privacy setting group, slide the slider in Show account details (eg email address) on sign-in screen to Off and you 're done.
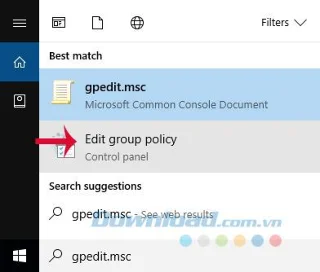
If you want to access the system directly, without going through the lock screen, you can easily do it by: Enter the keyword gpedit.msc into Cortana, when the search results appear, click on Edit group policy.
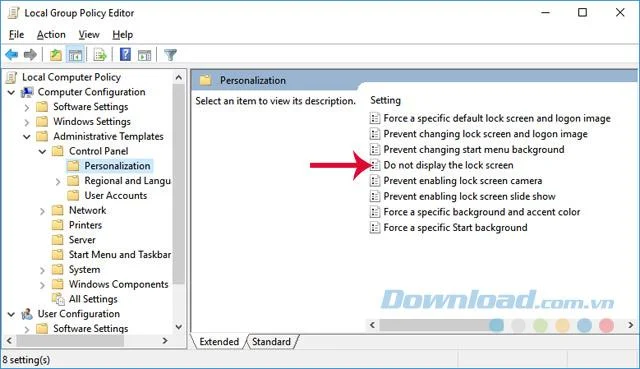
The Local Group Policy Editor dialog box appears, click Computer Configuration> Administrative Templates> Control Panel> Personalization. In the right pane, double-click the Do not display the lock screen option.
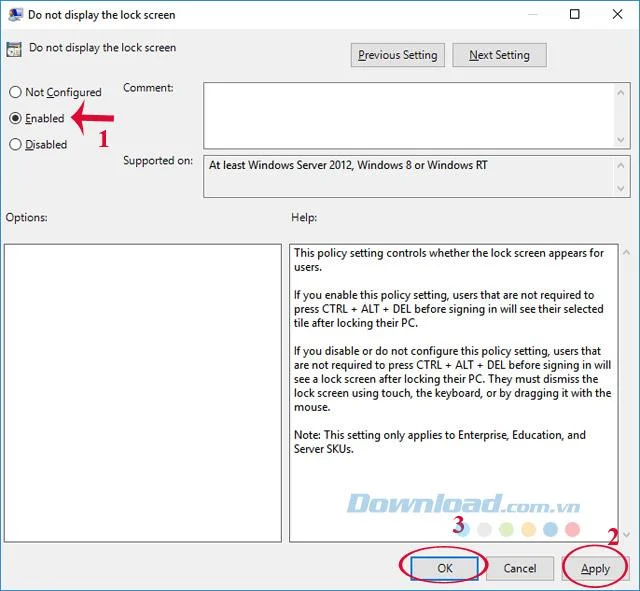
The Do not display the lock screen dialog box appears, select the Enable box . Then click Apply> OK to save.
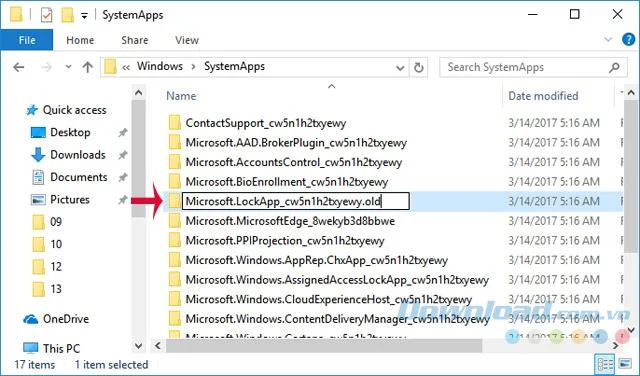
If you are using the Home or Pro version of Windows 10 Creators, do the following: Access the following path: C: \ Windows \ SystemApps. Here, navigate to the Microsoft.LockApp_cw5n1h2txyewy folder and add the following ".old" or ".backup" characters to disable the lock screen. Finally, reboot the system, then check the results.
With the above article, you can easily customize the lock screen on Windows 10 as you like.
I wish you successful implementation!
Start the Enterprise Docker Compose stack, persist its license and data, configure JWT safely, and confirm the editors are ready to integrate.
Use an ONLYOFFICE JavaScript macro to remove nonprinting characters and trim extra spaces from a defined spreadsheet range, with a safe review workflow.
Connect ONLYOFFICE DocSpace to Active Directory or OpenLDAP, import users and groups safely, map account fields, and schedule reliable synchronization.
Move portal data from Disk Default to a supported cloud storage provider, or relocate Docker data safely by changing its host volume mapping.
Identify whether Document Server uses a Linux package or Docker, remove only its components, and check remaining data without deleting shared services by mistake.
Trace slow collaborative editing to Docker resource pressure, proxy connections, or document load, then choose the fix that matches your measurements.
Install custom fonts in ONLYOFFICE Document Server, compare persistent Docker mounts with direct copies, rebuild the font list, and verify the result.
Choose where TLS should terminate, mount a trusted certificate and private key safely, and verify HTTPS access to a Dockerized ONLYOFFICE Docs server.
Embed the ONLYOFFICE editor in your PHP app, sign its configuration with JWT, and save edited files through a secure callback.
Set the proofing language for the whole document or selected text, confirm spell checking is active, and identify when a server dictionary is missing.