Build a Debian 12 RAID 1 Mirror with mdadm
Create and verify a two-disk Debian 12 RAID 1 data array, format it safely, and configure it to assemble and mount after reboot.
To create a Debian 12 software RAID 1 mirror from two blank disks, install mdadm, verify the exact device names, create /dev/md0, and build a filesystem on the array device. In this example, /dev/sdb and /dev/sdc are dedicated data disks; replace them with your verified device paths. Do not run the create or format commands on disks that contain data you need.
This procedure is for a new data volume, not a root or boot mirror. RAID 1 keeps mirrored copies and can continue after one member fails, but it does not protect against deletion, filesystem damage, theft, or a second disk failure. Keep a separate backup. Debian’s Bookworm mdadm manual documents the create and metadata options used below.
RAID 1 capacity is limited by the smaller member. Use disks at least as large as the data volume you need, preferably matching drives connected through independent ports. You can use whole disks as shown here or create same-sized partitions on each disk and mirror those partitions. The choice depends on your partitioning and future storage plan; do not mix a whole-disk member with a partition member accidentally.
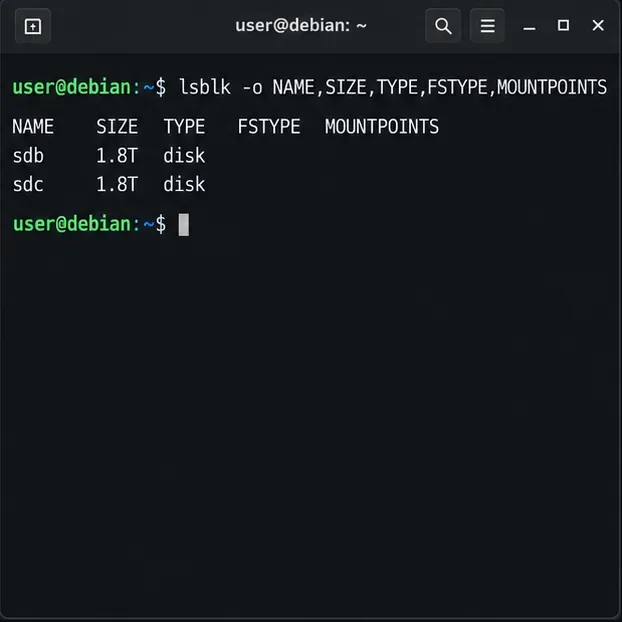
First list devices and filesystems:
lsblk -o NAME,SIZE,TYPE,FSTYPE,MOUNTPOINTS
sudo wipefs -n /dev/sdb /dev/sdc
lsblk shows sizes, partitions, filesystems, and mount points. wipefs -n only reports signatures; it does not erase them. Confirm by model, serial, capacity, and mount point that both targets are the intended, unmounted disks. Device letters can change after hardware or boot changes, so for servers, identify drives with stable /dev/disk/by-id/ paths and use those paths consistently.
Common misconception: RAID 1 does not combine two disk capacities into one larger volume. It mirrors writes, so the usable space is approximately that of the smaller disk. Check the reported sizes now and plan for that mirrored capacity.
Install Debian’s RAID management utility, then create a two-device mirror:
sudo apt update
sudo apt install mdadm
sudo mdadm --create /dev/md0 --level=1 --raid-devices=2 /dev/sdb /dev/sdc
Answer the confirmation prompt only after checking the member paths again. --level=1 selects mirroring, while --raid-devices=2 sets the number of active members. Debian Bookworm’s mdadm uses version 1.2 metadata by default for new arrays; specify a different metadata format only when a verified boot or compatibility requirement calls for it. The command writes RAID metadata to the selected devices. Treat them as disposable and never assume existing filesystems will remain usable.
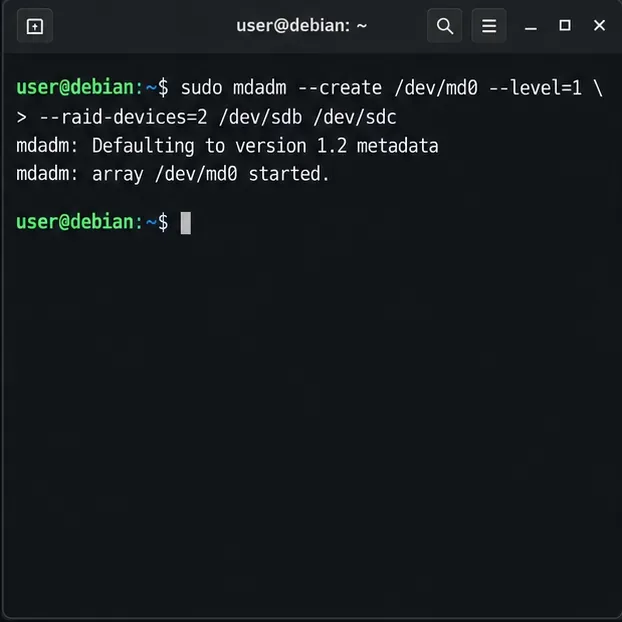
Creation starts synchronization, which can take a long time depending on disk size and activity. It is not proof that both copies are fully synchronized yet. Check progress with:
cat /proc/mdstat
sudo mdadm --detail /dev/md0
Look for raid1, both expected members, and [UU] when the array is fully active with both devices present. While a resync is running, /proc/mdstat reports progress; avoid heavy writes until it finishes if practical. Exact speed and duration depend on the drives, controller, and workload, so do not infer a completion time from another machine’s output.
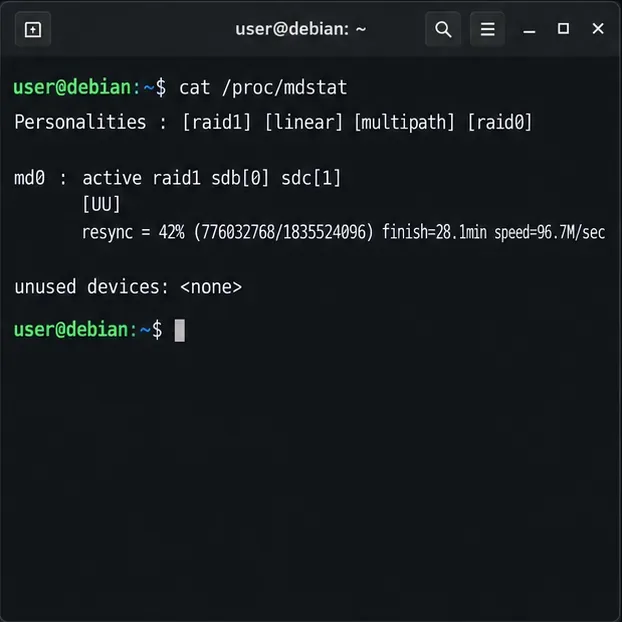
Common misconception: the array device is not ready to format just because the create command returned. Check /proc/mdstat and mdadm --detail first, and confirm the member list matches your two disks.
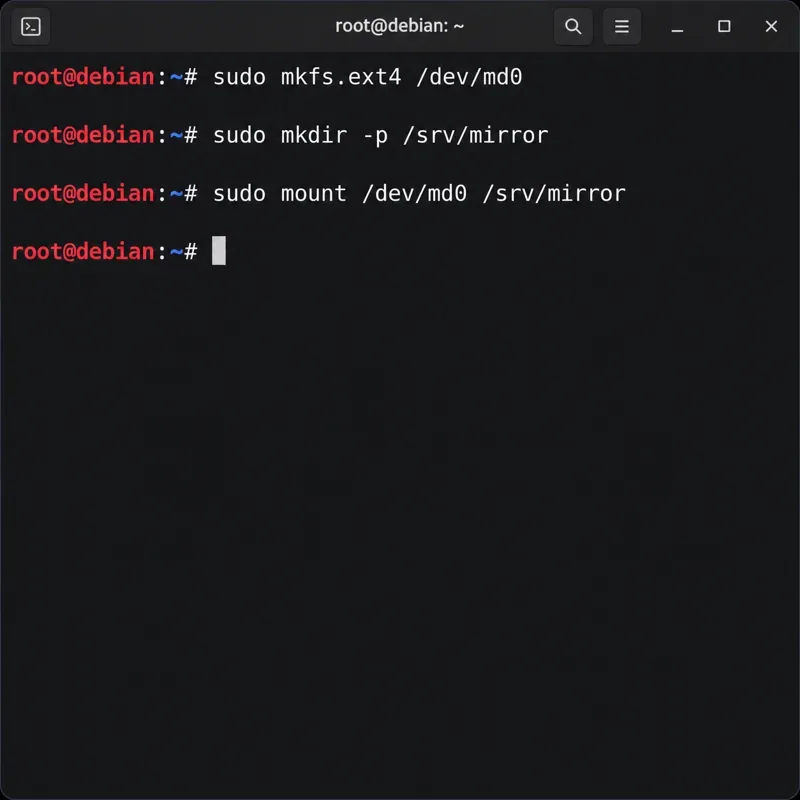
Once /dev/md0 is active and its members are correct, create a filesystem on the array device—not on each member disk—then mount it:
sudo mkfs.ext4 /dev/md0
sudo mkdir -p /srv/mirror
sudo mount /dev/md0 /srv/mirror
findmnt /srv/mirror
mkfs.ext4 erases data on its target. Formatting /dev/md0 creates one filesystem across the logical mirror, while formatting /dev/sdb or /dev/sdc separately would bypass the array. Confirm findmnt shows /dev/md0 mounted at /srv/mirror before writing files.
To help Debian reassemble the array by its identity at boot, inspect the generated entry:
sudo mdadm --detail --scanAdd the matching ARRAY line from the output to /etc/mdadm/mdadm.conf without replacing the rest of the file, then rebuild initramfs:
sudo nano /etc/mdadm/mdadm.conf
sudo update-initramfs -u -k all
Debian’s Handbook guidance for mdadm also recommends updating initramfs after changing this configuration. For automatic mounting, get the filesystem UUID and add a corresponding entry to /etc/fstab:
sudo blkid /dev/md0
# Example format; replace the UUID with the value from blkid:
UUID=your-filesystem-uuid /srv/mirror ext4 defaults,nofail 0 2
Use the actual UUID, not the example placeholder. Then validate the file and mount configuration:
sudo findmnt --verify
sudo mount -a
findmnt /srv/mirrorConfirm mdadm --detail /dev/md0 reports RAID level 1, both expected members, and a clean state after synchronization. Confirm /proc/mdstat shows both devices, then check that findmnt /srv/mirror reports the ext4 filesystem mounted from the array. After a planned reboot, repeat the array and mount checks before storing important data.
RAID 1 can keep the volume available after one member fails, but redundancy is not a backup and does not verify that every file is recoverable. Keep versioned backups on separate storage, monitor array status, and replace a failed member using the exact device and recovery steps documented by mdadm’s Bookworm manual. This guide does not cover converting an existing Debian root disk into RAID; that needs a migration and bootloader plan specific to the machine.
Create and verify a two-disk Debian 12 RAID 1 data array, format it safely, and configure it to assemble and mount after reboot.
Set up random-key encryption for an existing Debian 12 swap partition, verify the active dm-crypt mapping, and understand the hibernation trade-off.
Restrict Ubuntu 24.04 SSH accounts to designated SFTP folders with chroot, proper permissions, Match rules, and safe tests—without granting shell access.
Find which process owns Ubuntu’s dpkg frontend lock, let package work finish, and repair interrupted installations without deleting lock files.
Set up scheduled Btrfs system snapshots on Ubuntu Desktop with Timeshift, verify the Ubuntu subvolume layout, choose retention, and understand what snapshots cannot protect.
Plan a safer Debian 12 to Testing migration: upgrade through Stable, back up, clean APT sources, simulate dependency changes, and verify what changed.
Diagnose Ubuntu Server emergency mode safely. Read boot logs, check root and fstab mounts, repair a failed unit, handle filesystem errors, and verify a clean reboot.
Set up a Debian 12 WireGuard VPN server for one remote client. Configure keys, IPv4 forwarding, nftables NAT, firewall access, and connection checks.
Harden a Debian 12 workstation with a careful CIS Benchmark workflow: select the right profile, patch safely, review services and access, configure nftables, and document evidence.
Diagnose MySQL OOM kills on Debian 12, check VPS memory limits, configure swap, and tune database memory and concurrency without promising a universal fix.