Build a Reusable AutoYaST Profile for SLES 15 Installs

Turn an existing SLES 15 system into a reviewed AutoYaST profile, validate it, and use it to deploy a test server with fewer manual steps.
Illustrative scenario: An administrator needs to provision a second SLES 15 virtual machine for a lab web service. The example here uses a reference machine to create an AutoYaST XML profile, reviews and validates that file, then boots a disposable target VM with the profile. It is an example workflow, not a report of an actual deployment.
For this small rollout, create a reference profile with sudo yast clone_system, remove machine-specific or sensitive settings, validate the profile, and point the SLES installer at it with the autoyast= boot parameter. Keep the installer’s confirmation screen enabled for the first test. AutoYaST can configure storage and overwrite data, so never point an unreviewed profile at a production disk.
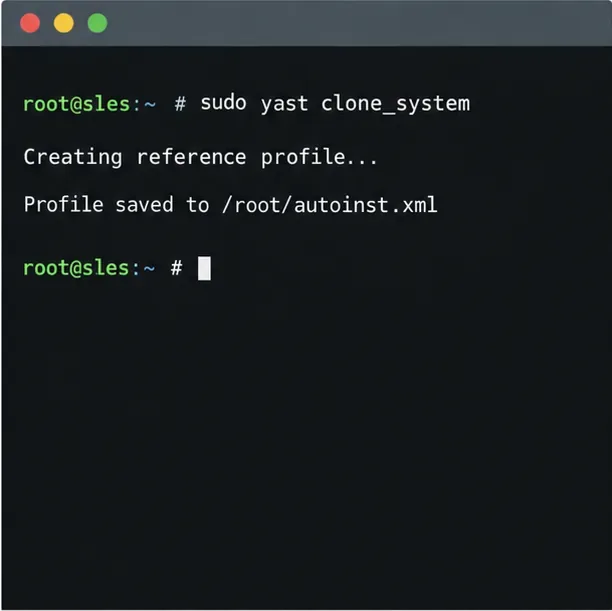
AutoYaST describes an installation in an XML control file, usually named autoinst.xml. SUSE’s SLES 15 SP7 AutoYaST Guide recommends creating a reference profile from an installed system or using YaST’s Autoinstallation Configuration module. The command-line method is convenient for the fictional lab VM:
sudo yast clone_system
sudo ls -l /root/autoinst.xml
The clone captures configuration from that reference machine. Treat it as a starting point, not a universally portable template: check disk device names, partition sizes, boot mode, network settings, package selection, users, and registration data against the target. A source host with a local disk layout that differs from the new VM can produce an unsafe storage proposal. If the source system has secrets or machine-specific identifiers, remove or replace them before distributing the profile.
Open /root/autoinst.xml in a text editor and inspect its sections before making it available to an installer. Prioritize partitioning: a profile can initialize a drive and erase existing contents. For the lab example, confirm that the target VM has a disposable virtual disk of the intended size and that the profile’s device-selection rules match that VM. Also replace the hostname, IP configuration, user credentials, and registration settings when they should differ from the reference system.
AutoYaST profiles may include password hashes, registration keys, scripts, or other confidential values. Limit file access and avoid placing secrets in a public URL, boot command history, or an unprotected repository. Use an access-controlled profile server and HTTPS where available. Make sure the installer can trust the server certificate and can reach the host during boot.
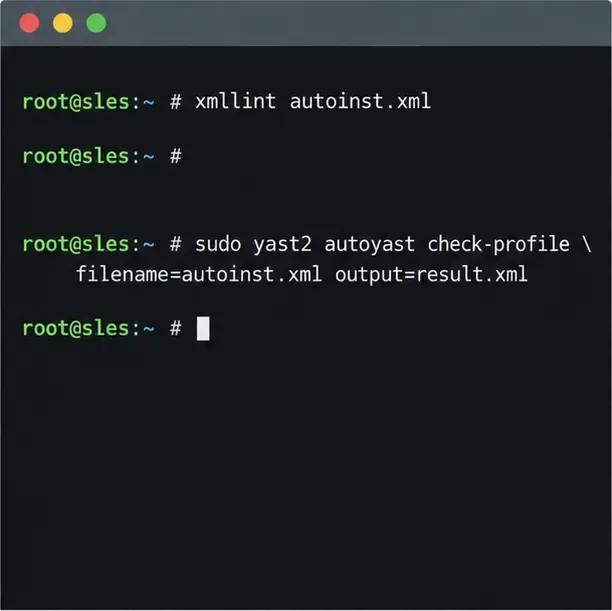
First check that the document is well-formed XML, then ask AutoYaST to process and import it:
xmllint /root/autoinst.xml
sudo yast2 autoyast check-profile \
  filename=/root/autoinst.xml output=/root/autoinst-checked.xml
xmllint catches XML structure errors such as an unclosed tag; it does not confirm that every AutoYaST setting is valid. The SLES AutoYaST command check-profile performs additional profile checks. Its result can differ across architectures, media, and YaST package versions, so it is not a replacement for installing to a representative test VM. Do not enable its run-scripts=true option for an untrusted profile: scripts in a profile can run as root.
For one lab installation, place the file on a reachable HTTPS server and add its address to the SLES installation media’s boot options:
autoyast=https://provision.example.test/profiles/lab-sles.xmlexample.test is a reserved example name; replace it with your profile server. SUSE documents other profile locations too, including NFS, USB, and a file on the boot medium. If the profile is remote, the installer needs network connectivity early enough to fetch it. In cases where network setup is not otherwise started, SUSE documents using a linuxrc network parameter such as ifcfg=eth0=dhcp alongside the AutoYaST boot option; replace eth0 with the installer’s actual interface name. SUSE also documents ifcfg=eth*=dhcp to configure DHCP on all interfaces. Static addressing requires the corresponding boot-time network configuration for your environment.
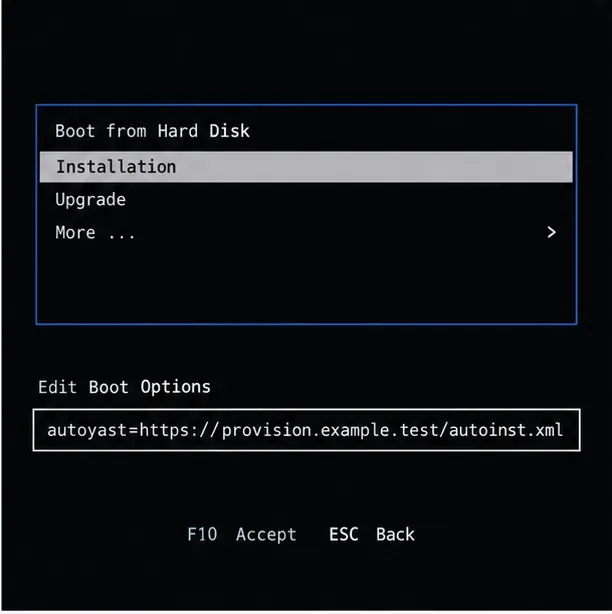
On SLES 15 SP7, the installer can display a configuration summary before it writes changes. Check that product, network, software, registration, and especially the target disk match the lab plan. The summary is a useful final safeguard. Keep confirmation enabled during initial testing; only disable it for unattended runs after the profile has been reviewed and proven on representative disposable targets. The exact boot menu and available profile source depend on the installation media and boot method.
Begin with a disposable virtual machine that matches the intended architecture, boot mode, and disk layout. Boot it from the SLES 15 installation media with the profile parameter, follow the installer’s summary, and watch the console or serial output for retrieval, registration, storage, or package errors. AutoYaST may run a second stage after the base system is installed when additional configuration requires the installed system to boot; SLES 15 SP7 documentation notes that the autoyast2 and autoyast2-installation packages are needed for that stage.
After installation, verify the hostname, address, storage mounts, enabled services, expected packages, and registration status on the new VM. Compare these results with the profile and correct the profile before repeating. A successful XML check alone does not prove the target will install correctly: available repositories, hardware, disk enumeration, network access, and service-pack media all matter.
For the fictional lab, the profile is ready to reuse only after the test VM boots and its intended configuration matches the plan. To scale beyond a few similar machines, consider separating shared configuration from per-machine settings with AutoYaST rules and classes; those introduce extra files and merge behavior that should be tested independently. Start with the simplest profile that safely covers your target group.
See the SUSE SLES 15 SP7 AutoYaST Guide for profile creation, validation, profile locations, and installation behavior. The SLES 15 SP7 boot-parameter reference documents autoyast=. The SLES 15 SP7 linuxrc network setup reference explains early network configuration for remote profile retrieval. AutoYaST options and profile schemas can vary by service pack and installed YaST packages; check the documentation matching the installation media you will deploy.
Turn an existing SLES 15 system into a reviewed AutoYaST profile, validate it, and use it to deploy a test server with fewer manual steps.
Install the SLES 15 KVM and libvirt tools, enable the right host service, and configure selected virtual machines to start after a reboot.
Use systemd jobs and the previous boot journal to locate a slow service, mount, or storage dependency, then correct it without masking the cause.
Use firewall-cmd to inspect the active zone, allow HTTP safely, preserve SSH access, and verify that the rule survives a reload on SLES 15.
Trace a PAM failure to its service, account policy, or identity provider, then repair the right SLES configuration while preserving a working admin session.
Trace a failed kernel module at SLES startup, correct an obsolete boot entry or repair the required driver, and verify the next boot.
Prepare SCSI SAN paths, enable multipathd, inspect SUSE’s hardware defaults, and verify stable device maps without guessing array settings.
Find the process holding Zypper’s package lock, distinguish process conflicts from package locks, and retry updates without deleting lock files blindly.
Register SLE HA, bootstrap SLES 15 nodes, then add fencing, quorum, and tested service resources before relying on failover.
Trace a Zypper refresh error to SUSE, RMT, or a third-party endpoint, then apply the right server-side or cache fix without disabling essential updates.