Home
» How to
»
Fix APT Signature Errors by Repairing the Repository Key
Fix APT Signature Errors by Repairing the Repository Key
If APT reports “The following signatures couldn’t be verified,” identify the repository and the specific error code in the same output, then repair that repository’s trusted signing key or source entry. For a third-party repository, obtain its current key from the software publisher and bind it to that source with Signed-By; do not disable signature checks or add an unknown key globally.
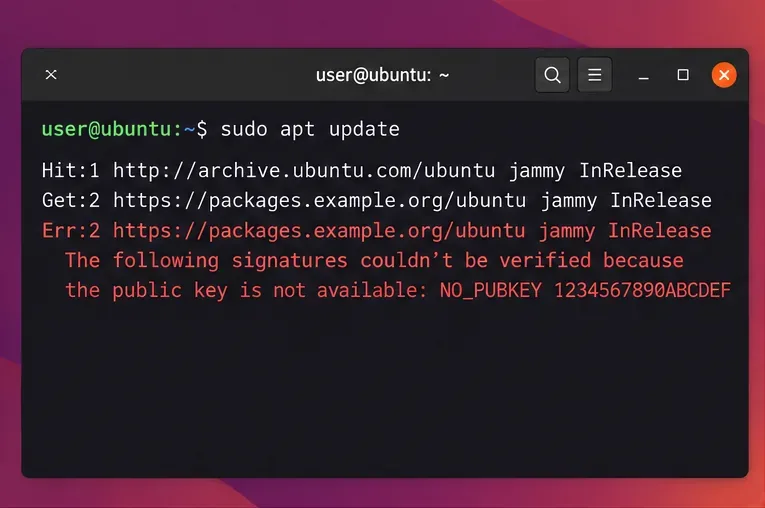
Example apt update output: a missing-key error names the affected repository and includes a NO_PUBKEY identifier.
1. Find the repository and read the exact error
Run an update so you can inspect the complete message:
sudo apt update
Look for the URL beside Err: and for a token such as NO_PUBKEY, EXPKEYSIG, KEYEXPIRED, or BADSIG. The URL tells you which source failed; the token narrows down why. APT verifies signed repository metadata before trusting the package index, so a failed signature check is a security signal rather than a cosmetic warning. Ubuntu installations already include keys for the default Ubuntu archives; manual key setup is normally needed only for repositories added later.
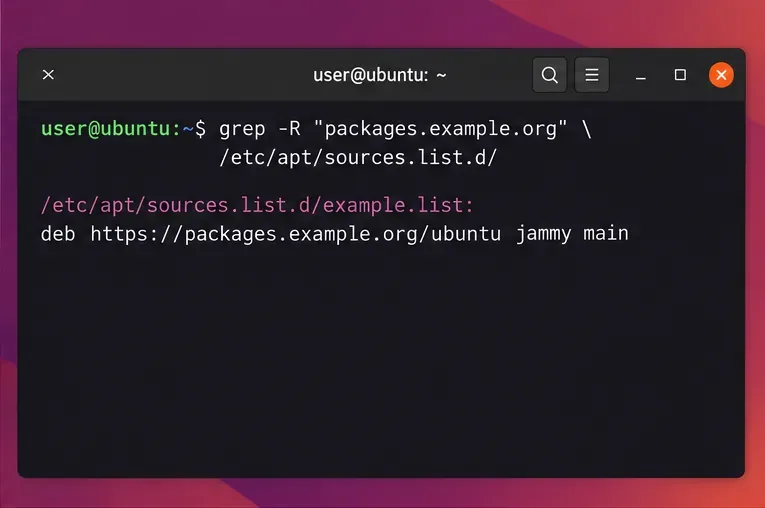
Find the source definition by searching for the host named in the error. Replace the example host with the one from your terminal:
Search the APT source directory for the exact host reported by the failed update.
Ubuntu 24.04 and later use deb822 source files ending in .sources by default; older installations often have one-line .list files. Check the repository URL, suite or Ubuntu codename, and any existing Signed-By entry. If the source points to a release the vendor no longer supports, use the vendor’s instructions for your Ubuntu release or disable that source. A key cannot fix an obsolete or incorrect repository path.
2. Repair a missing or rotated third-party key
For NO_PUBKEY, first confirm that the repository is one you intentionally installed. Open the publisher’s current installation documentation and obtain the signing-key URL and full fingerprint from that source. Compare the fingerprint with a separately published vendor reference when available. Do not fetch a key from a random keyserver just because its short ID matches the error.
For a vendor that publishes an ASCII-armored .asc key, install it as a dedicated APT keyring. Replace the example URL with the exact URL documented by that publisher:
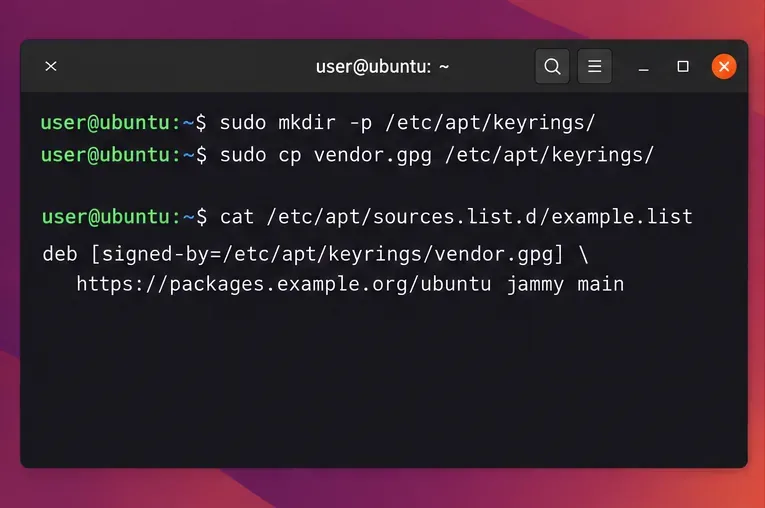
The .gpg file must be readable by APT’s unprivileged download user. If the publisher supplies a binary .gpg keyring, follow its instructions instead of dearmoring it again. Ubuntu recommends that third-party keys live in a separate keyring and be referenced by that repository, limiting which source can use the key.
A source-specific Signed-By setting keeps the repository tied to its own keyring.
Edit the existing source definition rather than adding a duplicate entry. For a deb822 file such as /etc/apt/sources.list.d/vendor.sources, use the vendor’s actual URI, suite, and component values, then add the keyring path:
Types: deb
URIs: https://packages.example.org/ubuntu
Suites: YOUR_UBUNTU_CODENAME
Components: main
Signed-By: /etc/apt/keyrings/vendor-archive.gpg
If the existing entry is in a one-line .list file, the equivalent syntax is deb [signed-by=/etc/apt/keyrings/vendor-archive.gpg] https://packages.example.org/ubuntu YOUR_UBUNTU_CODENAME main. Preserve the repository’s documented suite and components; the example values are placeholders. Avoid apt-key add: it is deprecated, and a global trusted key can grant a third-party key broader authority than intended.
If the message says EXPKEYSIG or KEYEXPIRED, the signing key may have expired or the vendor may have rotated it. Download and verify the replacement key using the vendor’s current instructions, then update the source’s keyring. Do not extend the old key’s trust by ignoring expiration.
3. Check clock, Ubuntu archive, and mirror problems
If the repository is an official Ubuntu archive, do not import a third-party key. Check that your system clock is correct with timedatectl status, and confirm that the source uses a valid Ubuntu archive URL and the codename for your installed release. The ubuntu-keyring package supplies Ubuntu archive signing keys; if package management still works through a trusted Ubuntu source, refresh that package with:
sudo apt install --reinstall ubuntu-keyring
A BADSIG message means the signature did not match the metadata APT received. Repeating a key import is usually the wrong response. Check for a wrong system clock, a stale or inconsistent mirror, a caching proxy, or a repository-side publishing problem; retry after correcting the cause. If only a third-party source fails and you do not need it, disable its specific .sources or .list entry while you contact its maintainer. Keep security verification enabled.
4. Verify the fix
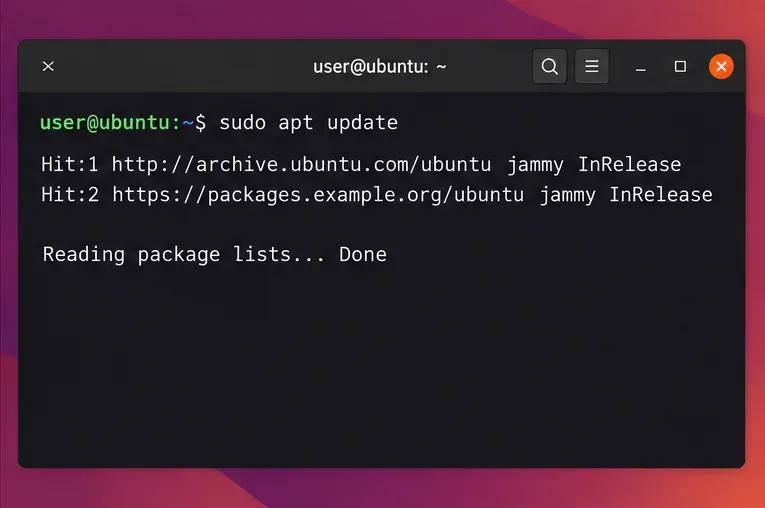
After correcting the source or keyring, rerun apt update and confirm that no signature error remains.
Run sudo apt update again. The repair is complete when the affected repository is fetched without a signature warning and APT reaches Reading package lists... Done. A successful update does not certify that a third-party publisher is safe; it confirms that the metadata signature matches a key you chose to trust. If verification still fails, recheck the repository URL, codename, key fingerprint, keyring permissions, and the exact error token before making another change.