Home
» How to
»
How to Clean a Brita Water Filter Pitcher Without Damaging the Filter
How to Clean a Brita Water Filter Pitcher Without Damaging the Filter
If by “clean a Brita water filter” you mean cleaning a Brita pitcher or dispenser, the safest rule is simple: remove the filter cartridge, hand-wash the pitcher components with mild dish soap, rinse them well, and reinstall or replace the cartridge according to its own instructions. Brita’s current U.S. guidance says pitchers, lids, and reservoirs should be hand-washed periodically and should not go in the dishwasher or be cleaned with abrasive products. The cartridge itself is not treated like a reusable sponge that you scrub with soap.
That distinction matters because different Brita cartridges have different preparation rules. The white Original filter, formerly called Standard, gets a 15-second cold-water rinse before installation. The blue Elite filter does not require a pre-rinse. Brita recommends replacing Original and Stream filters after 40 gallons, or about two months for most households, and Elite filters after 120 gallons, or about six months. Hard water can shorten those intervals. These details were checked against Brita’s U.S. support materials in September 2026. See the Brita replacement-filter instructions and Brita pitcher care FAQ.
What Does “Cleaning a Brita Filter” Actually Mean?
A common misunderstanding is that the filter cartridge should be washed whenever the pitcher is washed. Brita’s care instructions say to remove and set aside the filter before washing the pitcher system. That means routine cleaning applies to the pitcher body, lid, reservoir, and accessible non-filter surfaces—not to scrubbing the cartridge with detergent.
Part or question
What is verified
What to do
Pitcher, lid, reservoir
Brita says to hand-wash periodically with mild detergent, avoid abrasive cleaners, and rinse well.
Wash by hand and keep the filter out of the soapy water.
Original filter, white
Brita says to rinse a new Original filter under cold water for 15 seconds before insertion.
Rinse as directed; do not treat the cartridge as a washable reusable part.
Elite filter, blue
Brita says no pre-rinse is required.
Install it with clean hands and follow the initial flushing directions.
Exact pitcher-washing schedule
Brita says “periodically” but does not publish a universal weekly or monthly interval.
Use visible buildup, heavy use, storage conditions, and filter-change time as practical reminders.
Action: Before cleaning, identify the filter you actually have. If an older instruction sheet says “Standard,” Brita says that product has been renamed “Original”; the company says the name change did not alter the filter itself.
How to Clean a Brita Pitcher in Four Steps
1. Remove the Filter and Take the Pitcher Apart
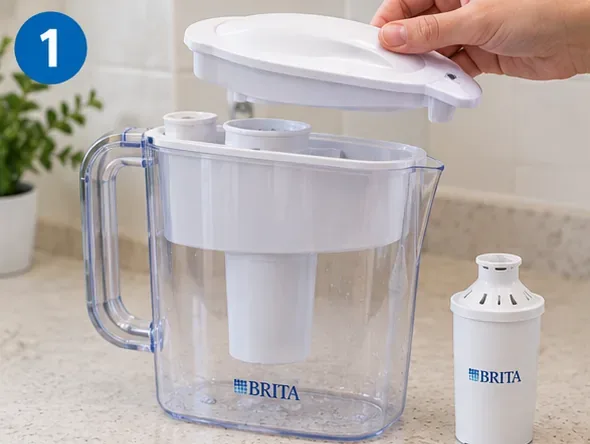
Wash your hands, remove the lid, lift out the reservoir if your model allows it, and take out the filter cartridge. Set the cartridge on a clean surface away from dish soap. Do not force parts that do not release easily; Brita pitcher designs vary, and the model-specific manual should take priority if your lid or indicator assembly is unusual.
The filter cartridge is removed before the pitcher components are washed, preventing detergent from being applied to the filter media.
Action: If you cannot tell whether a component is removable, check the model name on the pitcher and consult Brita’s official pitcher support page rather than prying it loose.
2. Hand-Wash the Pitcher, Lid, and Reservoir With Mild Dish Soap
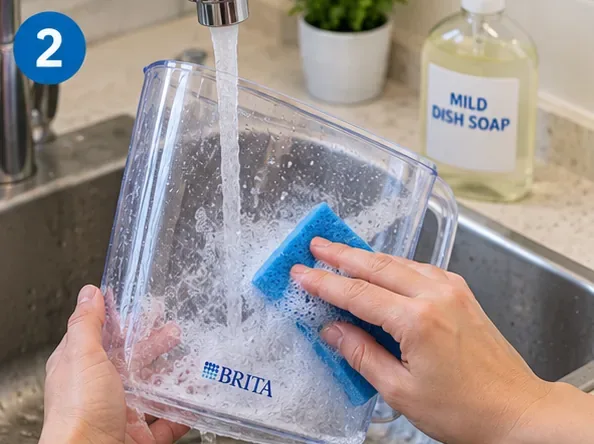
Use mild dish soap and a soft sponge or cloth. Clean the inside and outside of the pitcher, the reservoir, and the accessible areas of the lid and pour spout. Brita specifically advises against abrasive cleaners and says its pitchers and dispensers are not dishwasher safe.
Use mild dish soap and a non-abrasive sponge on the pitcher body and removable components, while keeping the cartridge out of the wash water.
There is no verified need in Brita’s pitcher instructions to add bleach, vinegar, baking soda, or another homemade disinfecting mixture for ordinary maintenance. Those substances may be recommended on unrelated household-cleaning pages, but that is not the same as Brita approving them for every pitcher material, seal, indicator, or finish.
Action: For routine cleaning, stay with the manufacturer’s verified method: mild detergent, hand washing, and no abrasive cleaner. If you are dealing with persistent mold-like growth, a damaged component, or an odor that returns after washing, stop improvising stronger chemicals and contact Brita about the specific model or replace the affected part.
3. Rinse Every Washed Part Thoroughly
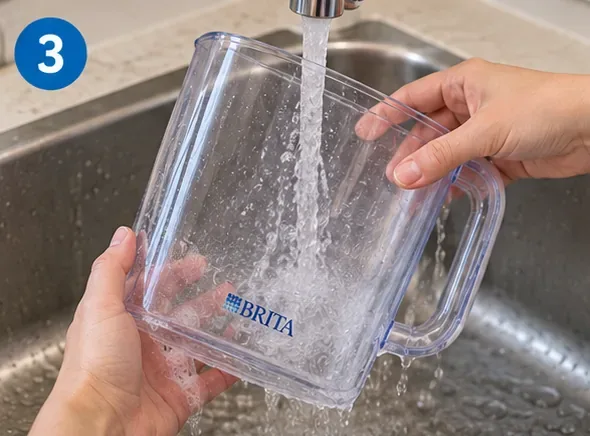
Rinse the pitcher, lid, and reservoir until no soap residue remains. Pay attention to the lip, spout, reservoir edges, and seams where detergent can linger. The goal is not to “sanitize” the filter media; the goal is to remove soap and physical residue from the washable components.
Rinse all washed components well so detergent does not remain on surfaces that will contact drinking water.
Action: Inspect the clean parts under good light. If you can still feel a slick detergent film or see residue, rinse again before reassembly.
4. Reassemble the Pitcher and Handle the Filter Correctly
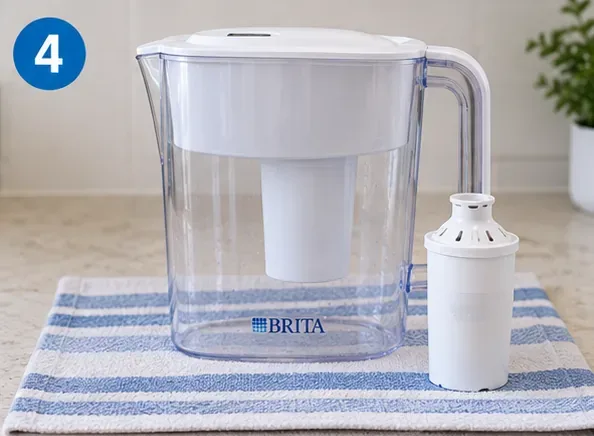
Reinstall the reservoir and lid in the correct orientation, then deal with the cartridge based on its type and age. If the existing filter is still within its service life and has been kept clean while the pitcher was washed, reinstall it. If it is due for replacement, use a new cartridge rather than trying to restore an old one by soaking or scrubbing it.
After the pitcher components are clean and rinsed, reassemble the system and reinstall an in-service filter or prepare a replacement according to its filter type.
For a new white Original filter, Brita instructs users to rinse it with cold water for 15 seconds, insert it firmly, and discard the first three pitchers of filtered water or use that water for plants. For a new blue Elite filter, Brita says no pre-rinse is required, but the first three pitchers should still be discarded or used for plants. See the Original filter instructions and Elite filter instructions.
Action: Reset the electronic or sticker filter indicator after installing a replacement so the reminder matches the cartridge you actually installed.
Do You Need to Air-Dry the Pitcher Before Using It Again?
Brita’s routine pitcher-cleaning instructions emphasize hand washing and thorough rinsing; they do not state that every pitcher must be fully air-dried before it is refilled. If you are going to use the pitcher immediately, a complete rinse is the important verified step. If you are putting the pitcher into storage, letting clean parts dry fully is a sensible practical measure to avoid trapping moisture, but that is different from a Brita-mandated drying interval.
Action: Refill immediately after a thorough rinse if you are continuing normal use. If storing the pitcher empty, let the components dry before putting them away.
How Often Should You Clean a Brita Pitcher?
There is no manufacturer-verified “every seven days” or “once a month” rule for all Brita pitchers. Brita says to hand-wash them periodically. The right frequency therefore depends on usage, visible residue, storage conditions, and how quickly film or mineral deposits appear.
A practical schedule is to inspect the pitcher regularly and wash it whenever you notice visible film, residue around the lid or spout, or buildup in the reservoir. Cleaning when you change a filter is also a convenient reminder, but it should not be treated as the only time the pitcher can be washed. An Elite filter may remain in service for about six months, and some households will reasonably want to wash the pitcher components much more often than that.
Action: Do not wait for a calendar date if the pitcher visibly needs cleaning. Conversely, do not claim an arbitrary weekly interval is required by Brita when the company itself only says “periodically.”
Can You Clean an Old Cartridge Instead of Replacing It?
No manufacturer instruction reviewed for this article supports scrubbing, washing with soap, or chemically “recharging” an exhausted Brita pitcher cartridge to extend its certified service life. Brita’s current replacement guidance is based on filter type and rated capacity: Original at 40 gallons or about two months, Elite at 120 gallons or about six months, and Stream at 40 gallons or about two months. Brita also notes that hard water can require more frequent replacement.
One detail can be confusing: Brita says an unused, sealed Original filter that is more than a year old may be pre-soaked for 15 minutes before first use. That is a preparation step for an unused older filter, not a method for restoring a spent filter.
Action: If the filter has reached its indicator limit, rated capacity, or recommended time, replace it. Do not use cleaning as a substitute for replacement.
Are Black Specks a Sign That the Filter Is Dirty or Moldy?
Not necessarily. Brita says carbon particles can appear in the reservoir with some older filters, and its Original-filter instructions note that carbon dust in the first few fills can be normal. Black flecks alone therefore do not prove mold or biological contamination.
What cannot be determined from appearance alone is whether every dark spot is harmless carbon. A persistent slimy film, unusual odor, or growth on pitcher surfaces is a different situation and deserves cleaning and closer inspection.
Action: Follow the required initial flushing for a new filter. If unusual residue keeps returning after the pitcher has been properly washed, replace the cartridge if appropriate and contact Brita rather than assuming every dark mark is carbon.
Can a Clean Brita Filter Make Questionable Water Safe?
Cleaning the pitcher does not turn the system into a universal water disinfectant. Brita states that its filters should not be used with water that is microbiologically unsafe or of unknown quality without adequate disinfection. That limitation is separate from how clean the pitcher looks.
Action: Use the system with potable tap water as directed. During a boil-water advisory or another local water-safety event, follow the instructions of the responsible public-health or water authority rather than relying on routine Brita filtration.
What Changes for Dispensers, Bottles, or Faucet-Mount Brita Systems?
The four-step pitcher method should not be applied blindly to every Brita product. Brita dispensers are also hand-washed with mild soap after the filter is removed. Premium filtering bottles differ by material: Brita says its stainless-steel bottles should be hand-washed, while its hard-sided plastic Premium Filtering Water Bottles are top-rack dishwasher safe after the filter is removed. Faucet systems have their own maintenance instructions; for example, Brita says that if a faucet system has not been used for several days, water should be run through the filter for 30 seconds to reactivate it. See Brita’s faucet-system care instructions.
Action: Match the cleaning method to the exact Brita product family. A dishwasher rule that applies to one plastic bottle does not override the pitcher guidance.
Bottom Line
The most reliable way to clean a Brita pitcher is less aggressive than many homemade cleaning routines: remove the cartridge, hand-wash the pitcher components with mild dish soap, rinse thoroughly, and reinstall or replace the cartridge according to its specific instructions. Do not put Brita pitchers or dispensers in the dishwasher, do not scrub the filter media with soap, and do not treat cleaning as a way to reset filter life.
The parts that depend on circumstances are how often your pitcher needs washing and whether hard water makes you replace the cartridge early. The part Brita does not specify is a single universal cleaning interval for every household. When in doubt, follow the model-specific manual and use the filter indicator and rated capacity as your replacement guide.