Schedule Reliable Backups for ONLYOFFICE Workspace

Set a backup destination, schedule, Mail coverage, and retention limit in ONLYOFFICE Workspace, then verify the archive is ready to restore.
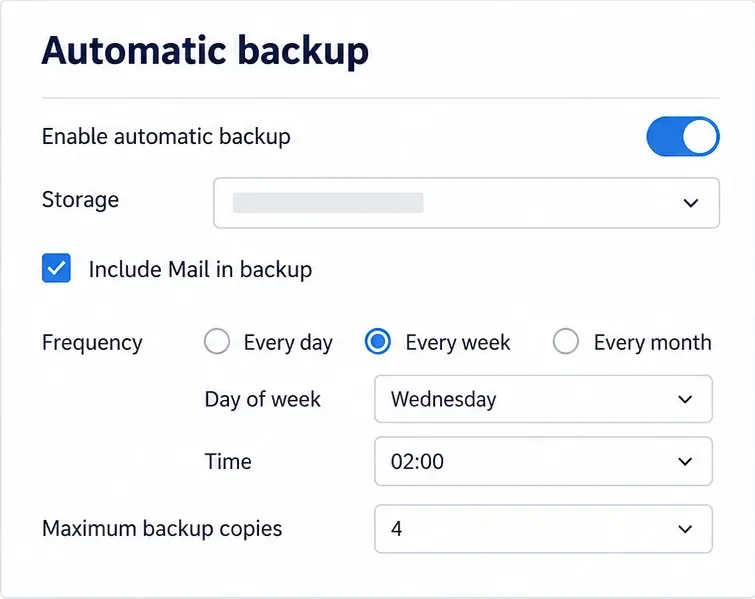
For a self-hosted ONLYOFFICE Workspace portal, enable scheduled copies in the Control Panel under Common Settings > Backup > Automatic backup, choose a destination, set a schedule and retention limit, then save. ONLYOFFICE Workspace Cloud uses a similar control in Settings > Data Management > Backup, but automatic backup is available only on plans that include it. A saved schedule is only the start: confirm that an archive reaches the destination and keep a recovery copy separate from the portal.
This walkthrough focuses on the built-in automatic backup feature documented for ONLYOFFICE Workspace. Menu wording and available destinations can vary by deployment and connected integrations. For the current product steps, see ONLYOFFICE’s Control Panel backup and restore instructions.
A backup is a restorable archive of portal data. In the self-hosted Control Panel, the Mail Server may need additional access settings for Mail files; consult ONLYOFFICE’s separate Backup Mail data instructions for your deployment. The linked Mail procedure explicitly says it does not apply to Windows. Retention is how many backup copies the system keeps before removing older ones. Choose settings with both recovery and storage capacity in mind.
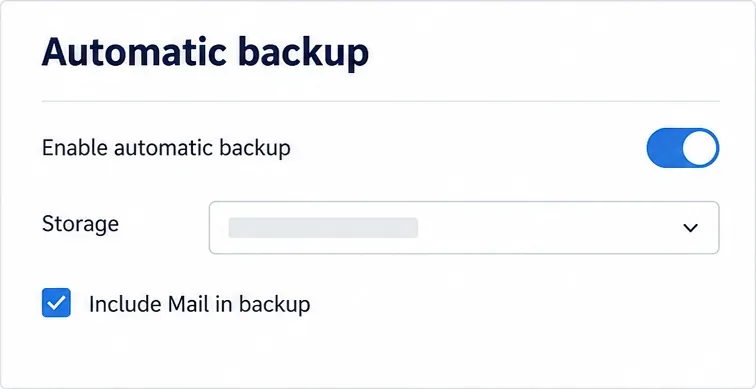
Saving archives inside the portal’s own Documents storage is straightforward, but it consumes portal storage. It can also leave the archive exposed to the same storage or server incident as the live portal. For stronger recovery, consider a connected third-party destination that your team can access independently, subject to your organization’s security and retention rules. This is an operational recommendation, not a guarantee that any particular provider is suitable for every deployment.
Retention is a count, not a time period. For example, keeping four weekly copies gives you four scheduled recovery points; it does not guarantee a full month of history if a schedule is changed or a run fails. Estimate archive size and available destination capacity before choosing the maximum. The Control Panel documentation says the maximum can be set from 1 to 30 copies; it does not promise a specific archive size or completion time.
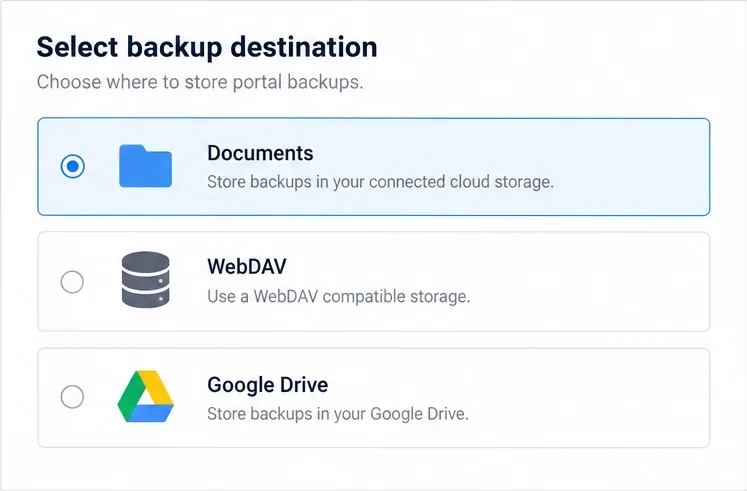
After saving, return to the Automatic backup section and confirm that the feature remains enabled and that the destination, Mail choice, schedule, and maximum-copy count match your plan. Then inspect the selected destination after the first scheduled run. The Control Panel guide says completed backups are stored as .tar.gz files, with a name in the form portal-name_date_time.tar.gz. A schedule visible on screen does not by itself prove that an archive was created.
If the file is absent, check whether the chosen storage is still connected and writable, whether the next scheduled time has passed, and whether the archive may have been saved in a different selected folder. Do not “fix” this by lowering permissions broadly or storing credentials in an exposed location; use the service’s supported connection settings and administrator permissions.
For higher confidence, perform a controlled restore test using the official restore procedure in a suitable test environment, rather than overwriting a live portal. A backup has practical value only if your team can locate it and restore the data it needs. Also note two limits in the Control Panel guide: the license data is not included, so the license file must be uploaded again after restoration; and a Mail backup requires the documented Mail Server configuration and access when that component is external to the portal.
Final check: the feature is enabled, the destination is reachable, the Mail choice is deliberate, the schedule and retention are saved, and a newly created archive is visible at the destination. Keep at least one recovery copy outside the portal’s primary storage when your recovery plan requires protection from a portal-wide incident.
Set a backup destination, schedule, Mail coverage, and retention limit in ONLYOFFICE Workspace, then verify the archive is ready to restore.
Start the Enterprise Docker Compose stack, persist its license and data, configure JWT safely, and confirm the editors are ready to integrate.
Use an ONLYOFFICE JavaScript macro to remove nonprinting characters and trim extra spaces from a defined spreadsheet range, with a safe review workflow.
Connect ONLYOFFICE DocSpace to Active Directory or OpenLDAP, import users and groups safely, map account fields, and schedule reliable synchronization.
Move portal data from Disk Default to a supported cloud storage provider, or relocate Docker data safely by changing its host volume mapping.
Identify whether Document Server uses a Linux package or Docker, remove only its components, and check remaining data without deleting shared services by mistake.
Trace slow collaborative editing to Docker resource pressure, proxy connections, or document load, then choose the fix that matches your measurements.
Install custom fonts in ONLYOFFICE Document Server, compare persistent Docker mounts with direct copies, rebuild the font list, and verify the result.
Choose where TLS should terminate, mount a trusted certificate and private key safely, and verify HTTPS access to a Dockerized ONLYOFFICE Docs server.
Embed the ONLYOFFICE editor in your PHP app, sign its configuration with JWT, and save edited files through a secure callback.