Home
» How to
»
How to Clean a Camera Lens on a Phone Without Making It Worse
How to Clean a Camera Lens on a Phone Without Making It Worse
A phone camera lens should be clean enough that fingerprints, oily haze, and loose dust are no longer visible on the outer lens cover, and a repeat photo in the same conditions should look at least as clear as before. That is the practical goal. Cleaning can improve blur, flare, low contrast, or a hazy look when surface contamination is the cause, but it cannot correct every camera problem.
Manufacturer guidance checked on September 13, 2026 is consistent on the basics. Apple recommends a soft, lint-free cloth and warns against compressed air and abrasive cleaning. Samsung specifically recommends a soft, dry microfiber cloth for camera lenses. Google advises gently wiping Pixel camera lenses and sensors with a soft, clean cloth when images look blurry or hazy. Start with the least aggressive method and judge the result before doing more.
What a good cleaning result should look like
Do not judge success only by whether the lens looks shiny. Use three signs together:
Surface check: Under soft reflected light, the glass should no longer show obvious fingerprints, greasy streaks, or a cloudy film.
Focus check: A stationary subject in good light should lock focus normally at an appropriate distance.
Image check: Fine edges should look cleaner and contrast should be normal. Light streaks or veiling glare caused by grease may be reduced.
If the lens is visibly clean but the camera is still blurry, repeatedly polishing it is unlikely to help. That is the point to switch from cleaning to troubleshooting.
What you need
Item
Use
What to avoid
Clean microfiber or lens cloth
Primary tool for fingerprints, dust, and light smudges
Paper towels, tissues, rough fabric, or a dirty cloth that may carry grit
Small amount of clean water, only if needed
For residue that a dry cloth does not remove and only where the phone maker permits a slightly damp cloth
Pouring, spraying, or dripping liquid directly onto the camera
Good indirect light
Helps you see smears before cleaning and evaluate the lens afterward
Judging only from a dark room or a single difficult photo
Apple states that a soft, slightly damp, lint-free cloth such as a lens cloth can be used on supported iPhone surfaces, while Samsung recommends a soft, dry microfiber cloth directly for Galaxy camera lenses. Because model construction and coatings can differ, use your phone maker's instructions when they are more specific than this general guide.
How to clean a camera lens on a phone
1. Remove the case and inspect the camera area
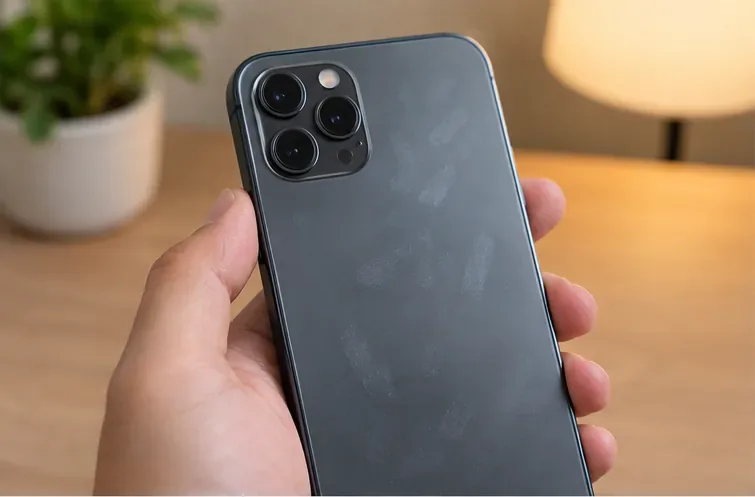
Unplug the phone. For a more careful cleaning session, power it down and remove the case so the edges around the camera bump are accessible. Look across the lens covers at an angle under a lamp or window light. Fingerprints usually appear as smooth oily patches; dried droplets look more sharply edged; a scratch tends to remain visible even after the surface is wiped.
Do not use canned compressed air. Apple tells users not to use compressed air on iPhone, and Samsung also advises against it in its device-cleaning guidance. The goal is controlled contact with a clean cloth, not forceful air around openings.
Inspect the camera area in soft reflected light before cleaning; visible haze, fingerprints, or smears give you a baseline for judging the result.
2. Wipe every lens gently with a dry microfiber cloth
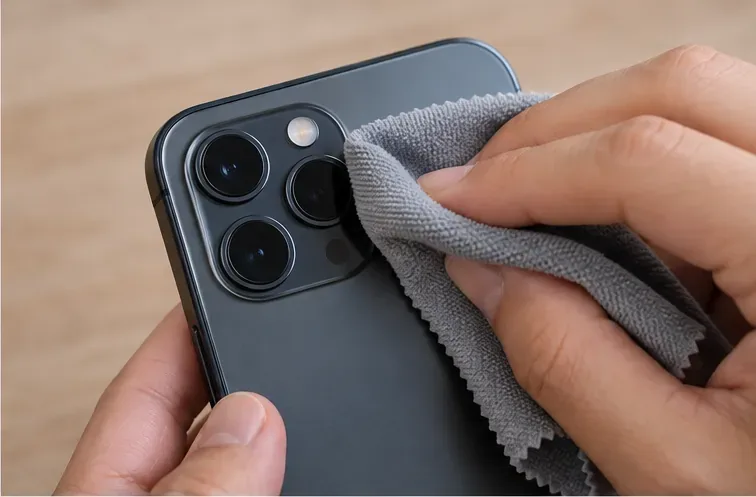
Use a clean section of a soft microfiber cloth. Hold the phone securely and wipe each camera lens with light pressure. You do not need to scrub. If your phone has several rear cameras, clean all of them because the camera app may switch between lenses automatically for different zoom levels, focusing behavior, or shooting modes.
Samsung's current camera troubleshooting guidance specifically says to use a soft, dry microfiber cloth to remove fingerprints, smudges, and dust from all lenses. Google's Pixel support similarly recommends gently wiping the camera lens with a soft, clean cloth when photos or videos look blurry or hazy.
After a few passes, rotate to a fresh area of the cloth rather than moving oil back over the glass. Stop when the visible smear is gone.
Start with a clean, dry microfiber cloth and light pressure. Wipe every camera lens, not just the one you use most often.
3. If a dry wipe leaves residue, change methods carefully
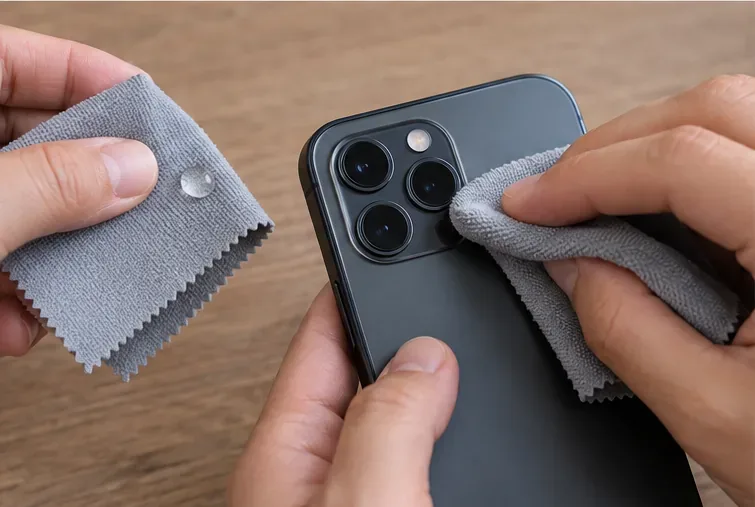
If the lens still has a dried mark or oily film, first check your manufacturer's cleaning page for your model. Where a slightly damp cloth is allowed, dampen a small corner of the microfiber cloth with a minimal amount of clean water, then wipe the affected surface gently. The cloth should be barely damp, not wet enough to release a droplet.
Keep moisture away from microphones, speaker openings, ports, seams, and any damaged glass. Never spray cleaner directly onto the camera module. Apple warns against getting moisture into openings, and Samsung says liquid solutions should not be applied directly to the device.
Household window cleaner, abrasive powder, scouring pads, and similar products are poor choices. Apple notes that cleaning products and abrasive materials can diminish protective coatings and may scratch the phone. Alcohol-based disinfecting rules vary by maker and are intended for exterior sanitizing; they are not necessary for routine removal of a fingerprint from a camera lens. For image clarity, begin with the dry-cloth method and use the mildest permitted escalation.
For residue that a dry cloth does not remove, use only a barely damp section of cloth when your phone maker permits it; never apply liquid directly to the lens.
4. Finish with a dry section and inspect again
Use a dry part of the cloth to remove any remaining moisture or streaks. Tilt the phone slowly under indirect light. A successful surface clean should leave the lens cover visually clear without a greasy rainbow-like smear.
If one spot remains exactly unchanged, do not automatically scrub harder. It may be a scratch, chip, damaged coating, debris under a protector, or contamination beneath the outer glass. Extra pressure does not solve those problems and can make surface damage worse.
5. Test the camera under repeatable conditions
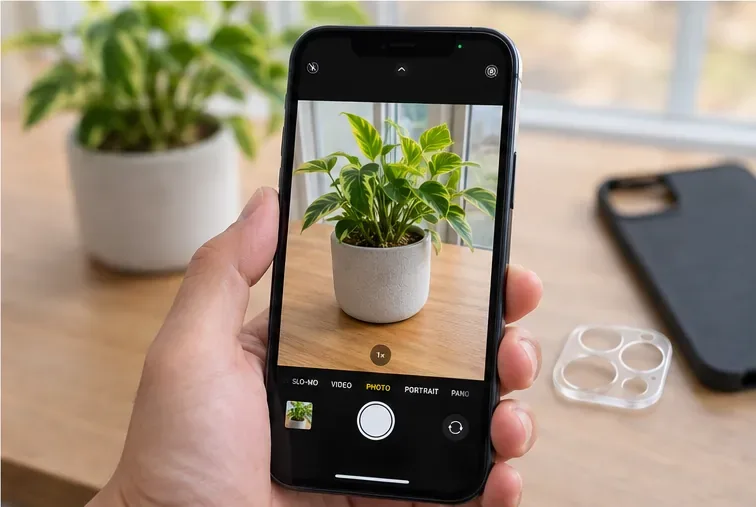
Open the camera and photograph a stationary, detailed subject in good indirect light, such as printed text on a box, a plant, or a textured object. Hold the phone steady and use the normal 1x camera first. Tap the subject to focus if your camera app supports that behavior, then compare the preview and photo with what you saw before cleaning.
Look for improved edge definition, normal contrast, and fewer halos around bright areas. Keep the test conditions simple: moving subjects, very low light, digital zoom, shooting too close, or strong light shining directly into the lens can create blur or flare even when the lens is perfectly clean.
Retest on a stationary, well-lit subject. If clarity does not improve, a lens protector or a non-cleaning issue may be responsible.
When cleaning is not enough
If the lens looks clean but the result is still poor, change the troubleshooting approach instead of cleaning more aggressively.
Remove or test without a camera lens protector. Samsung warns that a camera protector or lens cover can cause focus problems or light distortion. If your protector is removable without risking damage, compare photos with it off.
Increase shooting distance. Phone cameras have minimum focusing distances, especially telephoto cameras. A close subject can be out of focus even with spotless glass.
Change the light angle. Strong light entering the lens can produce flare. Cleaning may reduce flare made worse by fingerprints, but it cannot eliminate normal optical flare in every scene.
Wait for condensation to clear. Moisture inside the camera assembly cannot be wiped off from the outside. Samsung notes that temporary internal condensation can occur with temperature changes and should be allowed to clear naturally.
Troubleshoot software or hardware. Google's Pixel camera support recommends testing the camera after each troubleshooting step and moving on if cleaning does not fix the issue. Persistent inability to focus, camera errors, impact damage, or internal debris may require software troubleshooting or service.
How often should you clean a phone camera lens?
There is no need to polish it on a fixed schedule. Clean it when you can see fingerprints or haze, when photos suddenly show low contrast or smearing that was not present before, or before an important photo session. Frequent aggressive wiping is not useful. A brief gentle wipe with a clean cloth when contamination is visible is the better standard.
Keeping the phone in a reasonably clean case and avoiding touching the camera area with your fingers reduces how often cleaning is needed. Also check the inside edge of the case around the camera opening; a dirty case can transfer residue back onto freshly cleaned glass.
Common mistakes that reduce the quality of the result
Using a shirt or paper towel: These can carry grit or have a rougher texture than a dedicated clean microfiber cloth.
Applying liquid directly: Liquid can migrate toward openings and seams. Put any permitted moisture on the cloth, not the phone.
Pressing harder when a mark remains: A persistent mark may be damage rather than dirt.
Cleaning only one lens: Multi-camera phones may use another lens automatically.
Assuming every blurry photo means a dirty lens: Motion, low light, minimum focus distance, a lens protector, software behavior, or camera hardware can all affect sharpness.
Quick quality check
You can consider the cleaning step complete when the lens covers look clear under reflected light, no obvious fingerprint film remains, and a well-lit stationary test subject focuses normally. If those surface signs are good but image quality has not improved, stop cleaning and investigate the protector, shooting conditions, software, condensation, or hardware.
That limit matters: cleaning is effective for contamination on the outside surface. It does not repair scratches, damaged coatings, cracked glass, internal moisture, autofocus faults, or optical limits of the camera.