Home
» How to
»
How to Clean a Car Air Filter Safely: Know When to Clean vs. Replace
How to Clean a Car Air Filter Safely: Know When to Clean vs. Replace
There is no universal 2026 rule that says every car air filter should be washed. In fact, current manufacturer guidance shows why the first step is identifying the filter you actually have. Honda’s 2026 Pilot maintenance schedule lists the engine air-cleaner element as a replacement item, while reusable-filter manufacturers such as K&N and AEM publish separate cleaning procedures for their washable media. The practical takeaway is simple: clean only a filter that your vehicle manual or filter manufacturer says is serviceable. If you have a conventional disposable paper engine filter, replacement is usually the safer default.
This guide covers the engine intake air filter in the engine bay. It does not cover the cabin or pollen filter that cleans air entering the passenger compartment.
Quick decision guide: clean it or replace it?
Filter type
Can it usually be cleaned?
Best action
Disposable pleated paper engine filter
Usually not washable
Replace it when dirty, damaged, wet, oil-soaked, or due by the vehicle’s maintenance schedule. Use dry cleaning only if the owner’s manual explicitly permits it.
Reusable oiled cotton filter
Yes, if designed for washing
Use the filter maker’s cleaner, low-pressure rinse, full drying, and the specified filter oil. Do not substitute household chemicals.
Reusable dry synthetic filter
Yes, if the manufacturer says so
Use the manufacturer-approved cleaner and rinse method; many dry synthetic filters do not use oil.
Unknown filter media
Do not assume
Find the part number or owner’s manual instructions before applying water, solvent, oil, vacuum suction, or compressed air.
Your vehicle owner’s manual or the filter manufacturer’s service instructions.
Basic hand tools only if the airbox uses screws or bolts rather than clips.
A clean microfiber cloth or slightly damp shop towel for the airbox interior.
A manufacturer-approved filter cleaner if you have a washable reusable filter.
The correct filter oil only if your reusable filter specifically requires oil.
Eye protection if you are using approved compressed air.
Work with the engine switched off and cool enough to touch comfortably. Park on a level surface, set the parking brake, and keep dirt, leaves, tools, and loose hardware away from the open intake tract. You generally do not need to unplug sensors just to inspect a drop-in filter; if your model requires moving wiring or a sensor connector, follow the vehicle-specific instructions.
How to clean a car air filter: 8 practical steps
1. Identify the filter type before applying anything
Remove no dirt yet. First, look for a brand name, part number, “washable,” “reusable,” “oiled,” or “dry” marking on the filter frame. If you cannot identify the media, treat it as non-washable until the manufacturer says otherwise. A paper element that looks similar to a reusable synthetic element can be permanently damaged by water or the wrong cleaner.
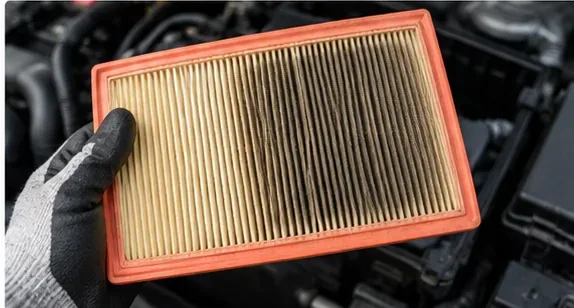
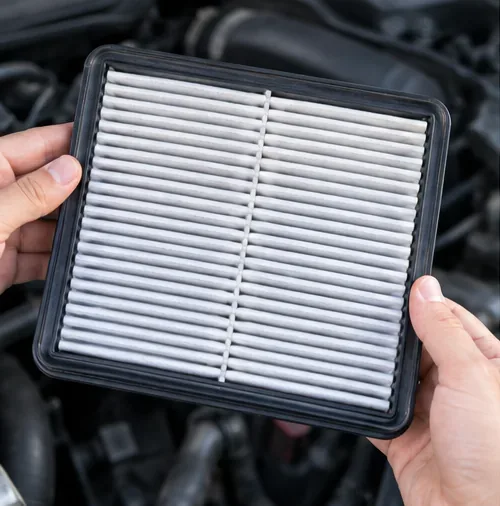
Inspect the filter’s condition and identify its media or part number before deciding whether to clean it or replace it.
2. Open the air-filter housing carefully
Locate the airbox, usually a black plastic housing connected to the engine’s intake duct. Release the retaining clips or remove the screws or bolts specified for your vehicle. Lift the lid only as far as necessary. Do not force plastic tabs; aged housings can be brittle, and a broken latch can prevent the airbox from sealing correctly.
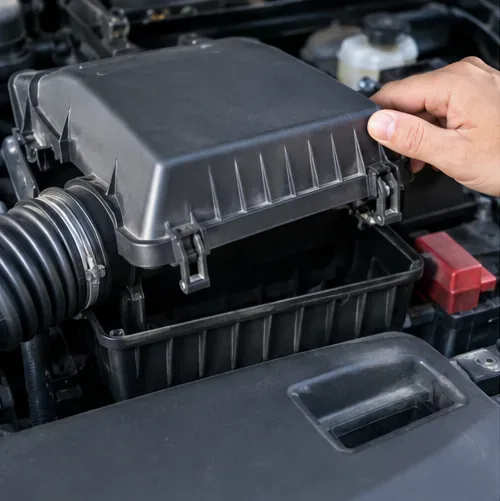
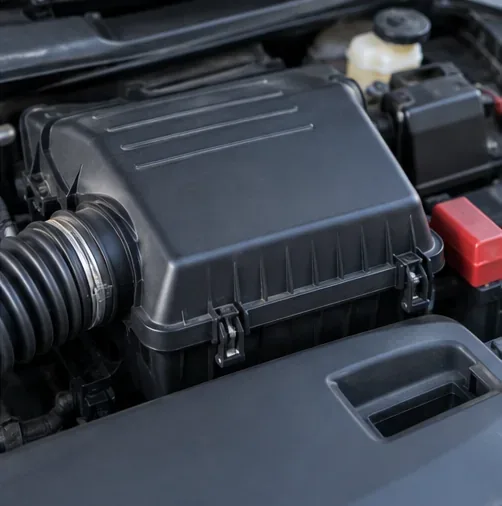
Release the airbox fasteners and lift the cover without forcing the plastic housing or intake duct.
3. Remove the filter without dropping debris into the intake
Note how the filter is oriented, then lift it straight out. Keep the dirty side away from the clean side of the airbox. If leaves or grit are sitting on top of the filter, remove the element slowly so that the debris stays with the filter rather than falling into the duct leading toward the engine.
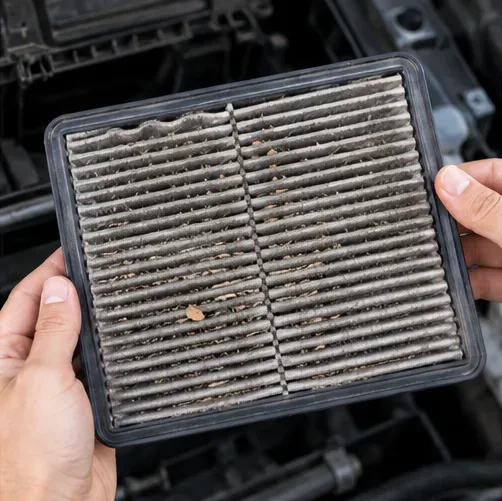
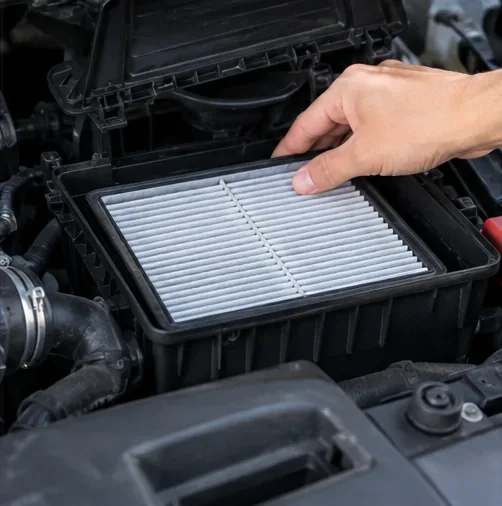
Lift the filter out slowly and keep loose grit from falling into the clean side of the intake system.
4. Remove only loose surface debris if the instructions allow it
If the filter’s service instructions permit dry cleaning, you can remove loose debris gently. A low-suction vacuum held slightly away from the surface can lift leaves and surface dust without dragging across the pleats. Do not scrub the filter, push a nozzle into the media, or use a powerful shop vacuum directly against delicate paper.
If the filter is disposable and already heavily loaded, cleaning may only improve its appearance while leaving fine particles embedded in the media. Replacement is the better option when the element is very dirty, torn, distorted, wet, or contaminated with oil.
A gentle vacuum can remove loose surface debris only when the filter maker permits dry cleaning; keep the nozzle off the pleats.
5. Use compressed air only when your manual explicitly approves it
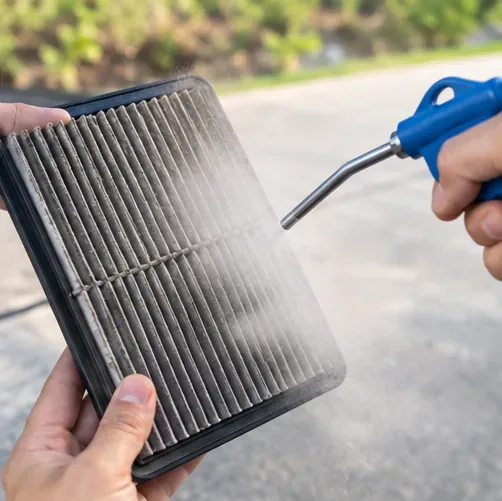
Compressed air is not a universal cleaning method. Some vehicle manuals allow low-pressure air on serviceable elements, while other schedules simply call for replacement. If your instructions permit compressed air, follow the specified pressure limit and direction. The usual principle is to blow from the clean side toward the dirty side so contaminants are pushed back out rather than deeper into the media.
Never improvise with very high pressure or hold the nozzle against the pleats. Excessive pressure can tear or separate filter media even when the damage is difficult to see.
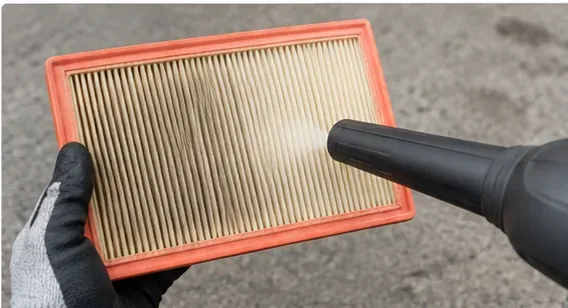
Use compressed air only when the vehicle or filter instructions allow it, and follow the specified pressure and airflow direction.
6. If the filter is washable, follow the exact media-specific procedure
Washable filters are not all serviced the same way. For an oiled cotton K&N filter, the manufacturer instructs users to remove loose debris, apply its filter cleaner, let it work for 10 minutes, rinse with cool low-pressure water from the clean side outward, allow the filter to dry naturally, and then apply the specified filter oil after the media is completely dry. K&N also instructs users to let the oil wick through the pleats before touching up light areas.
AEM’s Dryflow procedure is different: apply the specified Dryflow cleaner, allow a 10-minute soak, rinse with cool or warm—not hot—water from the clean side outward, then let the element dry naturally or use compressed air carefully to speed drying. AEM Dryflow media does not use filter oil. These differences are exactly why “wash with soap and water” is not a safe generic instruction.
If your reusable filter came from another manufacturer, use that manufacturer’s process instead. Avoid gasoline, brake cleaner, degreaser, dish soap, pressure washers, or improvised oils unless the filter maker specifically authorizes them.
Before reinstallation, the serviced filter should match the manufacturer’s required dry or ready-to-install condition and show no torn pleats or damaged seal.
7. Clean the airbox and reinstall the filter squarely
Before the filter goes back, wipe dirt from the airbox with a clean, slightly damp cloth. Keep the cloth and loosened debris away from the intake opening on the engine side. Do not spray cleaner directly into the airbox.
Place the filter in the same orientation as before and make sure its sealing edge sits flat in the housing groove. A reusable filter should be fully serviced according to its instructions before installation. A replacement filter should match the correct part number and dimensions for the vehicle.
Seat the filter evenly in the housing so its perimeter seal is not folded, pinched, or sitting above the groove.
8. Close the airbox and perform a quick final check
Lower the cover into place without trapping the filter seal. Refasten every clip, screw, or bolt that was removed. Check that the intake duct is still secure and that no tools or cloths remain in the engine bay. If you had to unplug any electrical connector for access, reconnect it before starting the engine.
Start the engine and listen for an unusual intake hiss or rattling around the airbox. If the cover will not sit flush, the filter may be misaligned or the wrong size. Stop and correct the fit rather than forcing the housing closed.
Finish by securing the airbox completely and checking that the housing, clips, and intake duct sit normally.
When should you replace the filter instead of cleaning it?
Replace the engine air filter when any of the following applies:
The owner’s manual schedules replacement and does not provide a cleaning procedure.
The filter is disposable paper and is heavily loaded with fine dirt.
The pleats are torn, crushed, warped, or separating from the frame.
The rubber or foam sealing edge is damaged, hardened, or no longer seats flat.
The filter has been soaked with water, oil, coolant, or another contaminant that is not part of its normal design.
A washable filter remains dirty or damaged after the manufacturer-approved service process.
You cannot verify what kind of media it is or how it should be serviced.
Do not judge replacement intervals from a generic mileage number alone. Vehicle makers may shorten service intervals for dusty roads, frequent off-pavement use, or other severe conditions. Your owner’s manual and maintenance reminder system should take priority over a general web guide.
Common mistakes to avoid
Washing a disposable paper filter. Water can weaken or distort media that was never designed to be rinsed.
Using household detergent on a reusable performance filter. Reusable media can depend on specific cleaners and, for some designs, a specific oil treatment.
Over-oiling an oiled cotton filter. Use only the quantity and method specified for that filter.
Using high-pressure air or water. Strong pressure can damage pleats, seals, or bonding points.
Cleaning only for appearance. A filter can look lighter after surface dust is removed while fine contamination remains embedded.
Leaving debris in the airbox. Clean the housing without pushing dirt into the downstream intake duct.
Pinching the filter seal. The airbox should close normally with the filter seated flat.
How to tell whether the job was successful
A properly serviced air filter should be intact, correctly oriented, and fully seated. The airbox cover should close without force, every fastener should be secure, and the intake duct should remain connected. There should be no abnormal intake hiss, loose cover, or visible gap around the filter seal.
For a washable filter, success also means you followed the exact cleaner, rinse, drying, and oiling requirements for that product. For a disposable paper filter, success may simply mean recognizing that cleaning is not the appropriate service and installing the correct replacement instead.